Blum make the best cabinet hinges, in my opinion. They’re not cheap but they are absolutely the best quality and they last ages. The only bad thing I have to say about them is that there’s a bewildering array of options to choose from and the documentation leaves a bit to be desired. The documentation, like most documentation these days, has almost completely removed all text. Presumably this is so they don’t have to translate anything, but I suspect I’m not the only person left wondering what half the labels actually mean.
Anyway, I figured all this out a while back when I built myself a test sample but for some reason I forgot to write it all down. I’m not going to make that mistake again!
What Hinge?
I should start by detailing exactly what type of hinge this guide covers. I’m working with clip top blumotion overlay self closing hinges. Let’s quickly break that down.
Overlay means that the door sits in front of the cabinet frame and completely covers it. This is most commonly seen in kitchen cabinets. There is also half-overlay where you want the overlay but you have two doors next to each other mounted in the same piece of dividing timber. The final option is inset, where the door sits flush with the cabinet frame. This guide should work with all three styles of hinge.
Blumotion is the soft close technology Blum has developed. Not all hinges have blumotion, for example I don’t remember seeing any inset hinges with it. If you need soft close and it’s not built into the hinge there are options.
Clip top describes the way the hinge attaches to the hinge plate which in this case is a tool less clip on mechanism. Self closing means that the hinge holds the door closed, there’s no need for an additional catch. As far as I know all euro hinges, as this design is commonly known, are self closing.
In particular, during this guide, I’m working with overlay hinge part number 71B3550 and plate part number 175H3100N. Having worked with them, I know that very similar instructions will work with the inset hinge part number 71T3750 and plate number 173L6100N.
Hinge Plates
The hinge plate is the part that attaches to the cabinet which the hinge clips on to. There are plenty of options but only really two basic designs, horizontal and cruciform. The horizontal design is what I’m using in this guide as I think it provides a somewhat tidier finished look. The cruciform design gives a little bit more adjustability and is somewhat simpler to fit. The cruciform design also requires slightly less depth in the cabinet frame for fitting. This is only an issue if you build frames like I do out of 44mm square timber.
Blum offer a wide range of attachment options for connecting the hinge plate to the cabinet. I go for the simplest option which is just fixing with screws that you provide yourself. They also offer Expando, Inserta, System Screw, and two forms of Knock In. All but the screw design are aimed at cabinet shops that have jigs or dedicated machines for drilling the required holes.
The only other option that really matters for the hinge plates is what Blum calls spacing. If you look at the table below, which is for the hinge plates I typically use, you’ll see two spacing options. This spacing option is used to control the amount of overlay. Essentially the larger the spacing the less overlay. The height dimension is directly related to the spacing but not important.
Fitting the Hinge
Deciding on Overlay
The diagram below confused me until I learnt about hinge plates. The H and D values relate to the hinge plate thickness, as mentioned above, only the D dimension really matters.
FA is the amount of overlay and is usually the setting that I let drive the others. For example, let’s say you want 16mm of overlay. To achieve that you’ll need a D=0 hinge plate and a set back of 5mm for the hinge cup hole. Take note of the TB value as that is needed in a moment.
Note that Blum don’t seem to produce D>3 hinge plates in many designs. It looks like you would be limited to one design of cruciform mounting plate if you want an overlay between 10 and 5mm and the full overlay hinge (although some of that range can be reached using a half-overlay hinge).
Boring the Hinge Cup Hole
The manual gives a pretty good diagram for the positioning of the hinge cup hole but it’s worth saying a couple of words about it. As with the hinge plates I’m using screw on hinges.
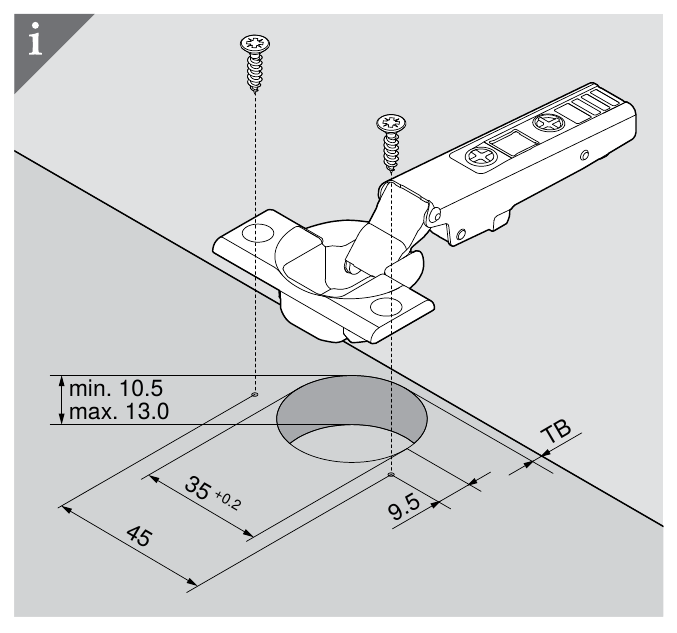
Notice that the TB value selected above is used here. This, along with the hinge plate thickness, sets the overlay. Working with the 16mm overlay we selected above TB=5mm. Add that 5mm to half the 35mm of the hinge cup hole and you get a centre position of 35/2+5=22.5mm in from the edge. Typically you want the hinge holes 75mm from the top and bottom of the door.
The hinge cup hole has to be accurately drilled to 35mm and at least 10.5mm deep. I don’t think the maximum matters that much although it’s mentioned on the diagram as 13mm. A good quality Forstner bit is a must for this hole. A drill press is not mandatory but it’s definitely a nice to have.
Put the hinge in place and square it up. Pre-drill the mounting screw holes. A self-centering bit makes this quick and easy but with careful marking you can do it by hand. You’ll almost certainly want to use 3.5x17mm screws so a 2 or maybe 2.5mm hinge (self-centering) drill is required.
Fitting the Hinge Plate
Fitting the hinge plate is quite simple. Shown below is the layout for the hinge plate I’m using in this example. As I mentioned above I use 44mm square timber to build frames so I need to double it up anywhere a hinge is to be fitted. My method of making cabinets is unusual though so I wouldn’t necessarily copy it. If you use one of the other designs of hinge plate the positions are obviously different.
The only bit of the fitting the requires real thought it getting the hinge plates lined up with the hinges fitted on the door. There is some adjustability bit it’s fairly minimal and really meant to be used for adjusting the fitted door.

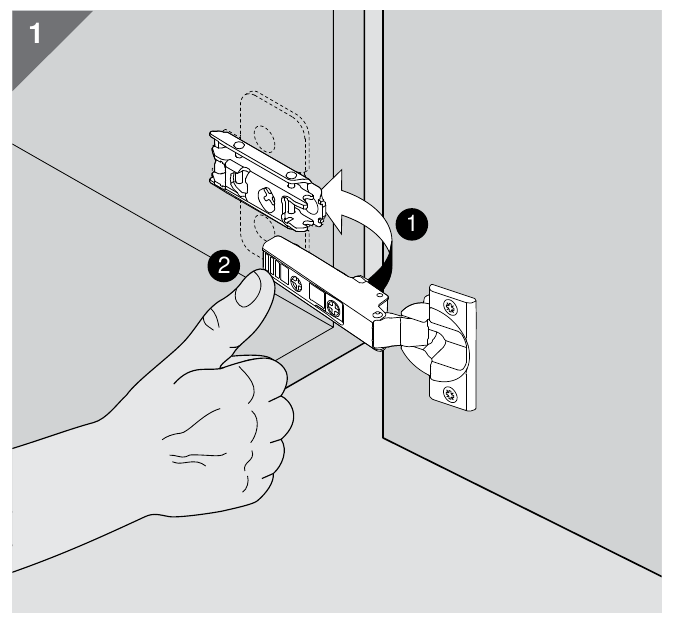
Attach the Hinge
Attaching the hinge to the hinge plate is very easy. At the front of the plate are a couple of hooks and the back of the hinge has a spring loaded clip. Just hook the hinge on the front of the hinge plate and then press the back until it clicks.
Adjustment
One thing I really like about these hinges is the adjustment they allow. If you are careful with the layout you have enough adjustment to correct for any slight variations in the frame and door.
Shown below is the vertical adjustment for the hinge plate type in this example. The various hinge plate designs have different adjustment mechanisms but they are all the same basic idea.
Another Way to Look at Overlay
Another way you can look at how to calculate the overlay is to consider a full overlay hinge mounted to a cabinet with a D=0 hinge plate. In this case 11mm of the hinge cup will overlay the side of the cabinet. The TB measure will then increase the overlay of the door further. If we add the 11mm of the hinge cup and the 5mm of the set back we come to the familiar 16mm of overlay.
Additional Notes
With the built in blumotion in hinges there is a small switch at the side of the hinge cup that turns off the soft close feature. I’m not sure why you’d want to switch it off but it’s there if you do.
Both the hinge cup and the hinge body have fancy covers you can buy to cover the fixing screws. This gives a nice finish but is purely cosmetic.
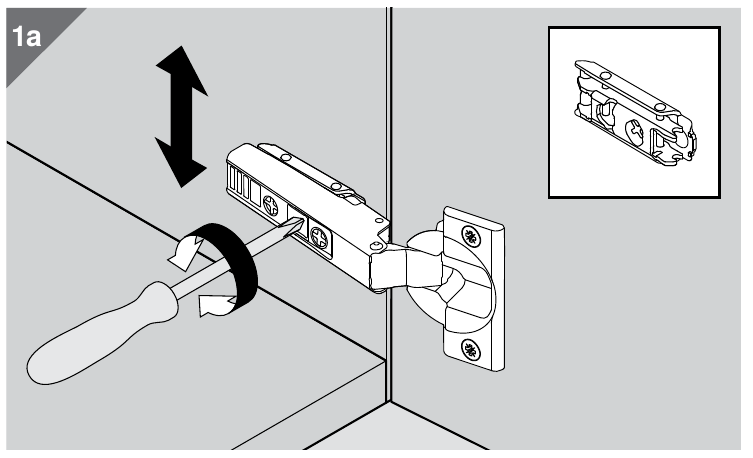
To remove a clip top hinge just squeeze the locking clip at the back of the hinge and pull away from the cabinet.