I’m going to start this article with photographs of the built lamp as there’s no way I’m taking it apart again for continuity. I think it’s also useful to see that it’s almost identical to what I showed at the end of the previous part.
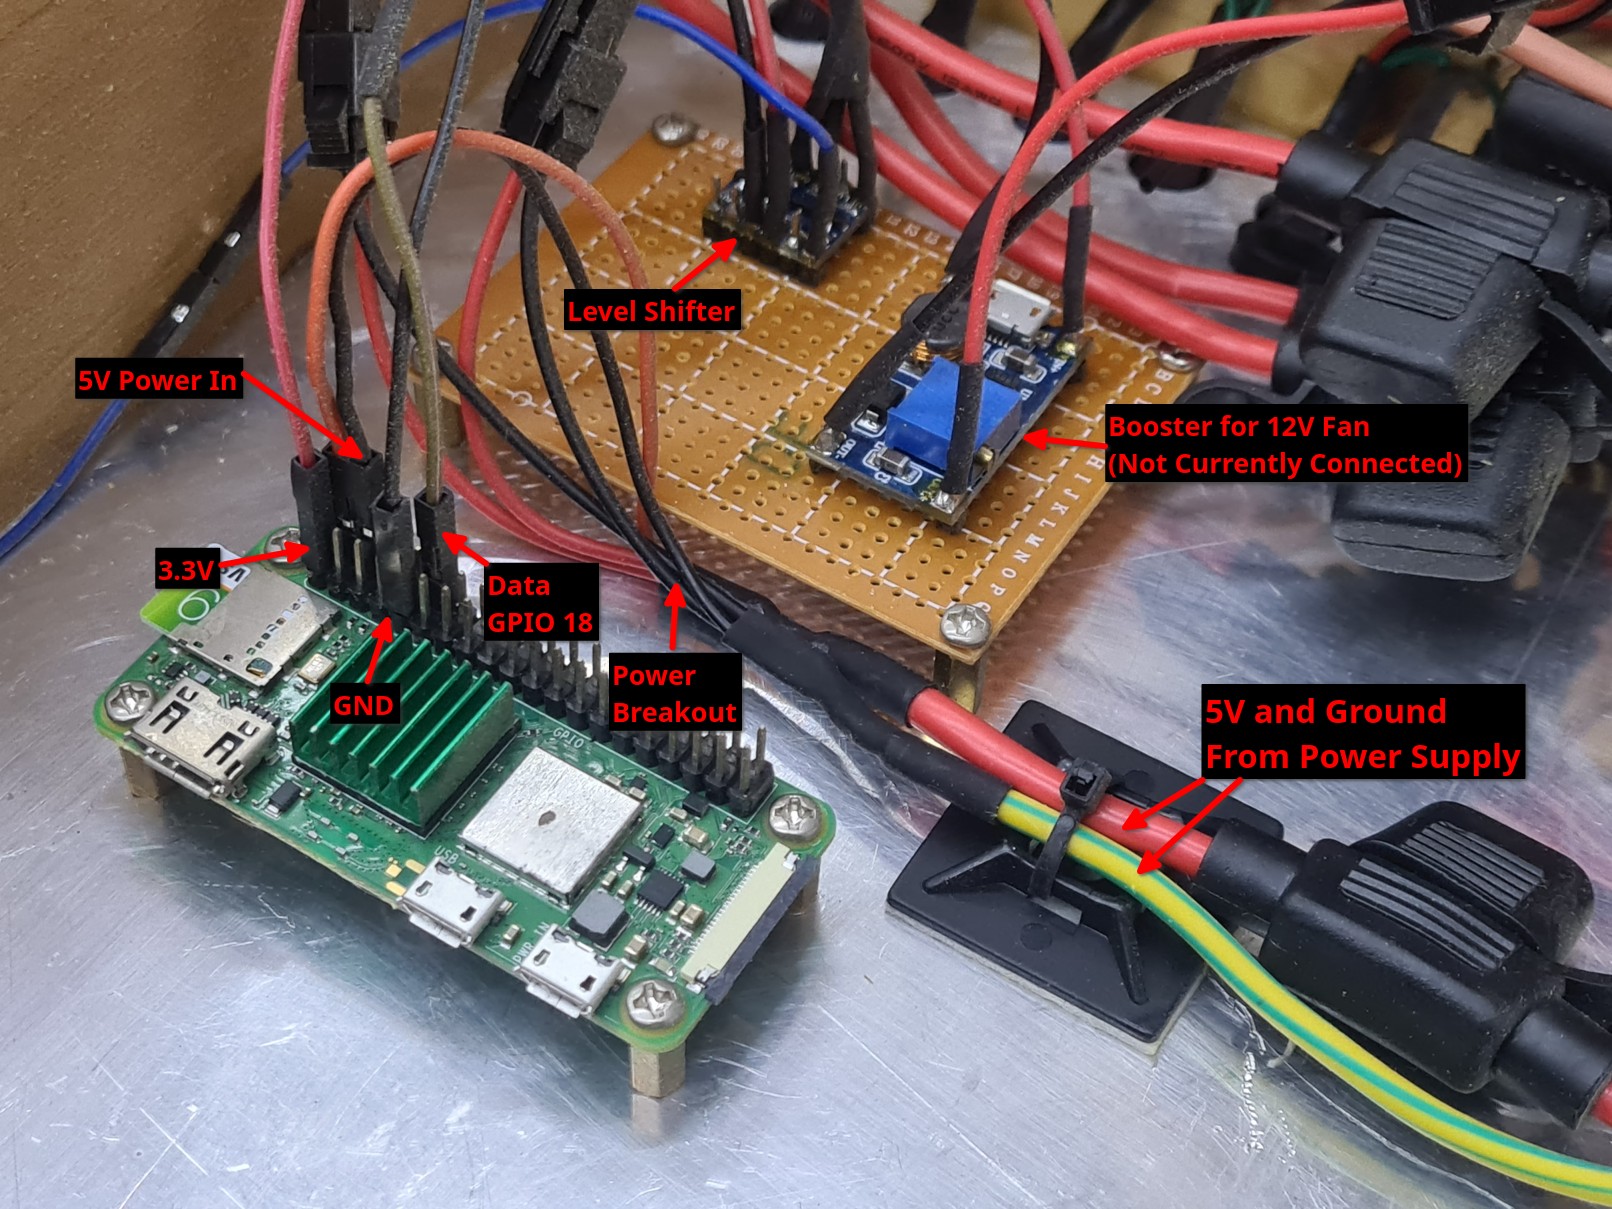
These are the interesting bits, towards the bottom left there’s the Raspberry Pi Zero 2W. I’m using the 5V power supply to run the Pi but it’s fused down (to 3A, IIRC). The 3.3V is connected across to the far side of the level shifter as is the ground and data. The blue line (running under the “5V Power In” label) is the one that sends data to the LED strip. The LED strip snakes up the front of the lamp and the data line jumps across at each level. I don’t know why I’ve used yellow and green cable for the ground line that powers the Pi and other things, I assume I was out of other suitable cable.
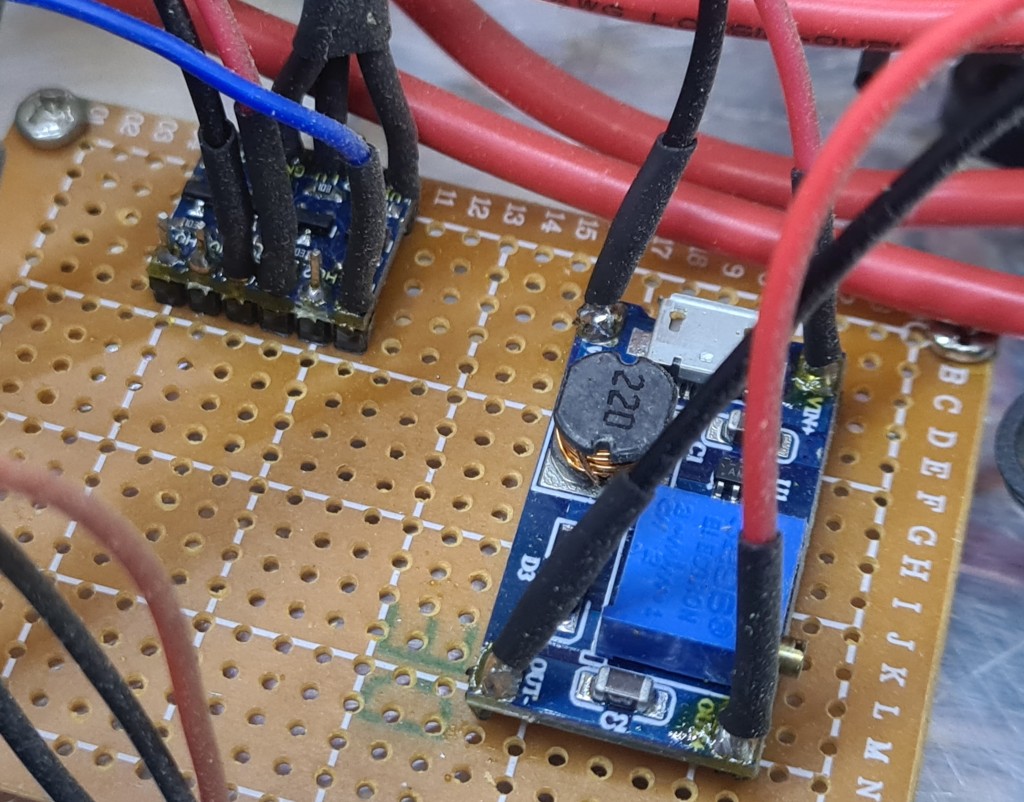
The booster is there in case I need a fan to keep things cool. I don’t think I will, I’ve already tested this at full power and it only got slightly warm.
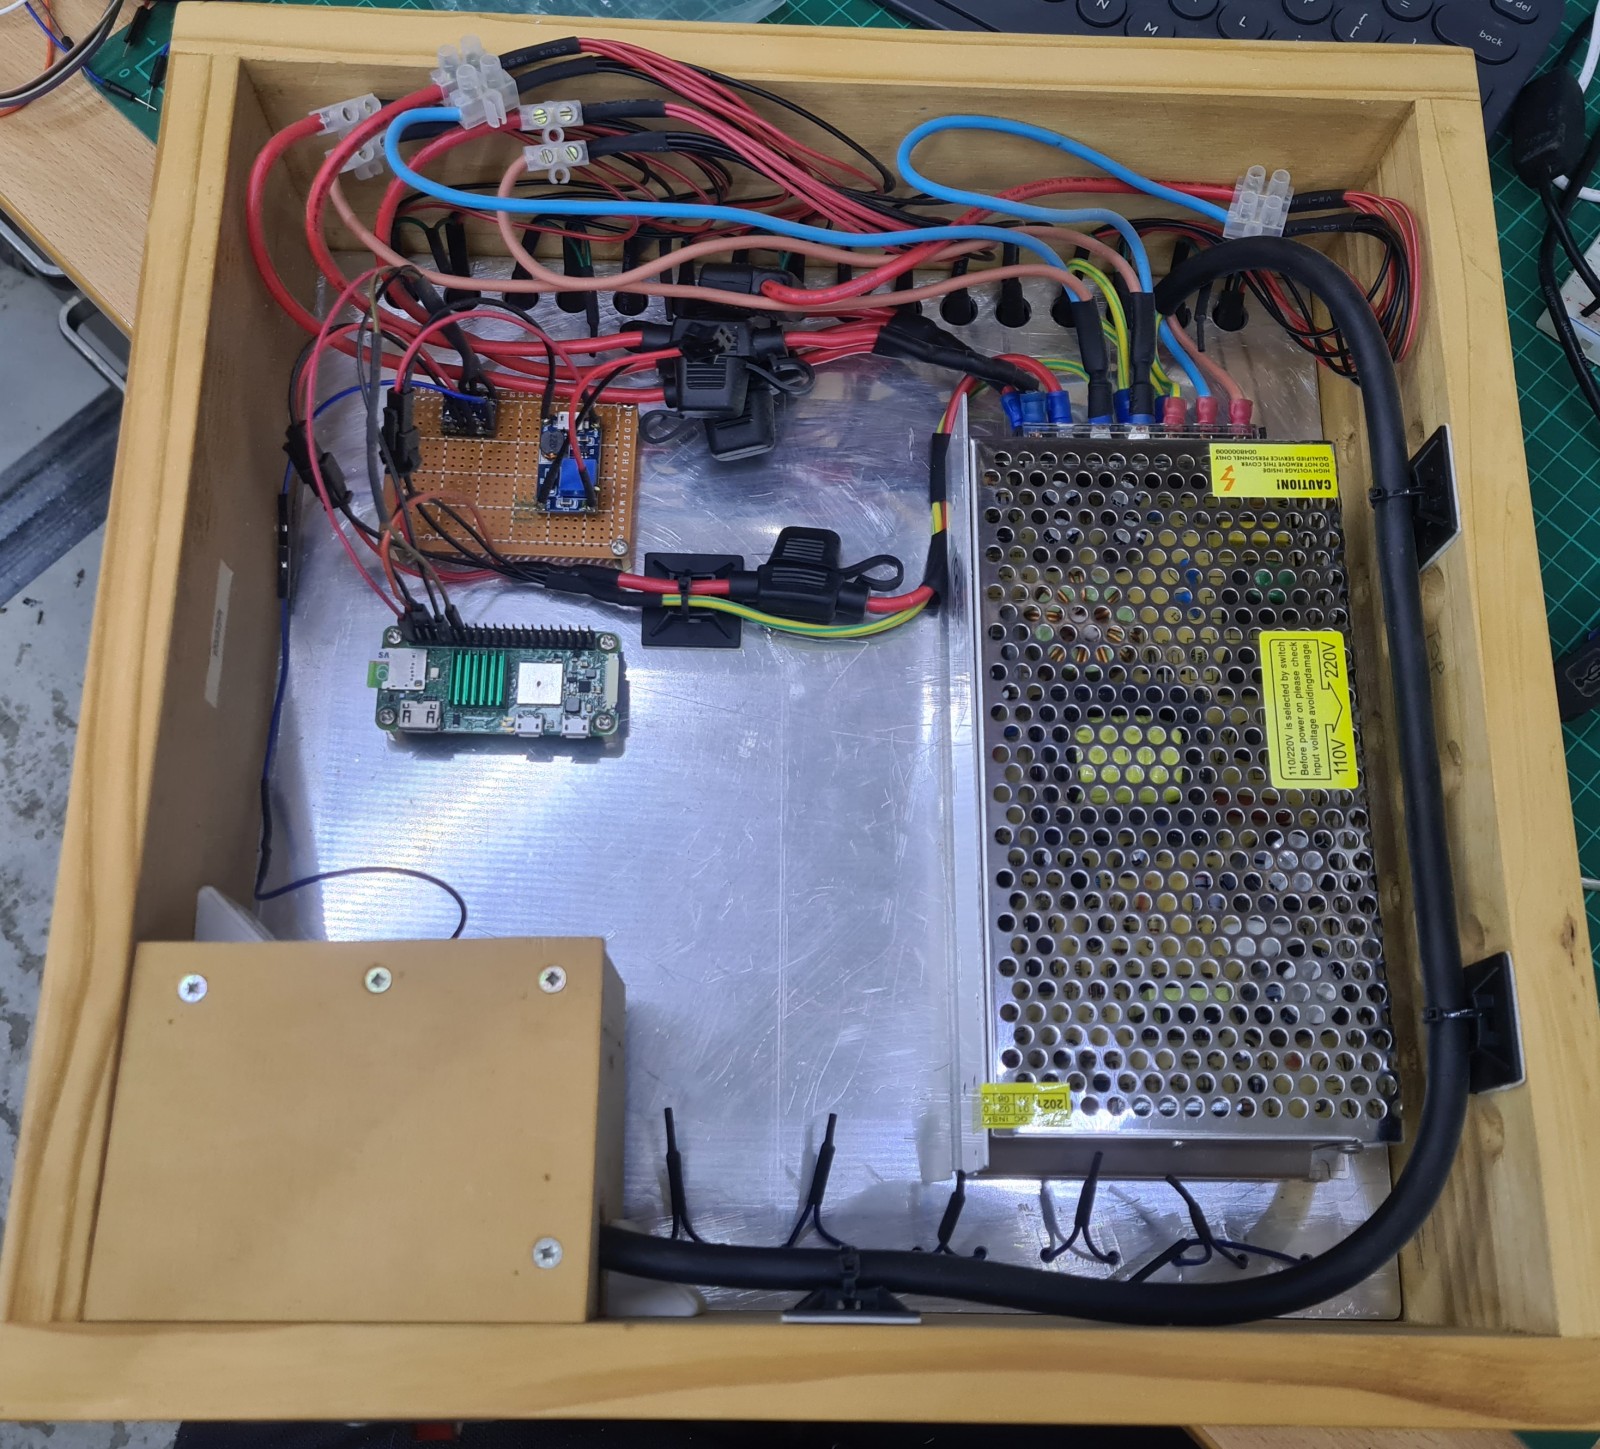
In this over view shot you can see the data line jumping from strip to strip at the bottom of the image, it does the same at the top but it’s much harder to see. The internal wooden box is to prevent accidental contact with mains voltage. The aluminium sheet is earthed just in case mains voltage ends up there some how.
The front of the lamp looks like this.
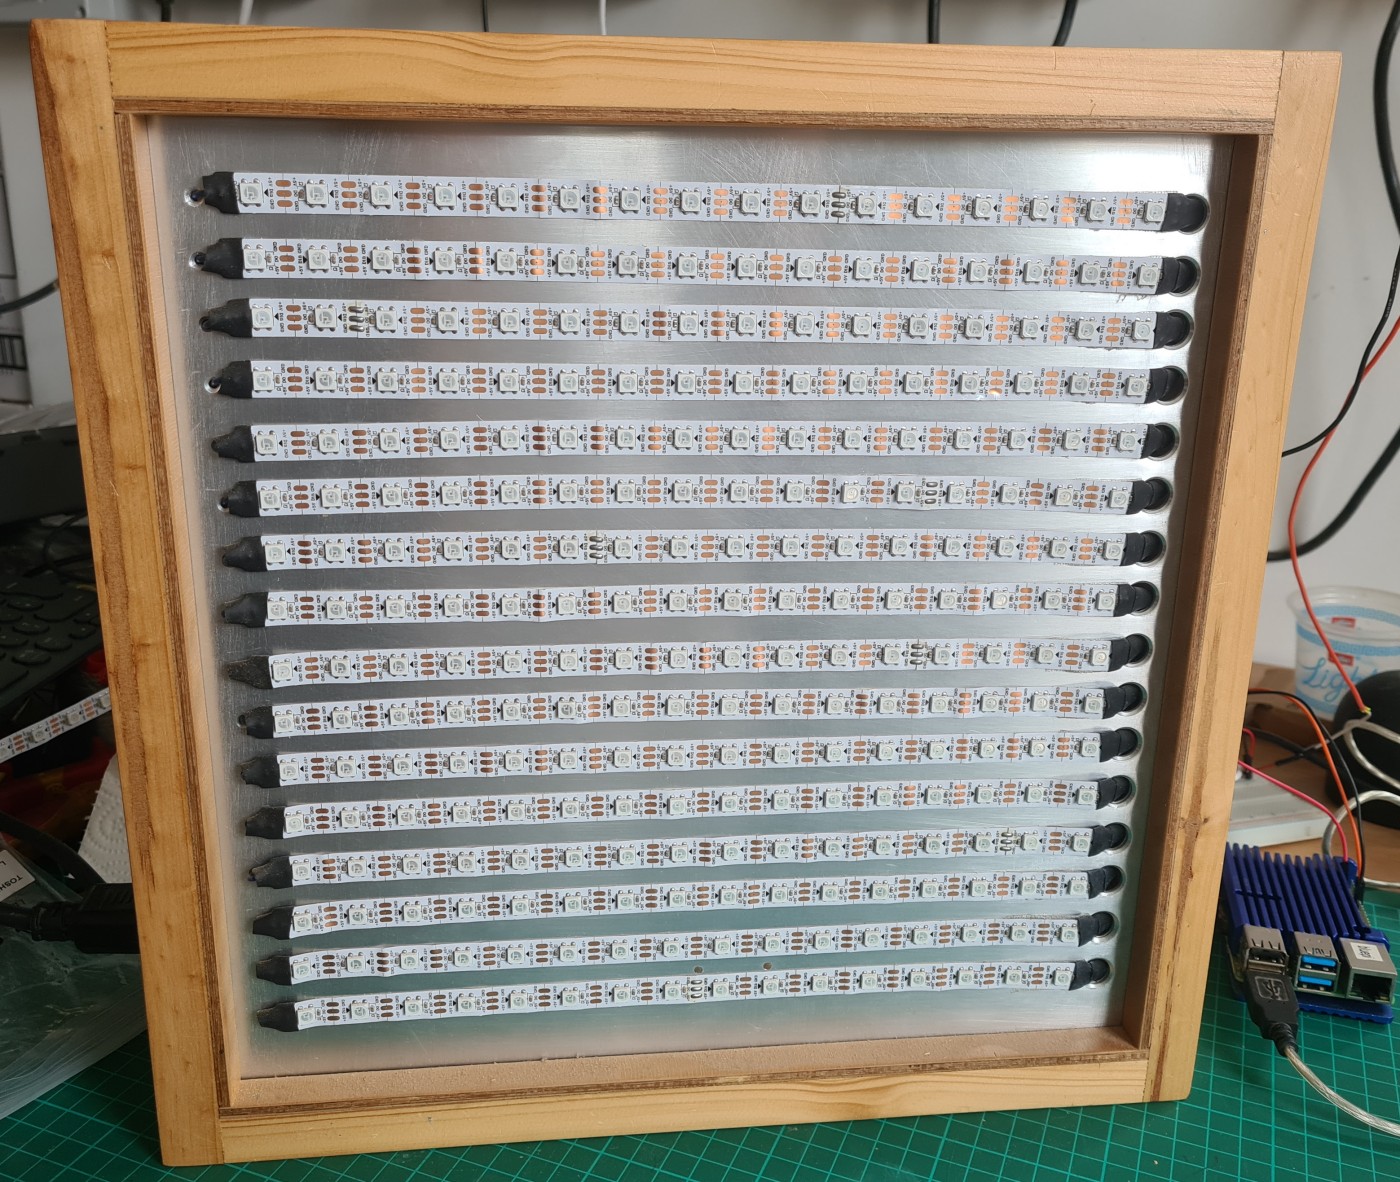
The first, zero, pixel is in the bottom left corner and the last pixel is in the top left corner… insert ominous foreshadowing noises. As can be seen the end of each LED strip are covered in heat shrink and totally belt and braces separated electrically from the aluminium sheet. This is great from an electrical point of view but it made it nearly impossible to wire. The right hand side, where power is injected, is so stiff it keeps lifting the LED strip off the aluminium which is very frustrating. In hindsight I should probably have just run a strip of kapton tape up the side or done just about anything else. It’s too late now though, this thing isn’t getting rewired now.
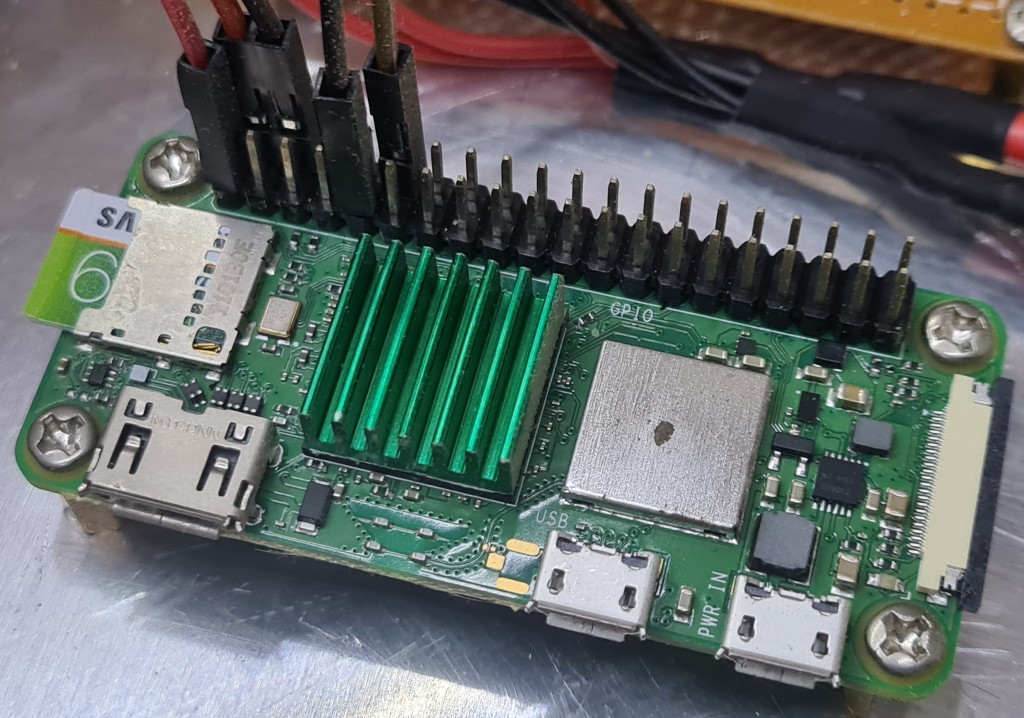
Setting up the Pi Zero 2W
The Pi Zero 2W is just like the Pi 4B that I was using before, it’s just less powerful with a few less connectors. If you are making a project like this the Pi Zero is absolutely perfect, a full fat Pi 4B is massive overkill – to be honest even the Zero is overkill for this, it could run off an Arduino or Raspberry Pi Pico. Anyway, the OS is installed just like on any other Pi. I recommend setting up a user, SSH access, and WiFi as you burn the OS to the SD card. This will make like easier as you won’t need to find a keyboard and monitor to configure these essentials later. Pick one of the versions of the OS that it headless. You’ll almost certainly never attach a monitor to this device let alone use a desktop. I think you can add a public key during set up but I typically use password access at first and then configure public keys later (whether you turn off password access is up to you).
I think I’ll leave this article here as it creates a nice break point to start working on the software for the lamp in the next article.