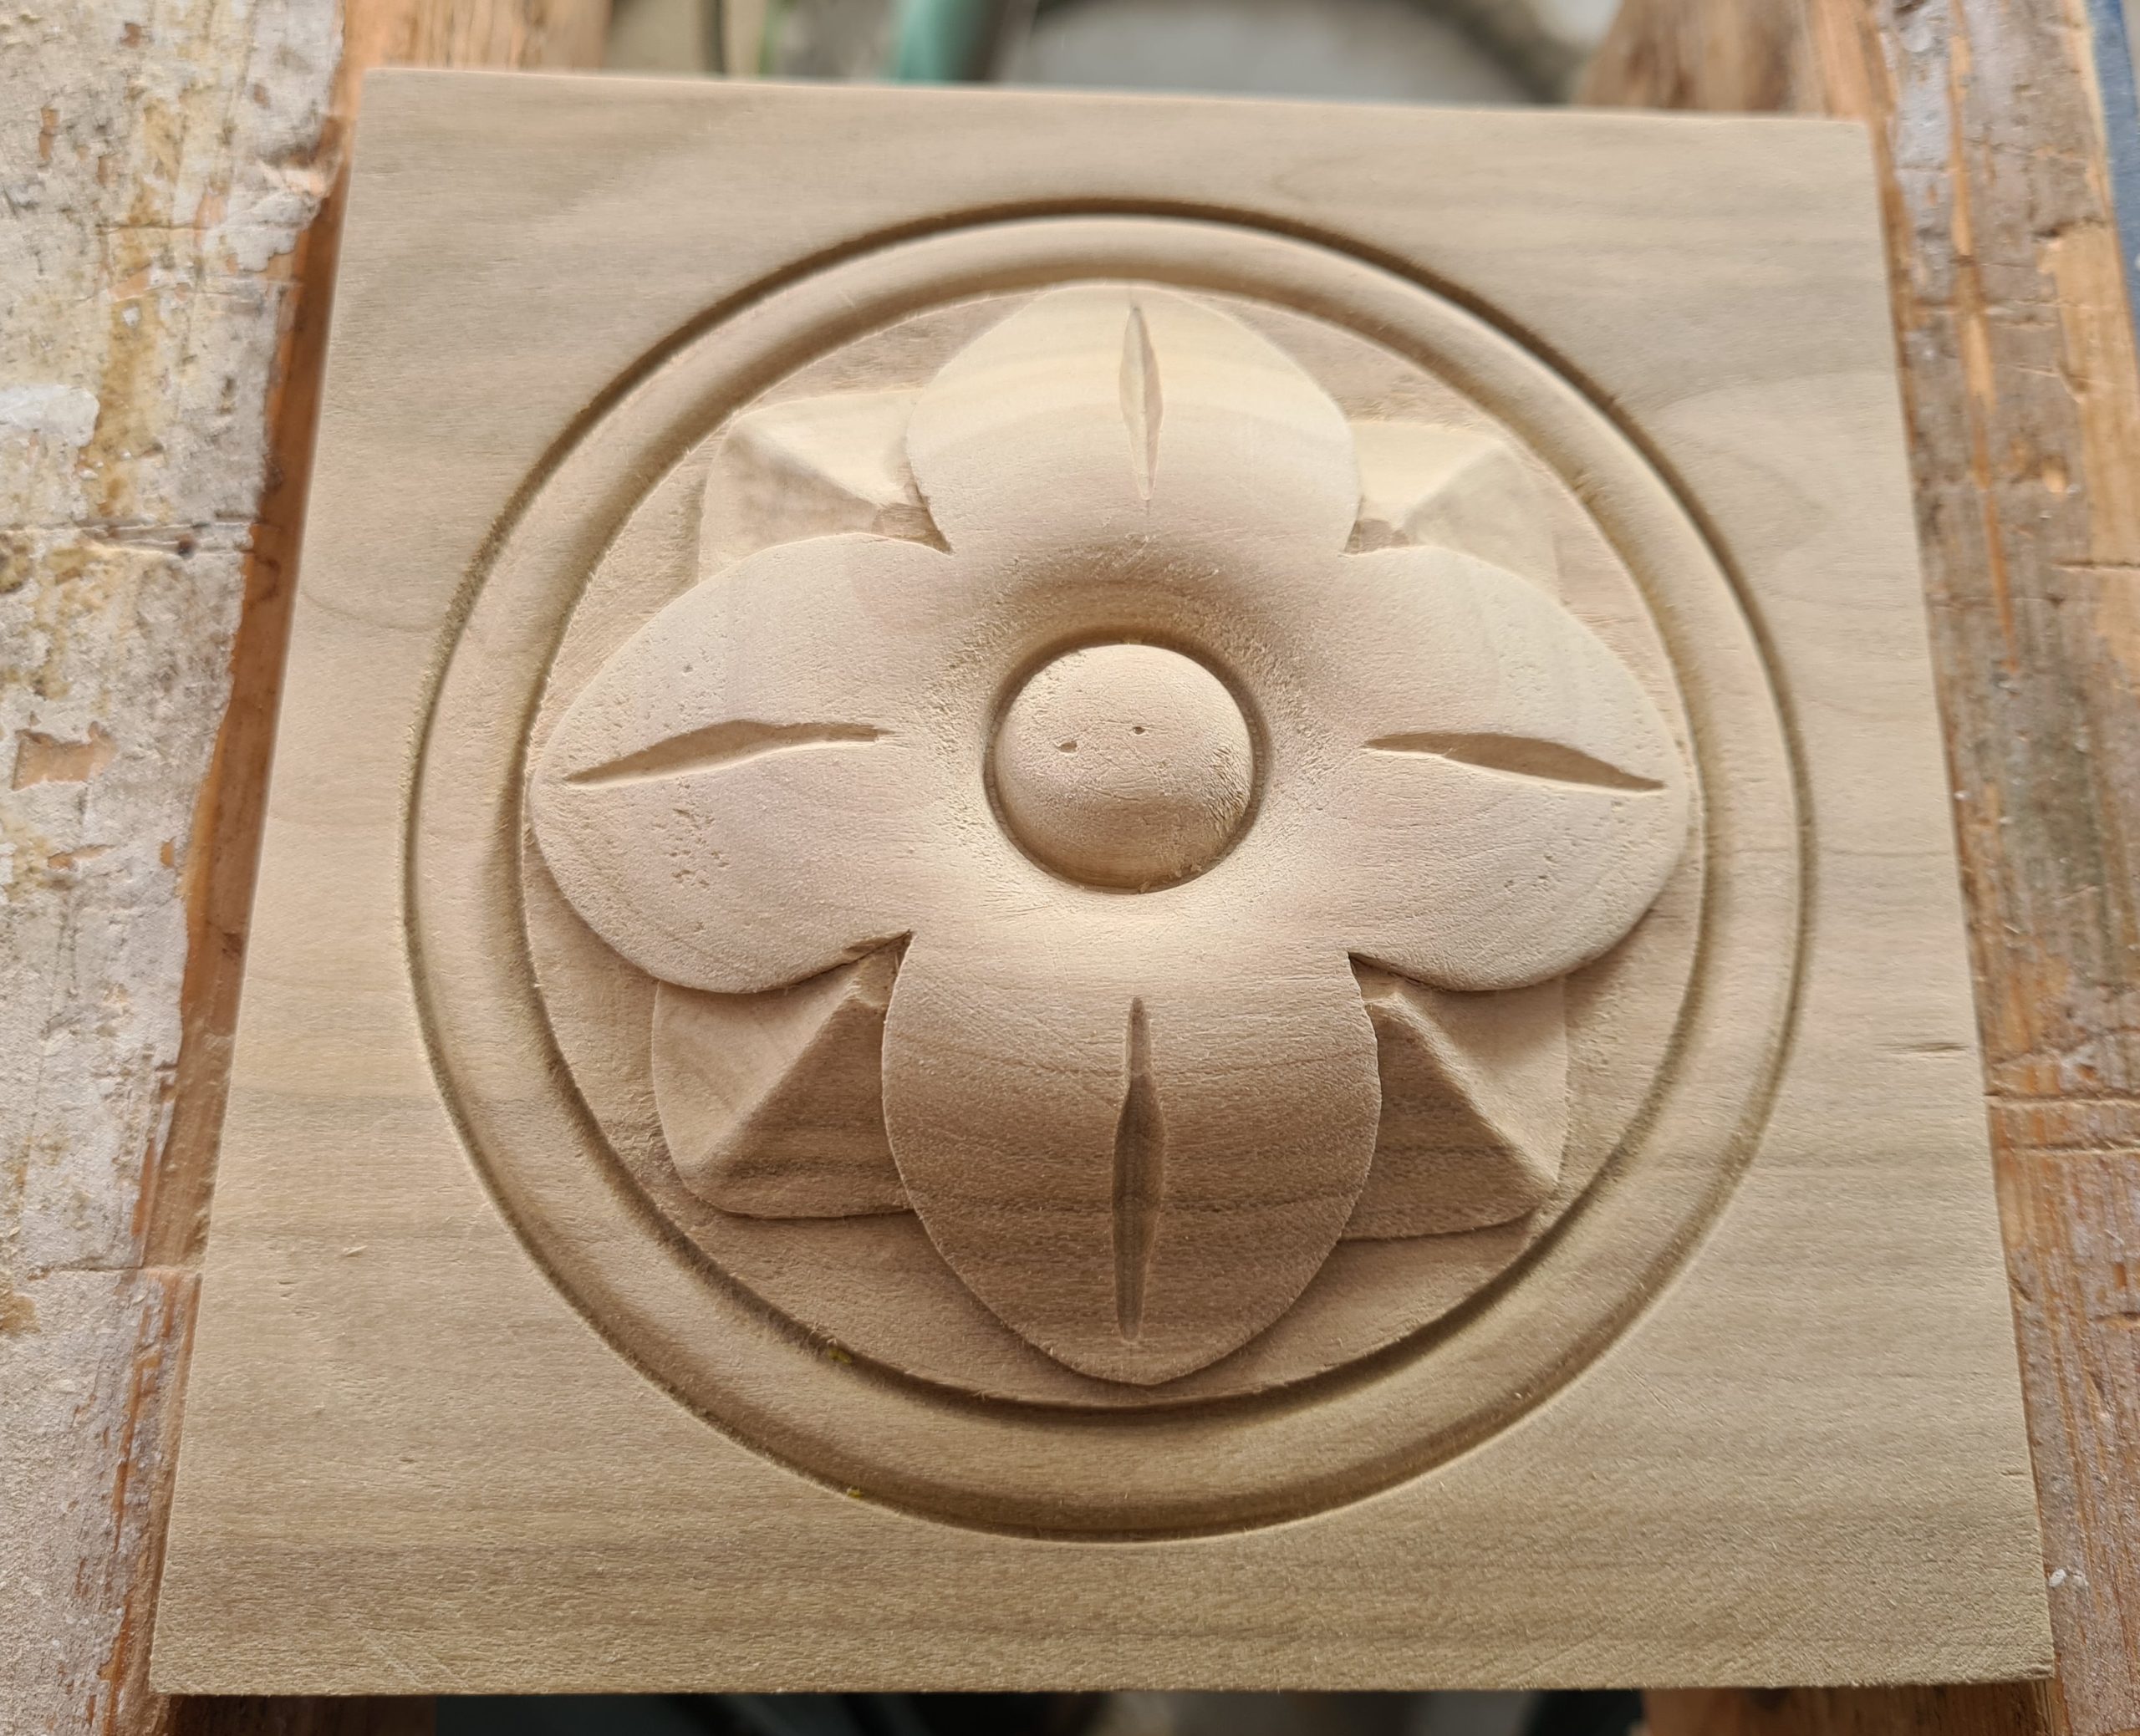
A friend asked me if I could make some wooden rosettes / bosses for the house he is doing up. The doorways (and windows) have decorative surrounds and these are positioned at the top corners. I made a around twenty in total. The picture below shows what I’m aiming for.
Prepare the Blanks
I’m going to skip over a bit of detail here for two reasons. Firstly because this is a time consuming step that’s technically easy but secondly because I don’t have many photographs of the process. Essentially, I took the rough sawn timber (poplar / tulip wood in this case) and accurately cut out blanks on the mitre saw.
I ran each blank over the planner and then mounted them to a custom made sled to thickness them to size. By using a sled I was able to thickness four blanks at a time.
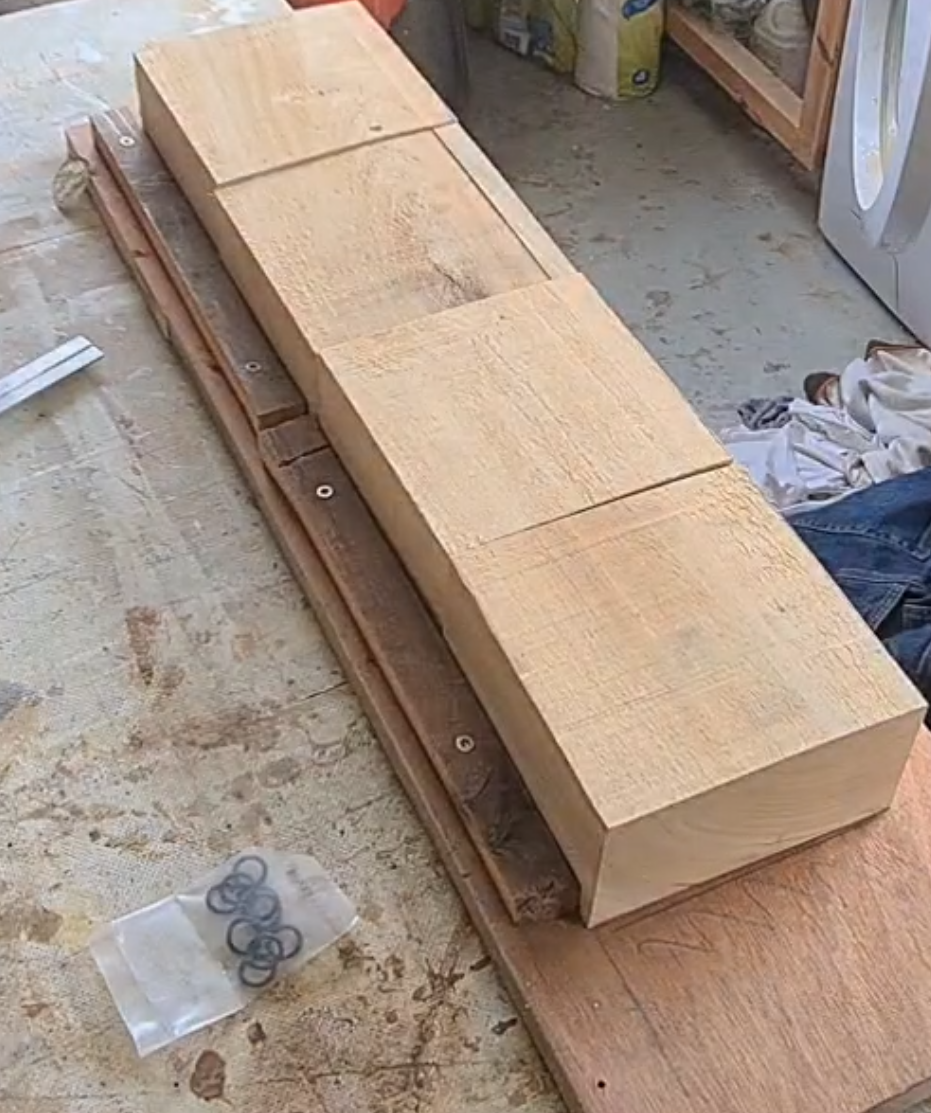
It would be slightly faster to just cut a strip of timber the right width and then thickness maybe as many as ten blanks worth of timber in one go. The reason I mounted them individually on a sled was because it allowed me to make up blanks from what would otherwise be waste timber. The blanks I needed fell awkwardly with the timber widths I could reasonably get and I would have had wastage of about 50% without the sled.
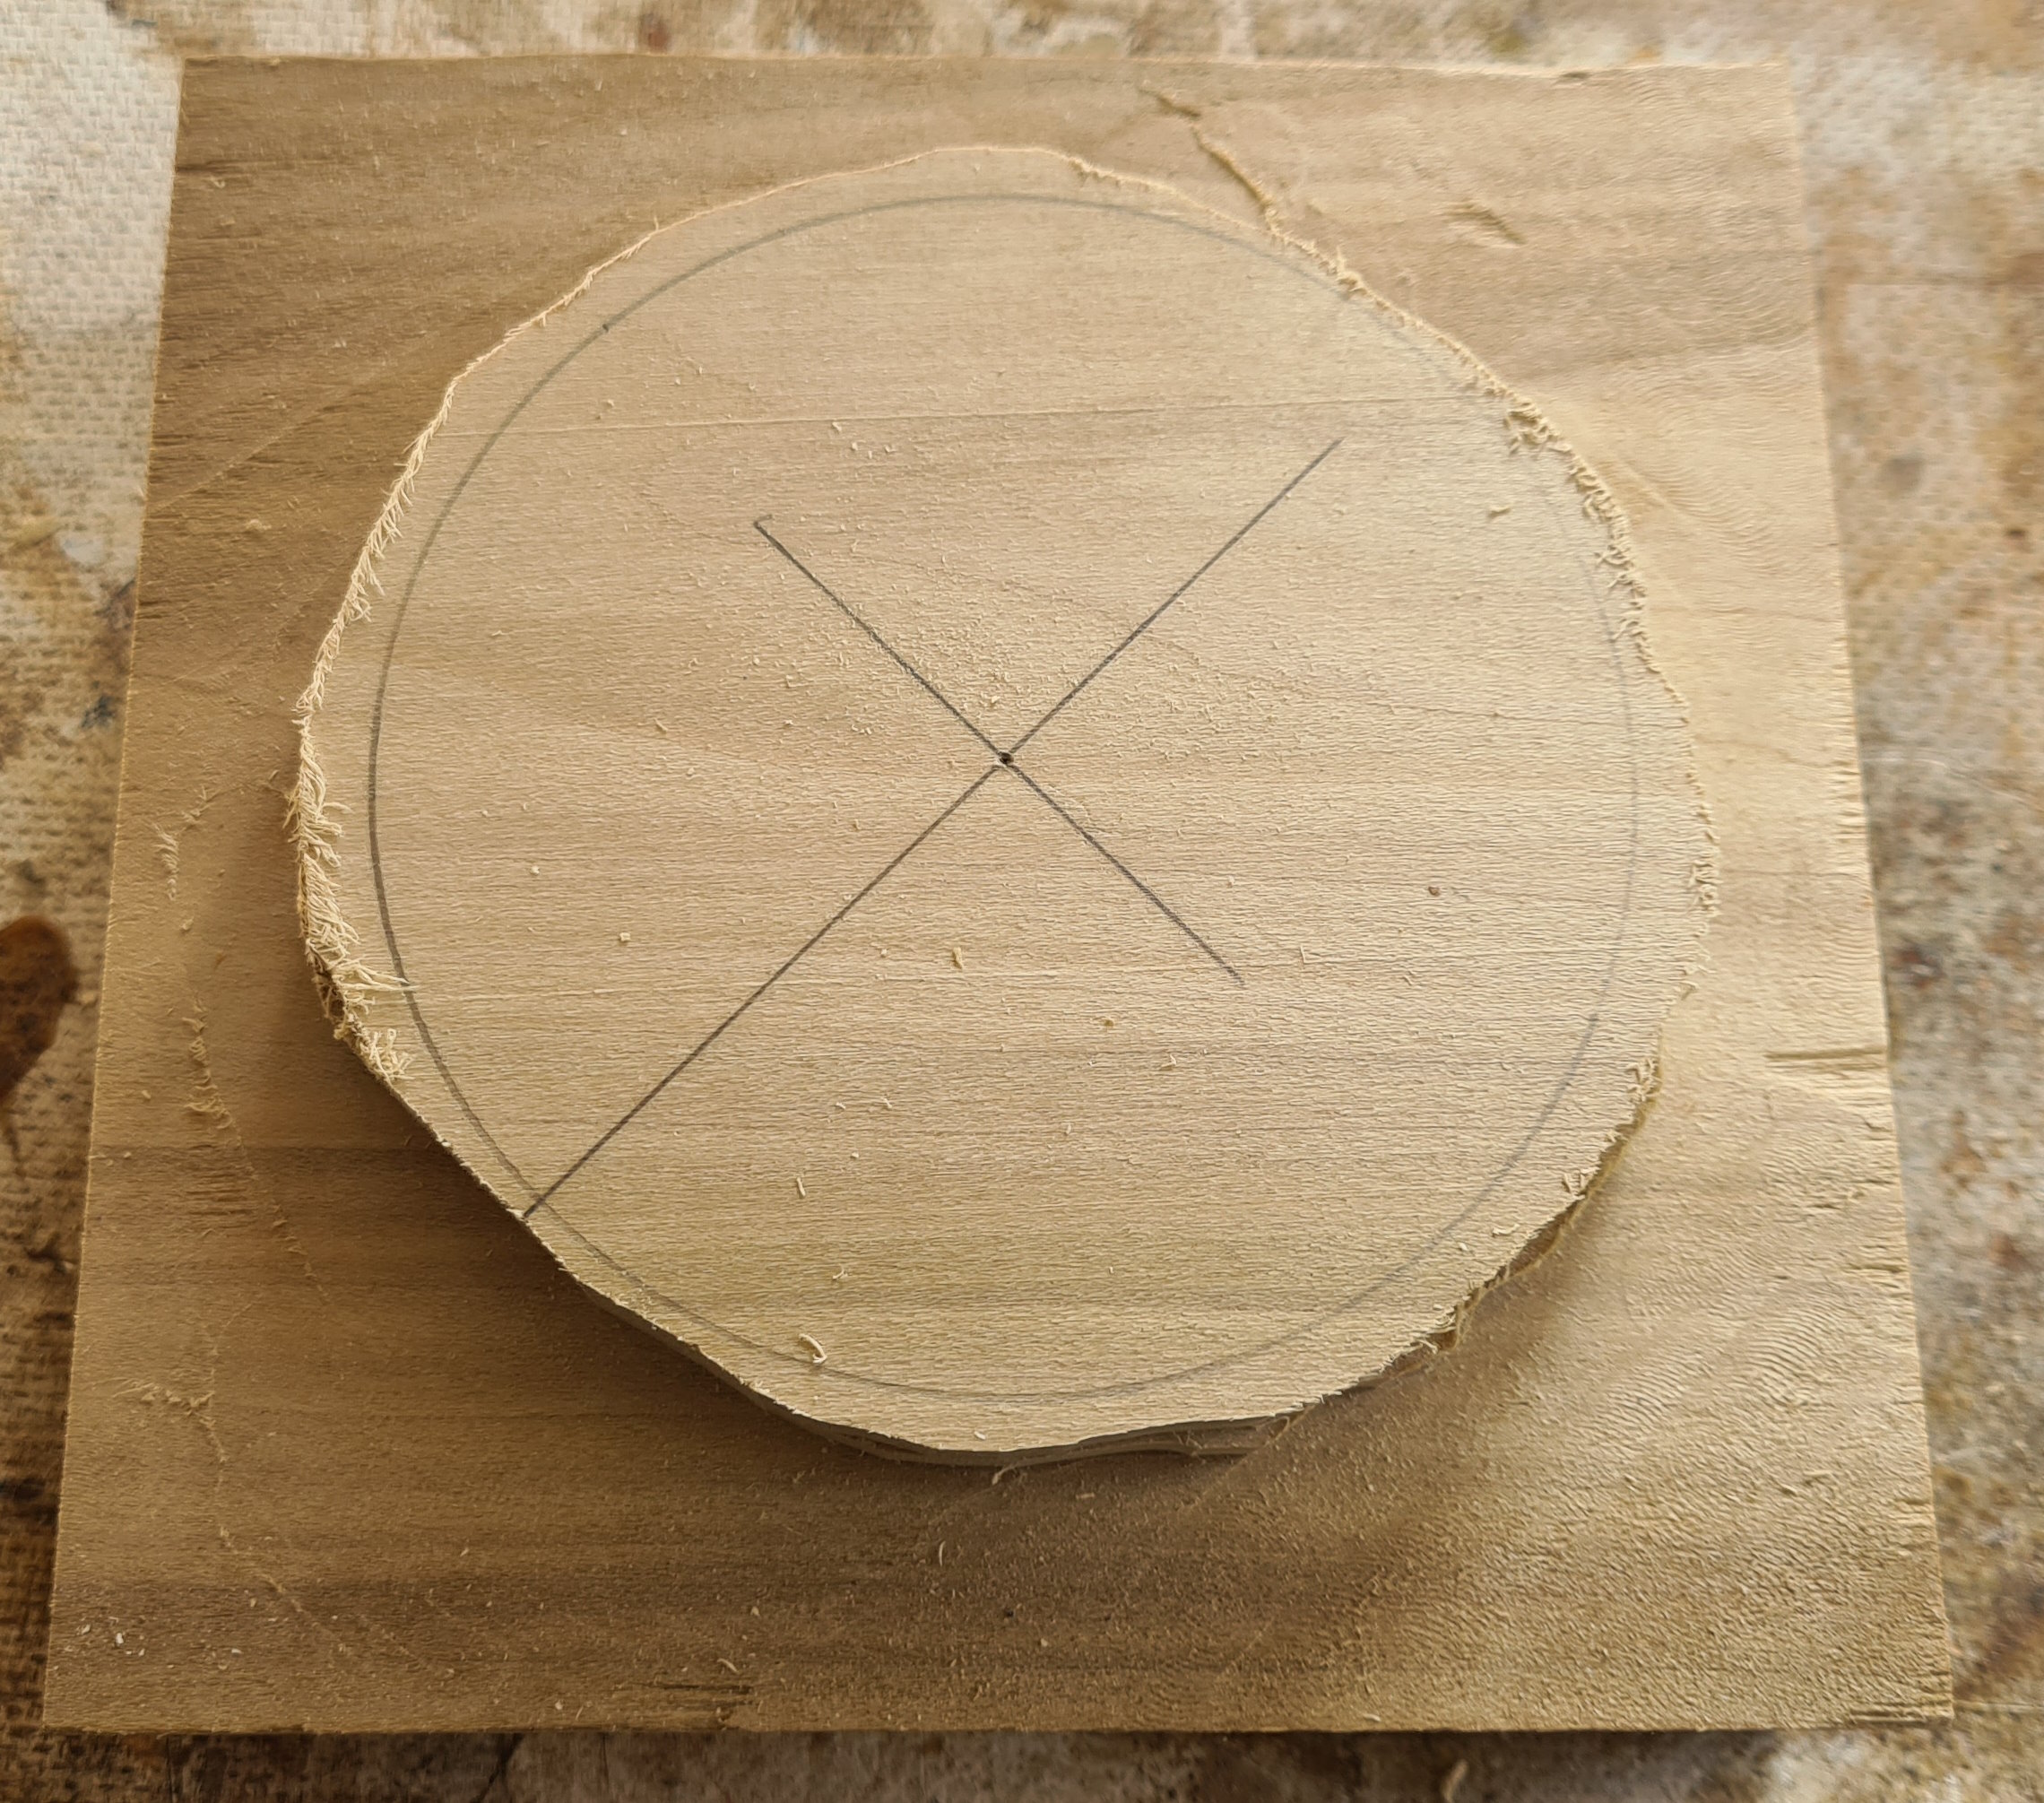
At this point I had cubes of timber that were smooth and the correct maximum final dimension. Accurately mark the centre on both the top and bottom of the blank by drawing a line from corner to corner. On the front draw a circle the size of the petal area. On the back draw a circle the size of the faceplate ring for your lathe.
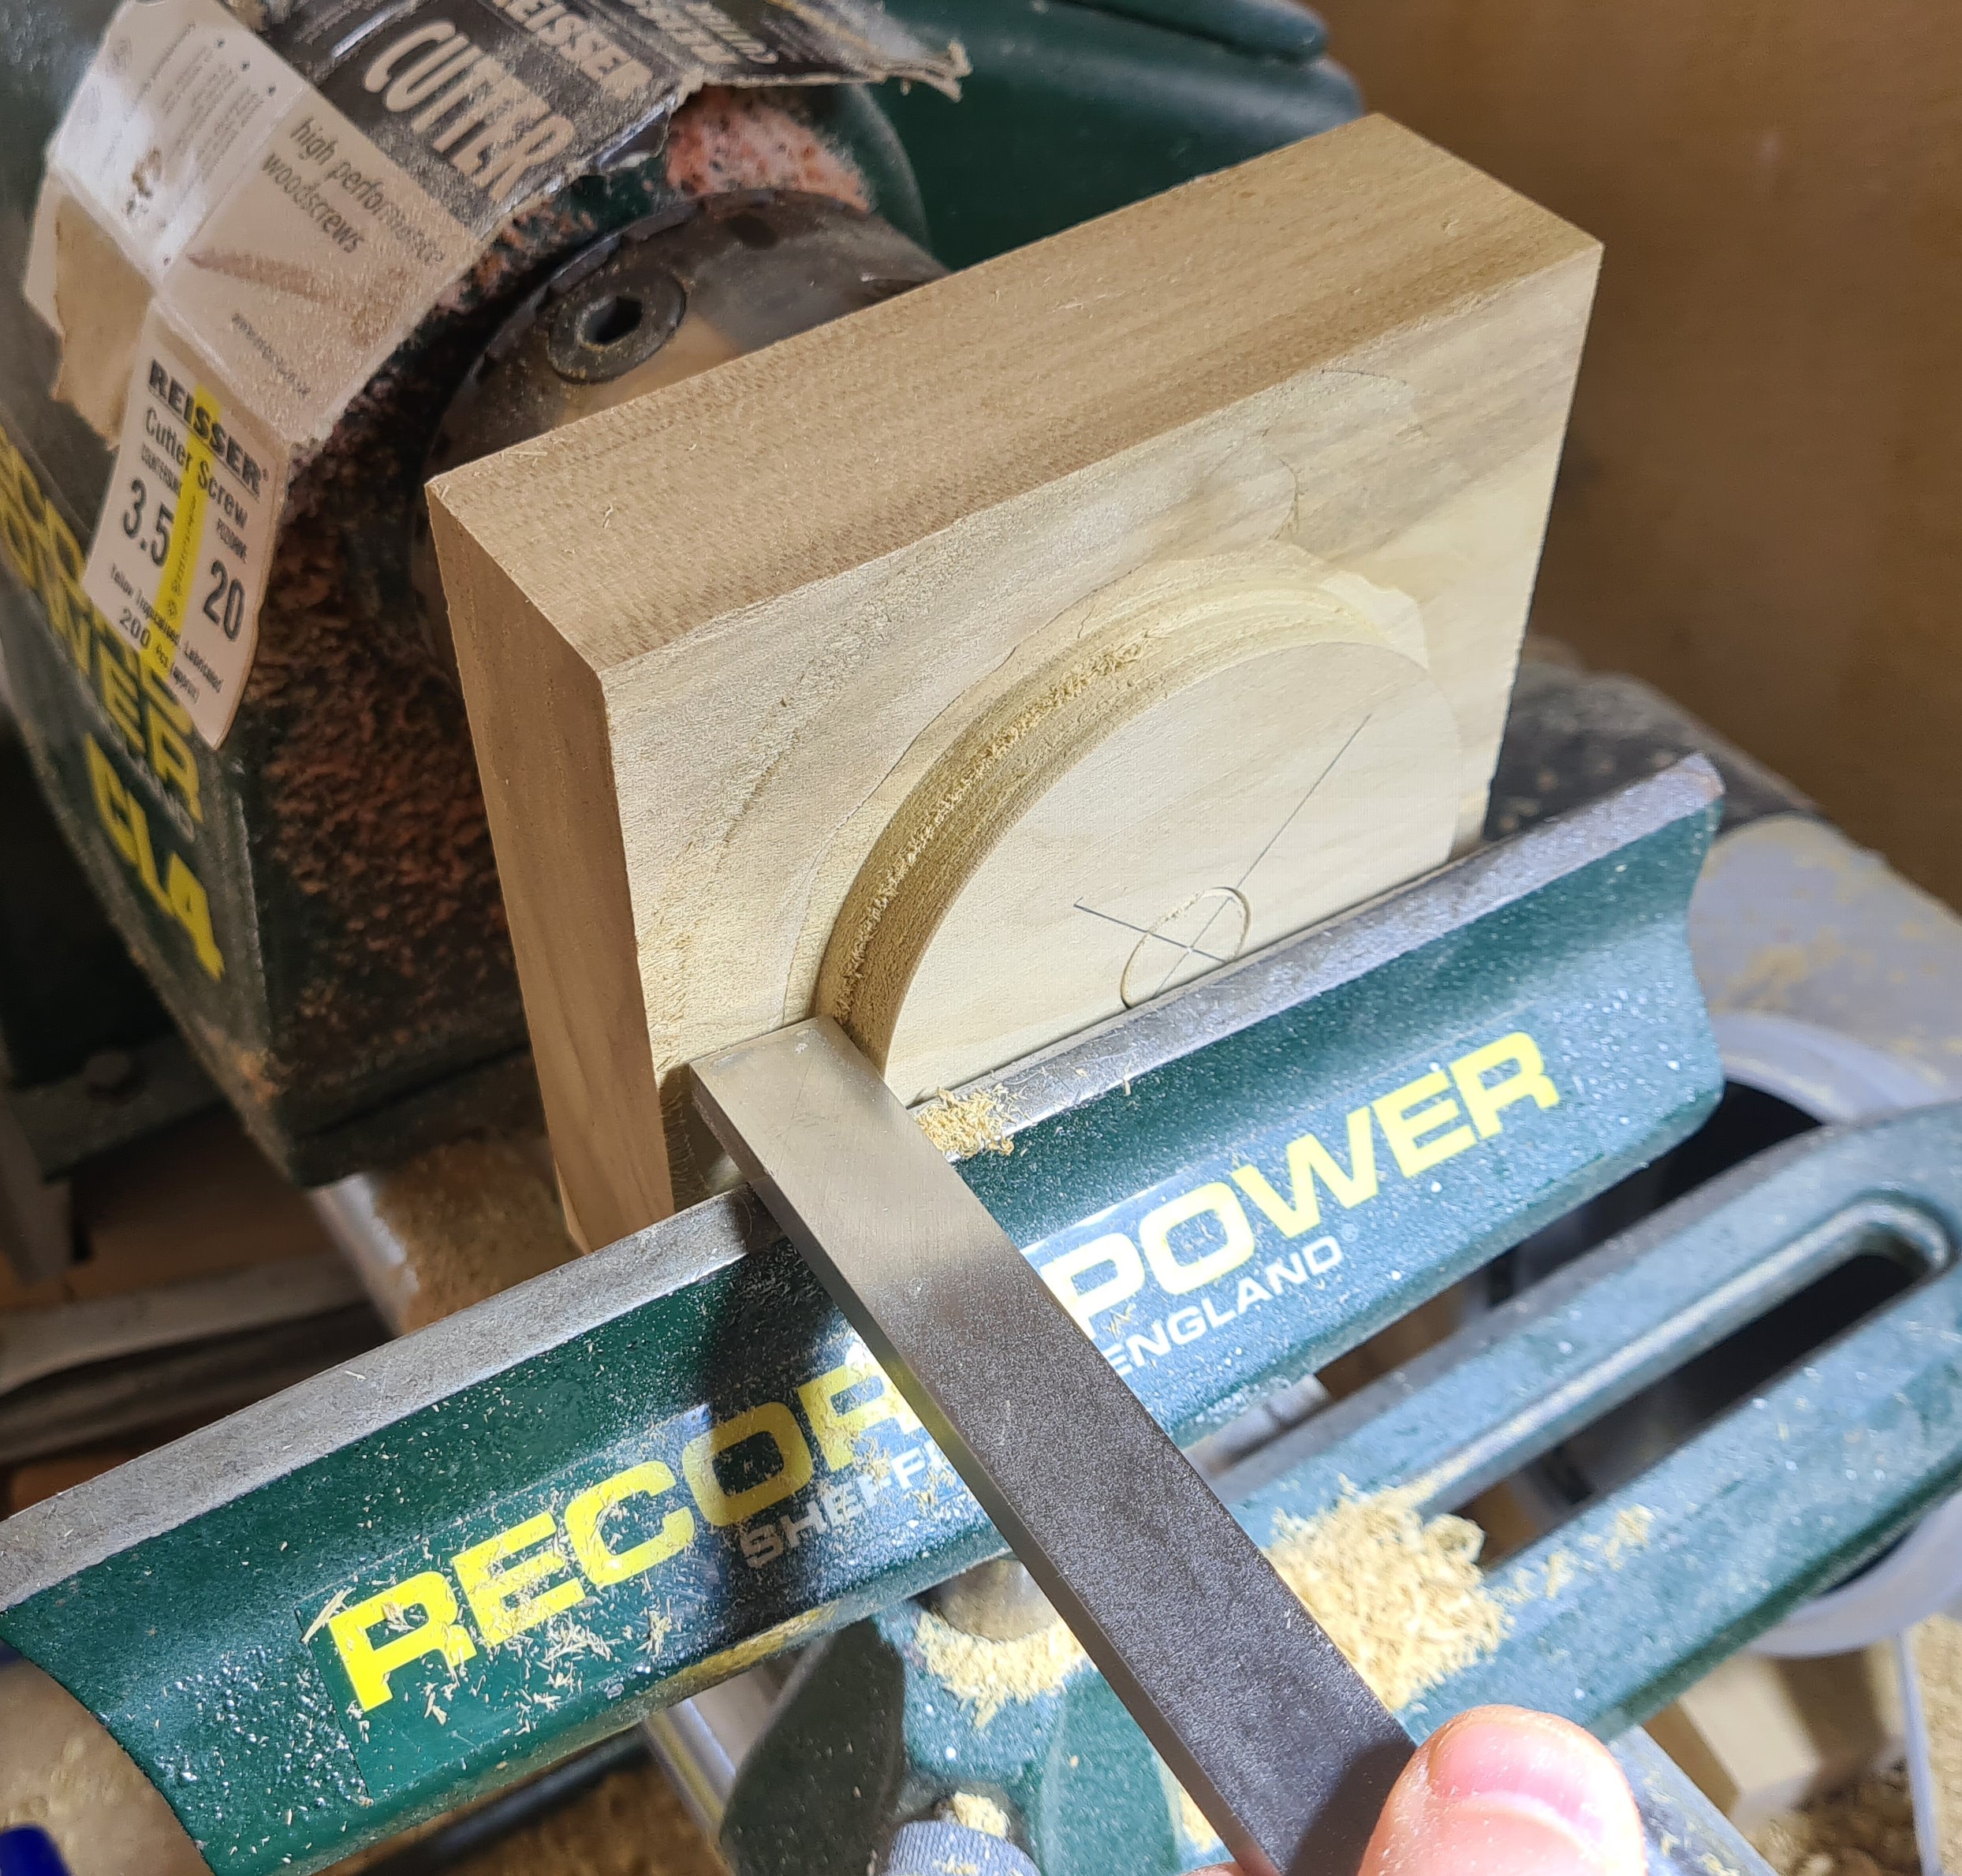
Using a router and a jig like the one shown below lower the land around the edge of the carving. A 1/2″ spiral up cut bit makes short work of this. Don’t route too close to the carved section in the centre, it’s easy to tidy this up on the lathe.
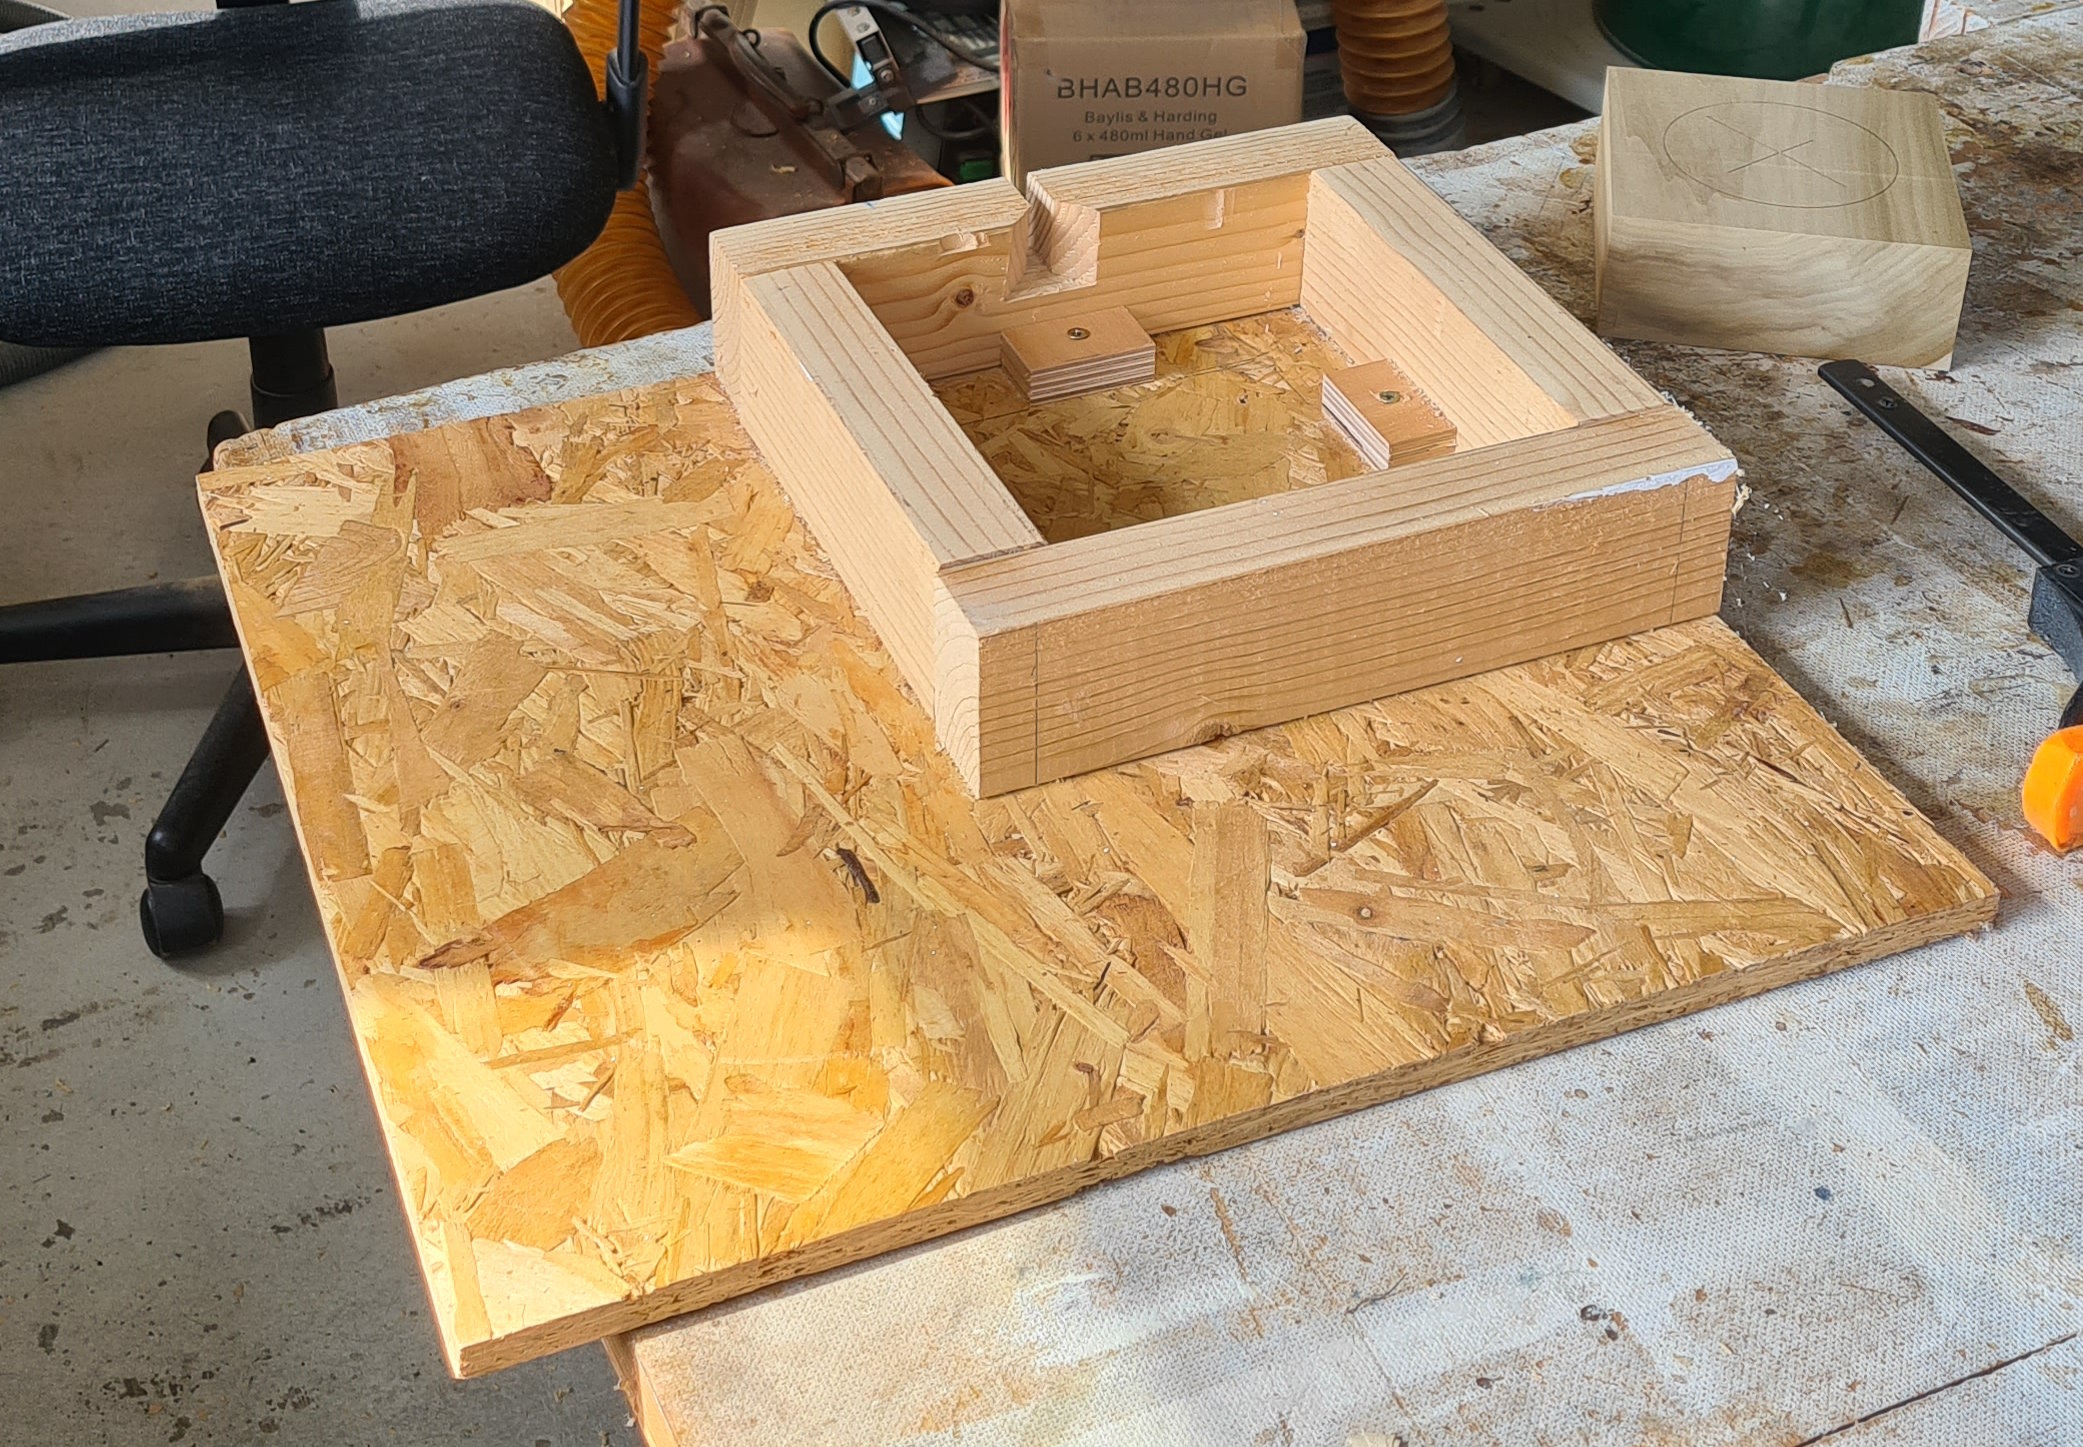
You might wonder why you’d lower the land with a router when this will be mounted on the lathe in the next step. Since the blank is square you have an interrupted cut which makes achieving an acceptable flat surface on the lathe difficult. I’m sure it could be done but I found the router gave a better finish and was faster. You should end up with something that looks like the rough blank shown below.
As you can see the router leaves an excellent finished. I found the poplar was a little prone to chipping which you can see on the right hand side. That chip is just small enough that later steps will make it vanish without needing a repair.
2025 Update
I had to make another batch of these and wanted to do a better job to minimise chip out from the router. I found a climb cut at a horizontal depth of about 2 to 3mm was enough to completely stop chip out. Obviously you have to be careful with a climb cut, but with a nice sharp bit and being alert to the dangers it’s completely possible to do it safely. The fact I’m working with a soft and uniform timber like poplar also helps. If you don’t feel safe don’t climb cut.
Lathe Work
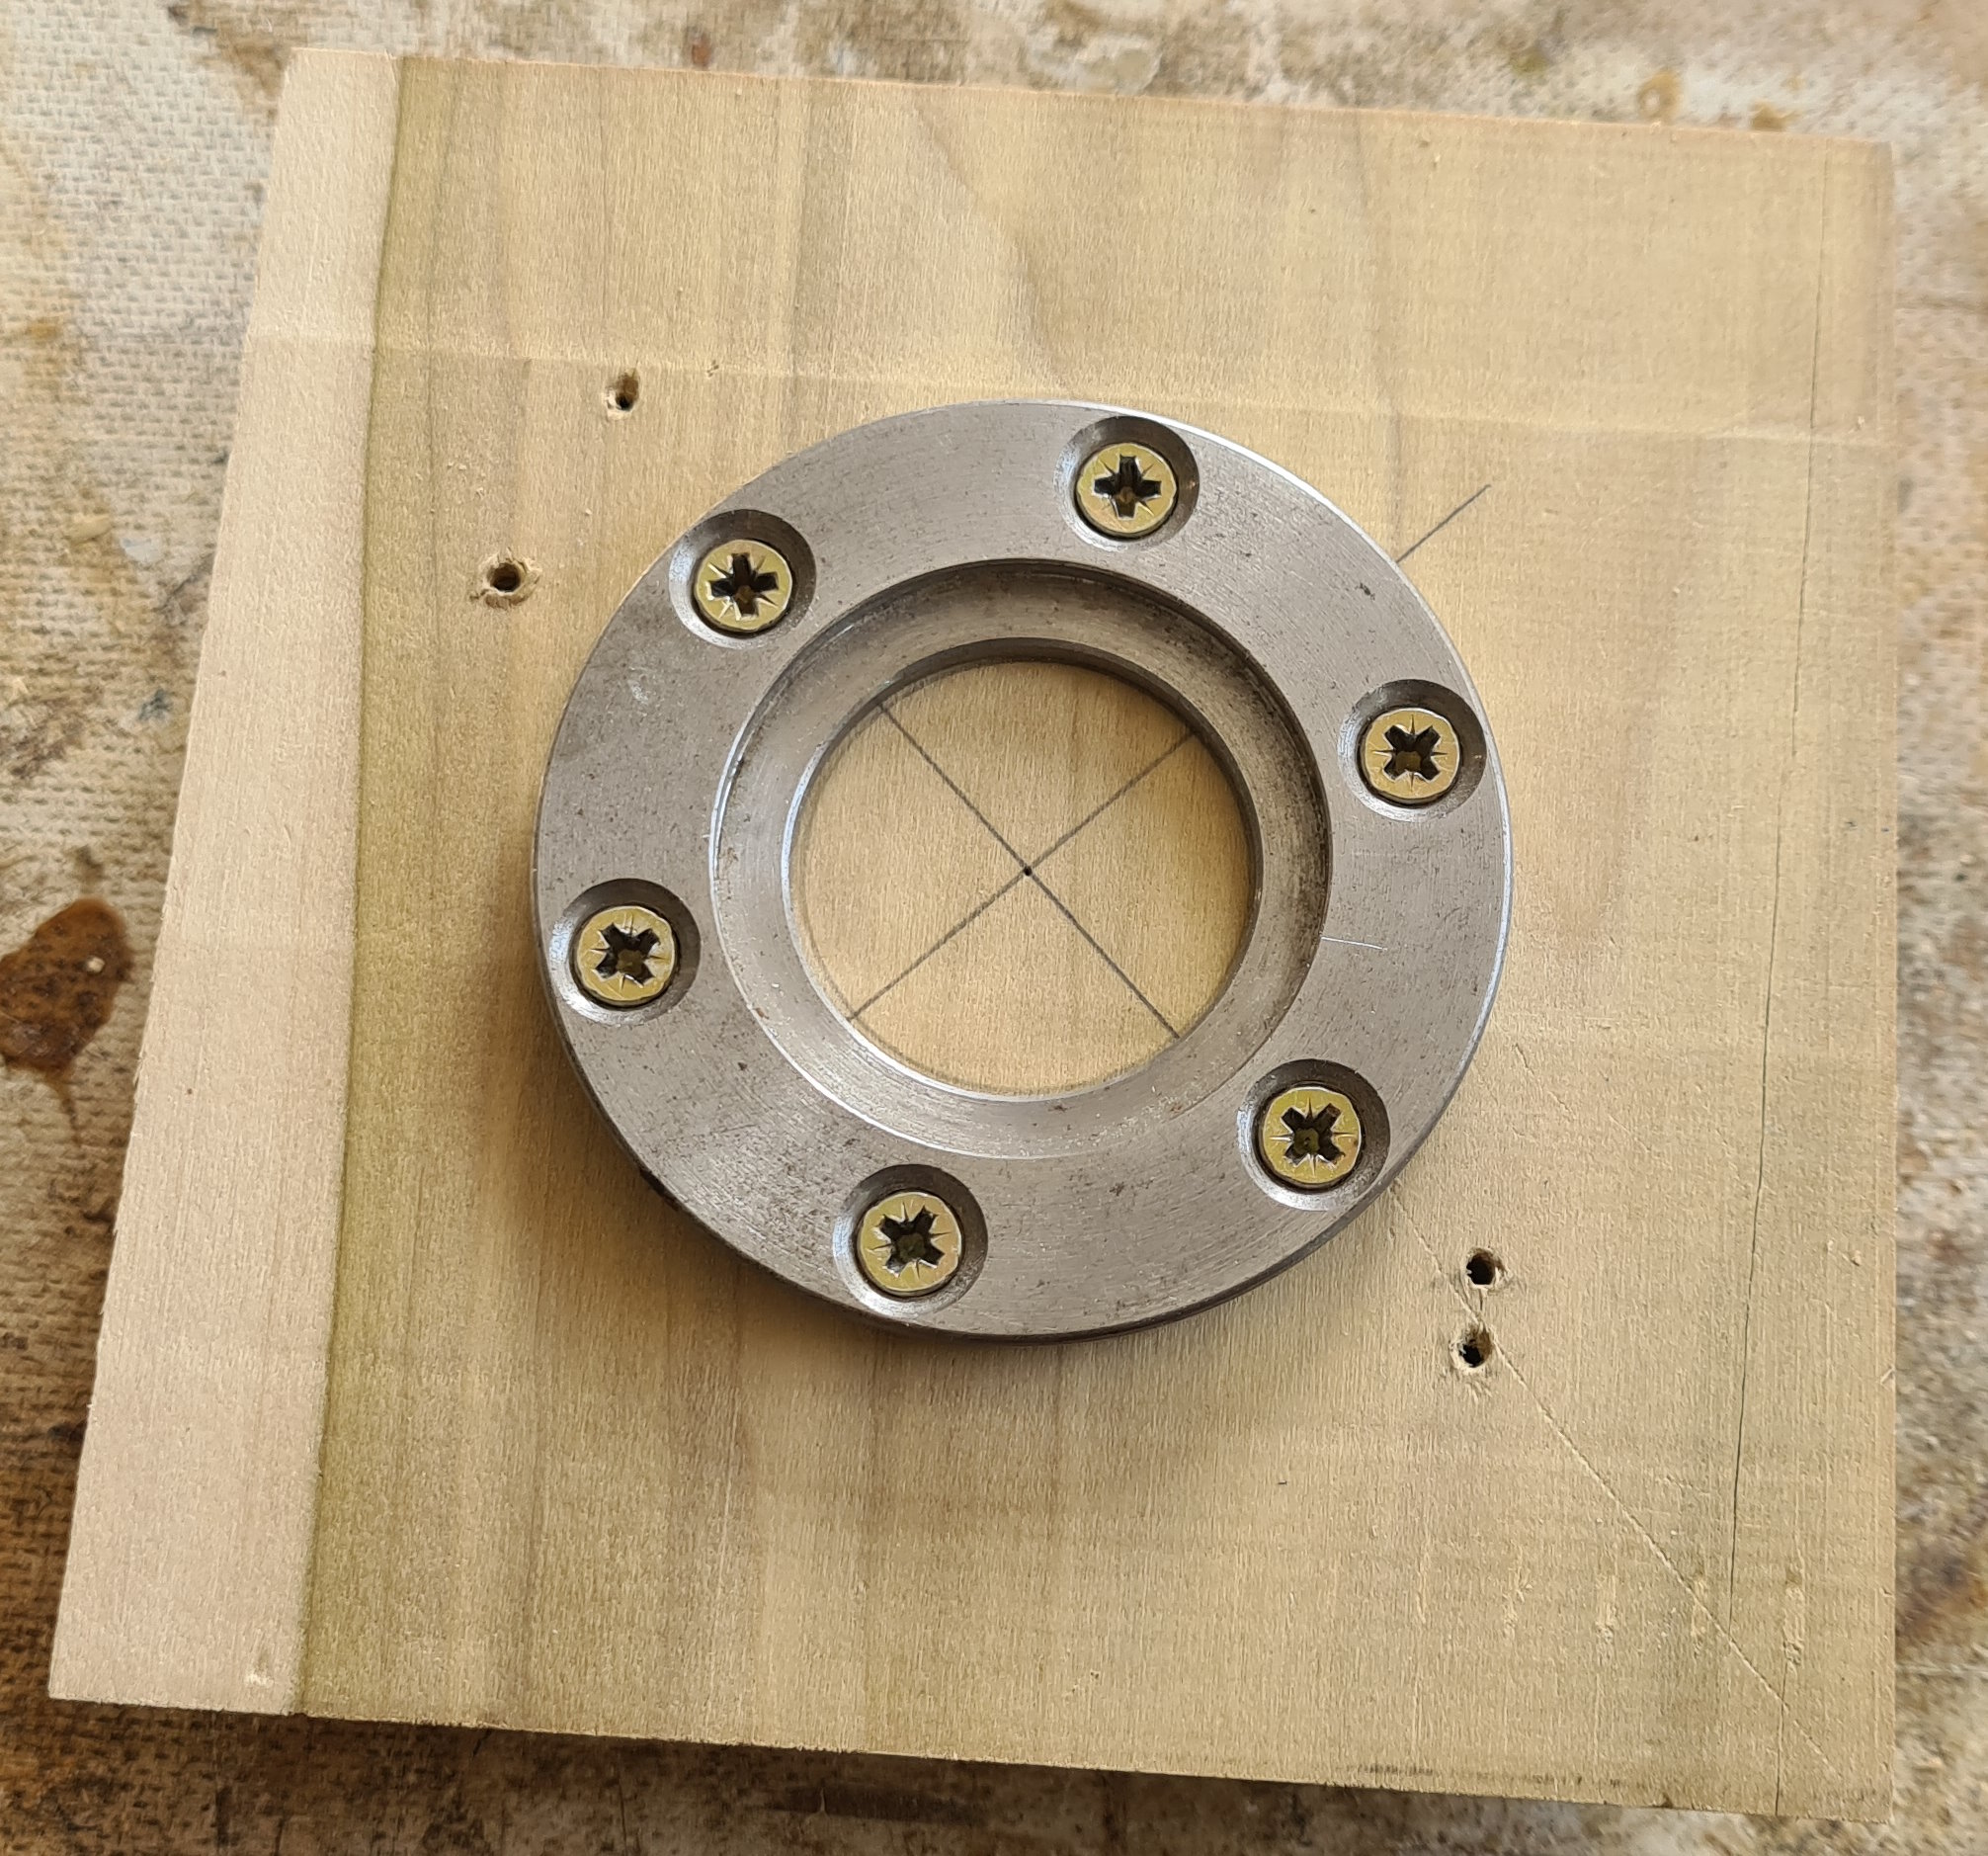
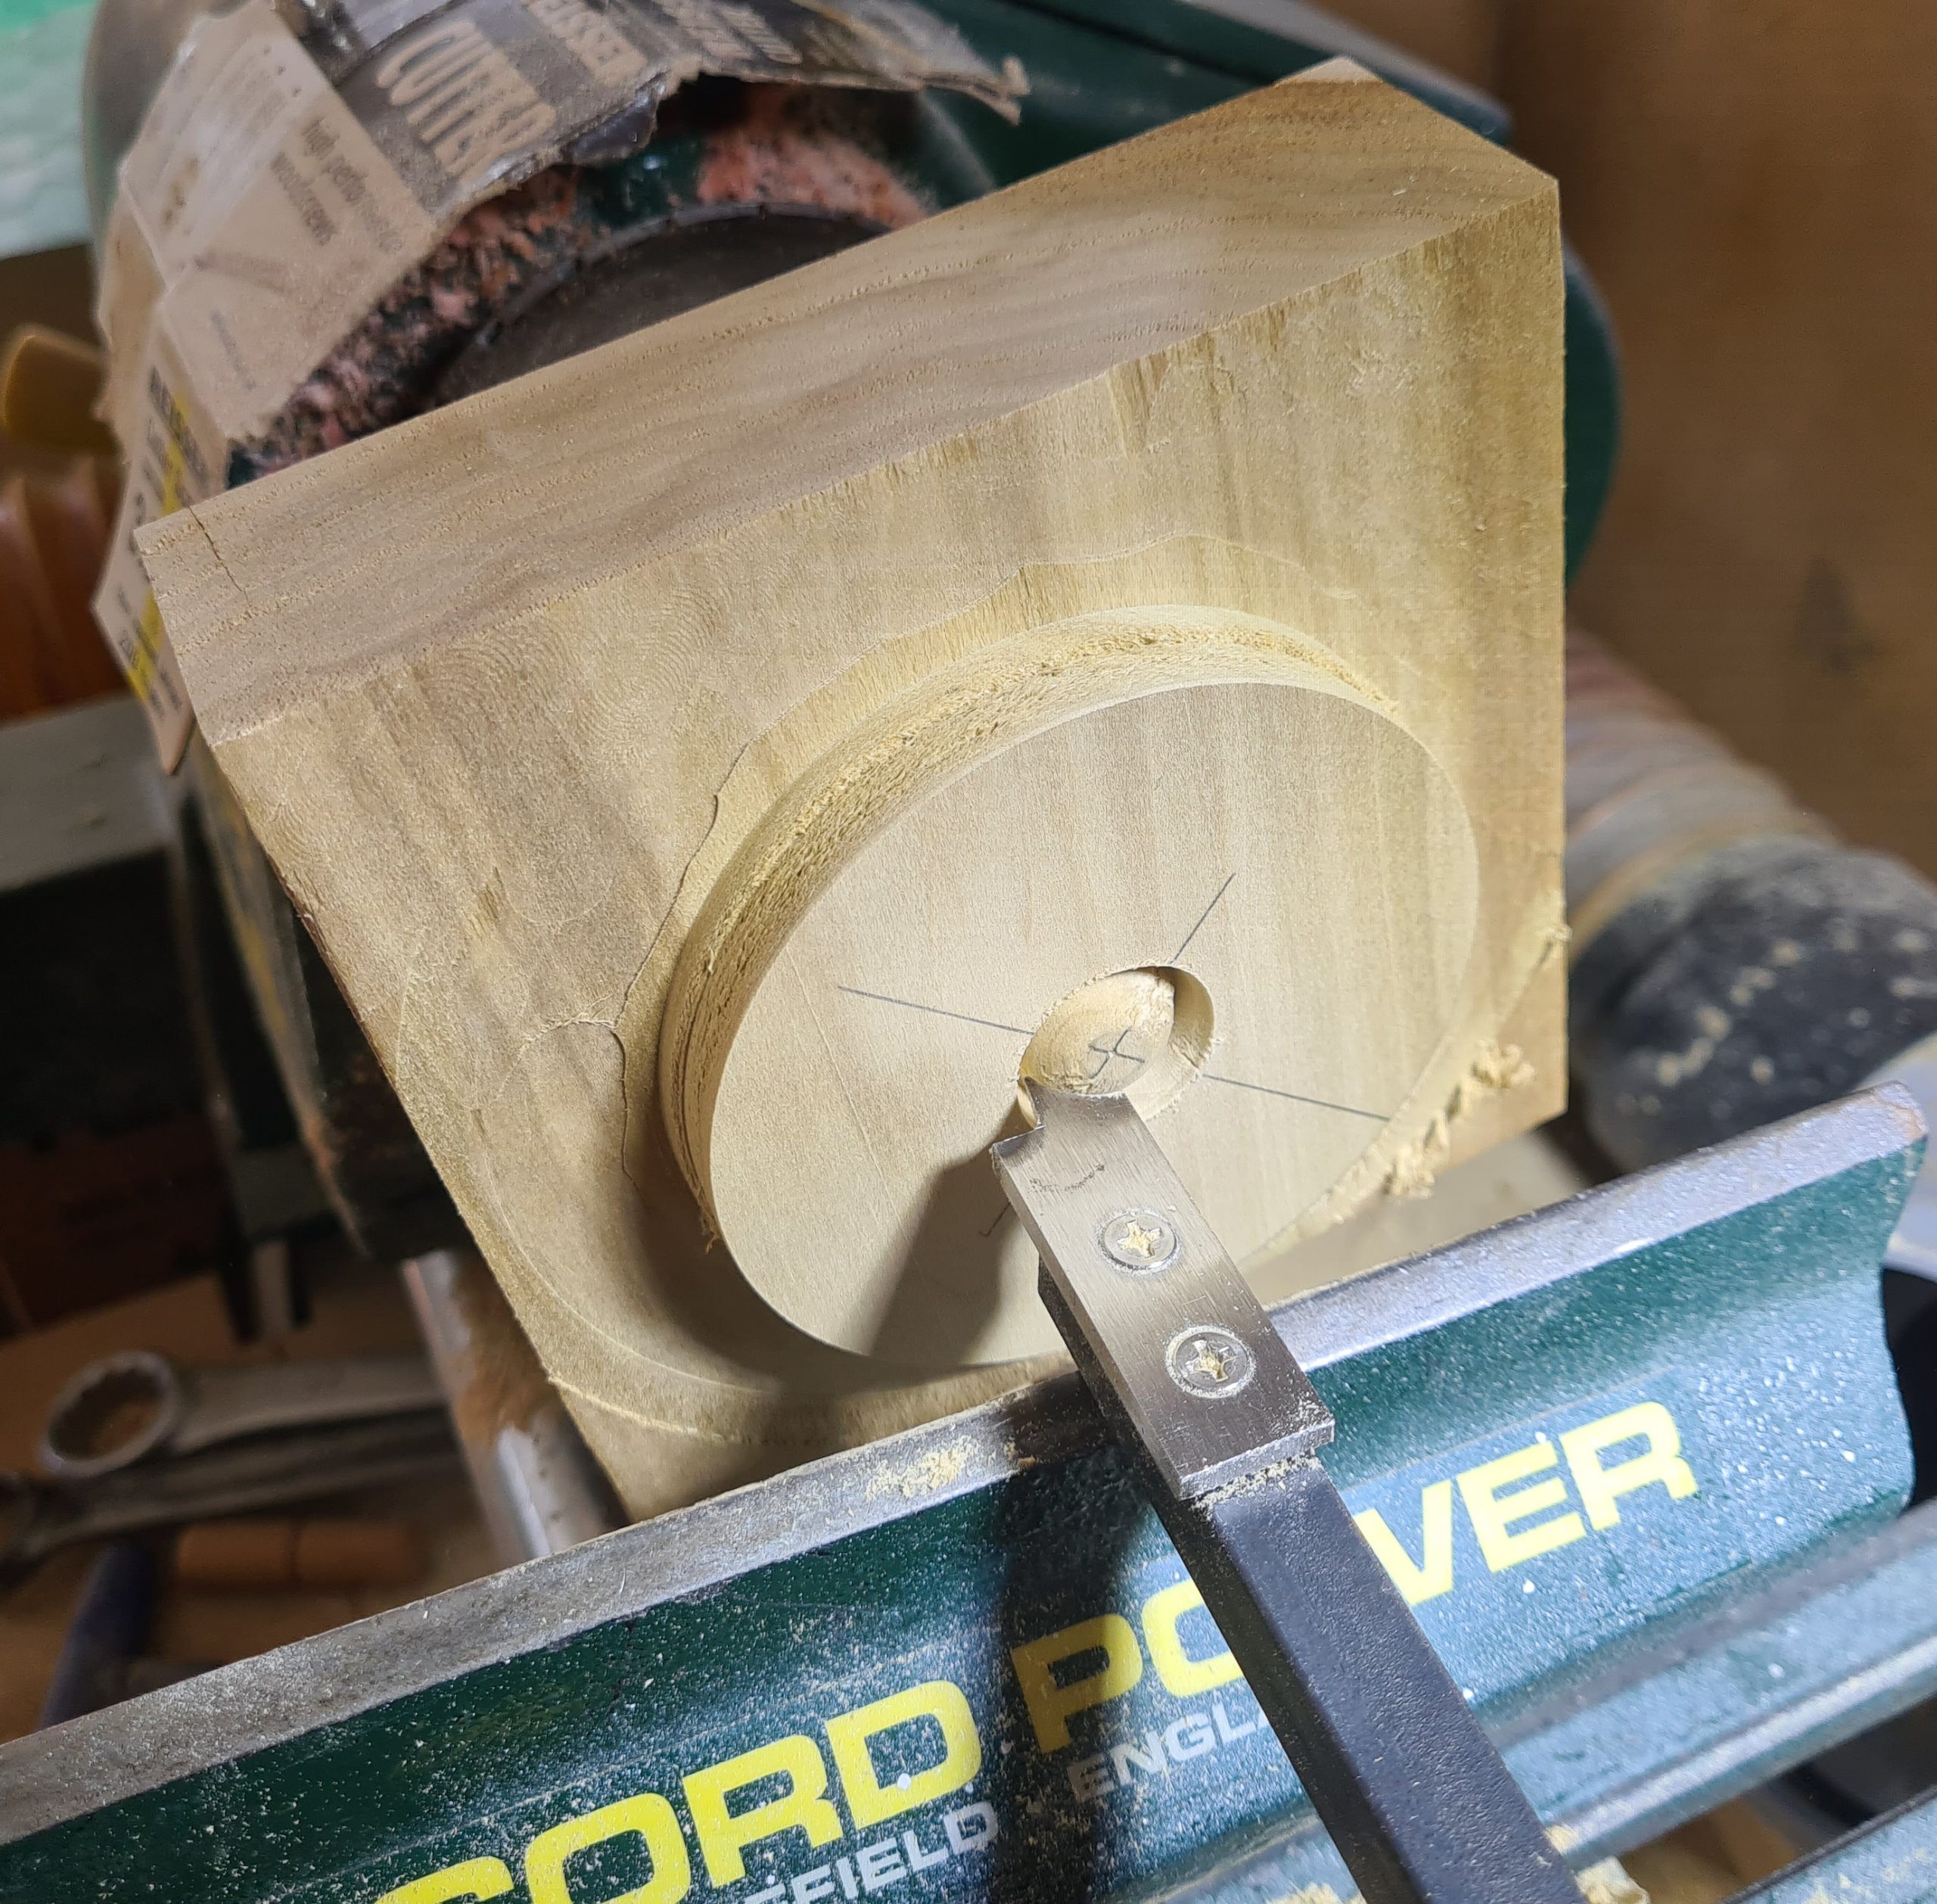
Mount the faceplate ring on the back of the blank aligning it with the circle you drew earlier.
Mount the work to the lathe and use calipers to scribe the circle that forms the petals and the one that forms the centre of the flower.
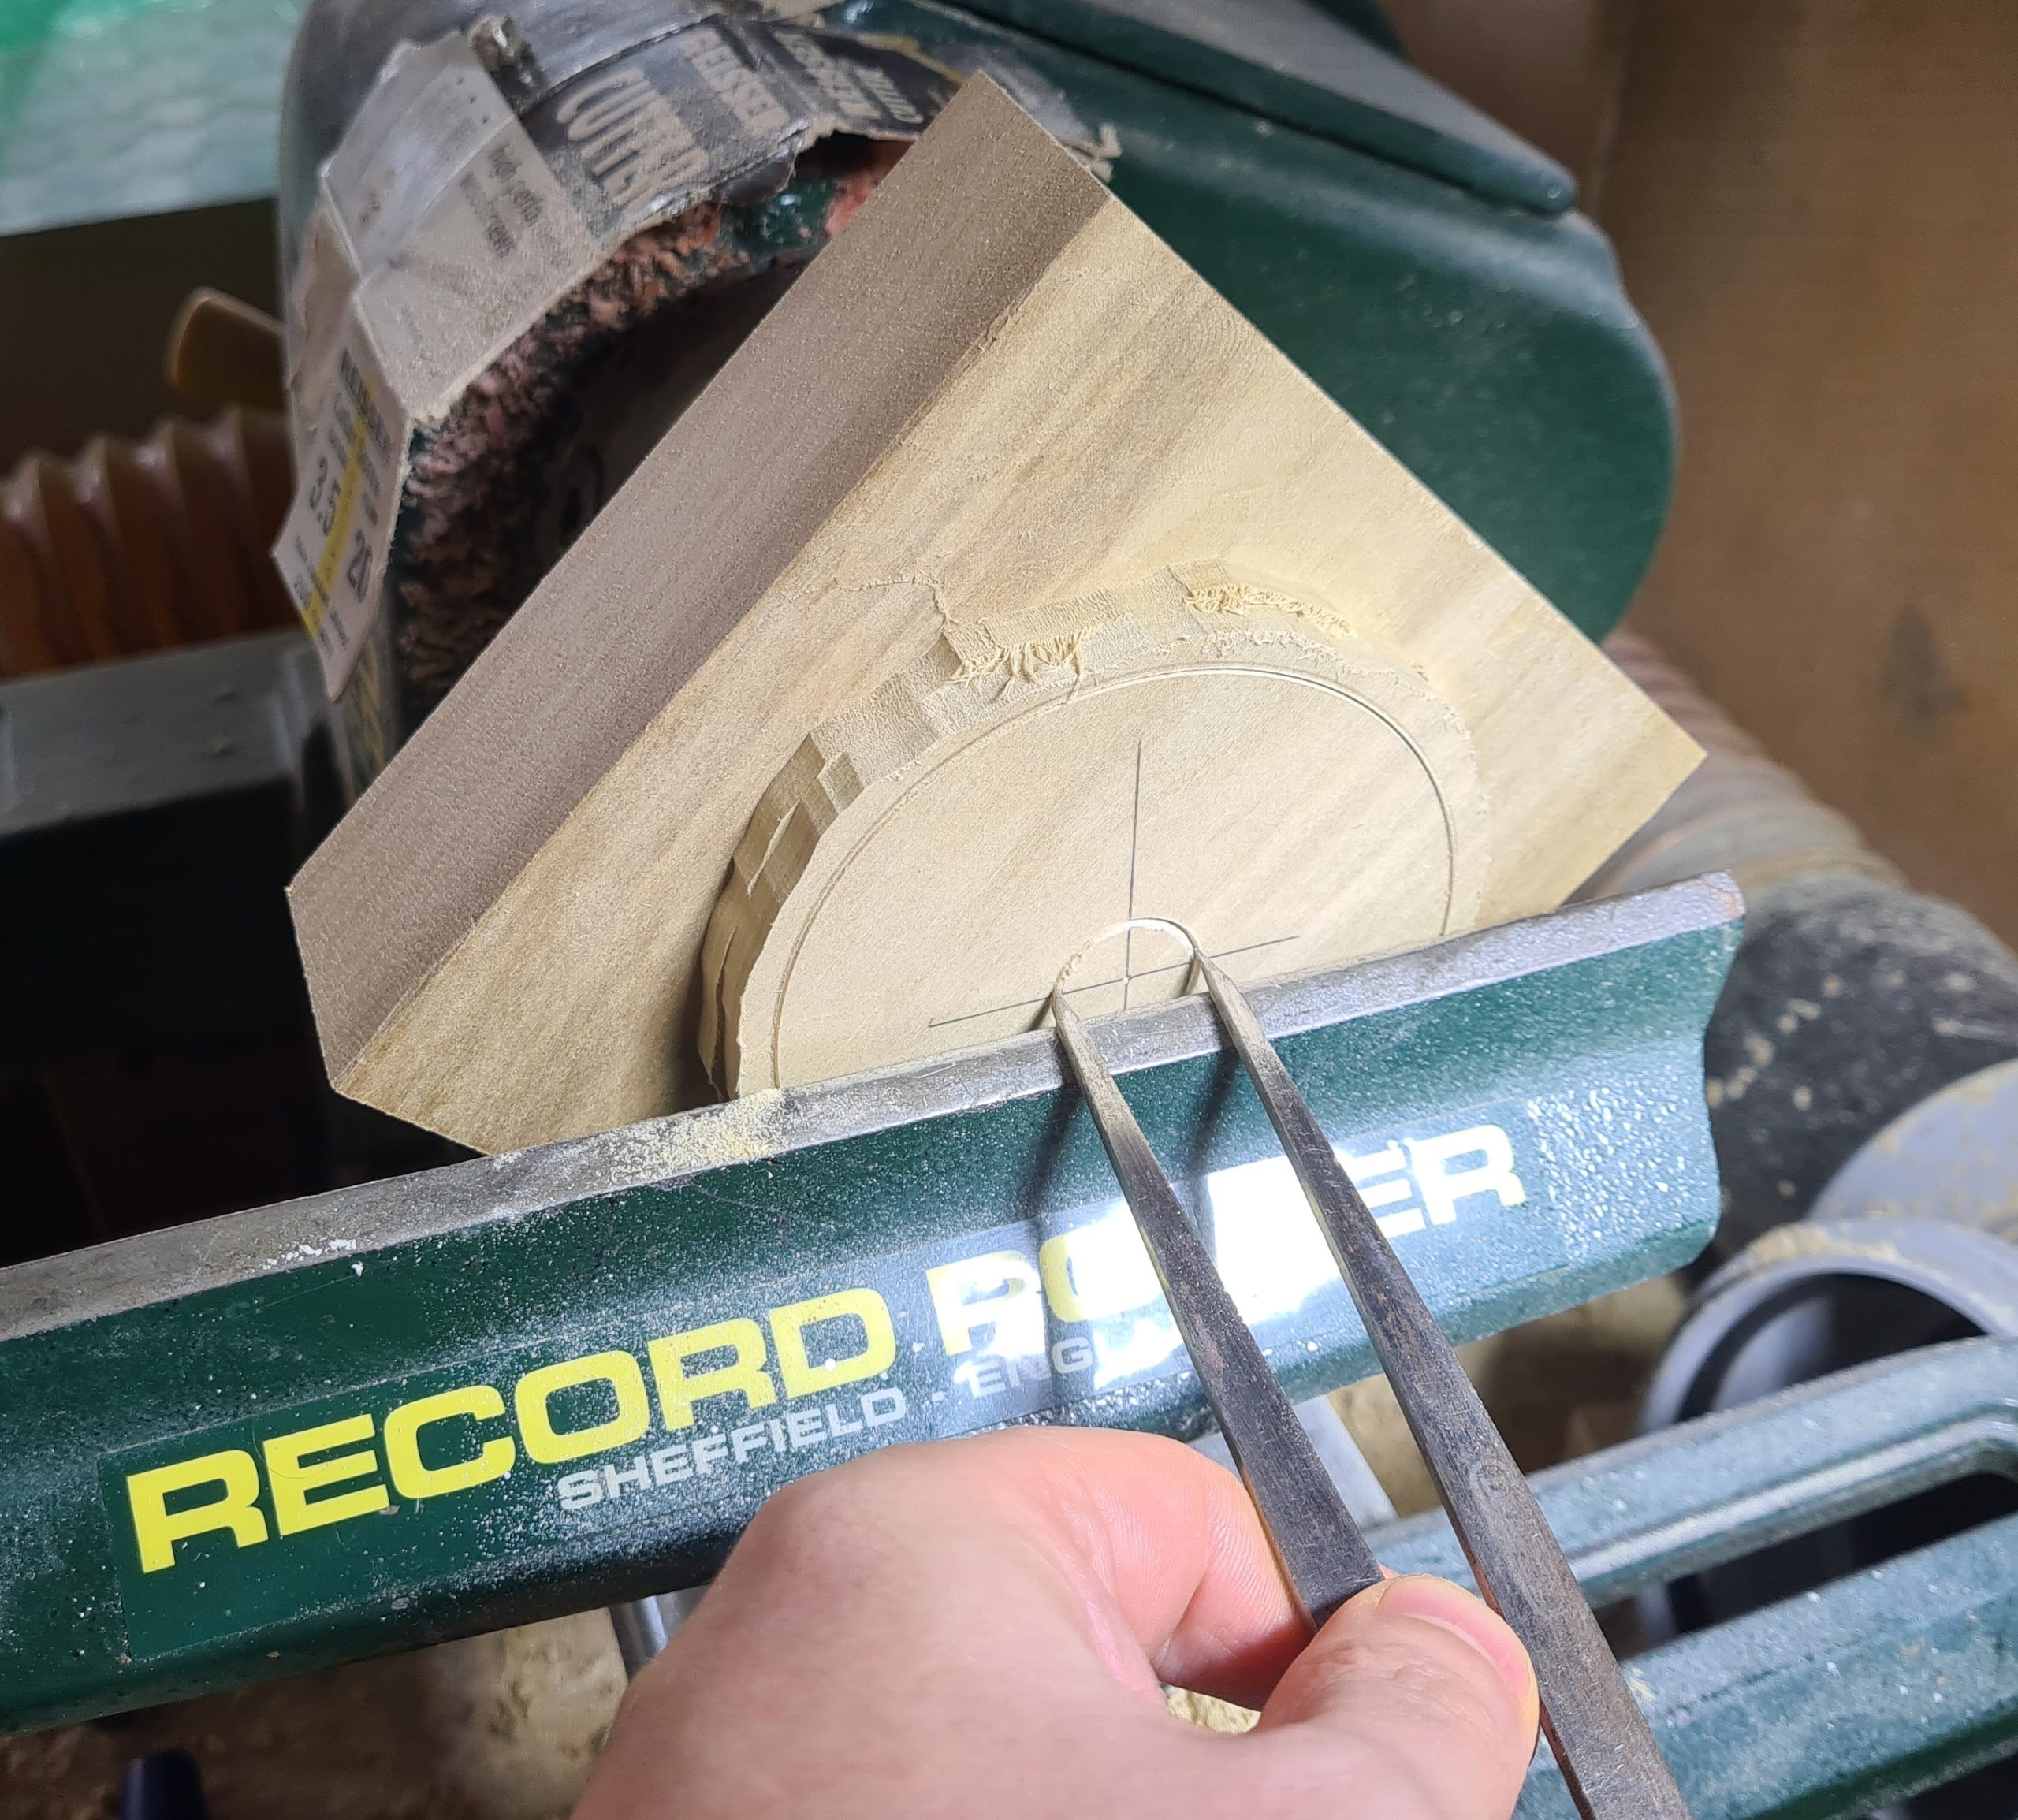
Use a square ended scraper to take the petal circle (outer) down to size. Take care not to over cut and lower the land. It’s possible to sand the land a little lower later but it’s time consuming. You can see here I’ve left it very slightly proud, I took that back flush with sandpaper.
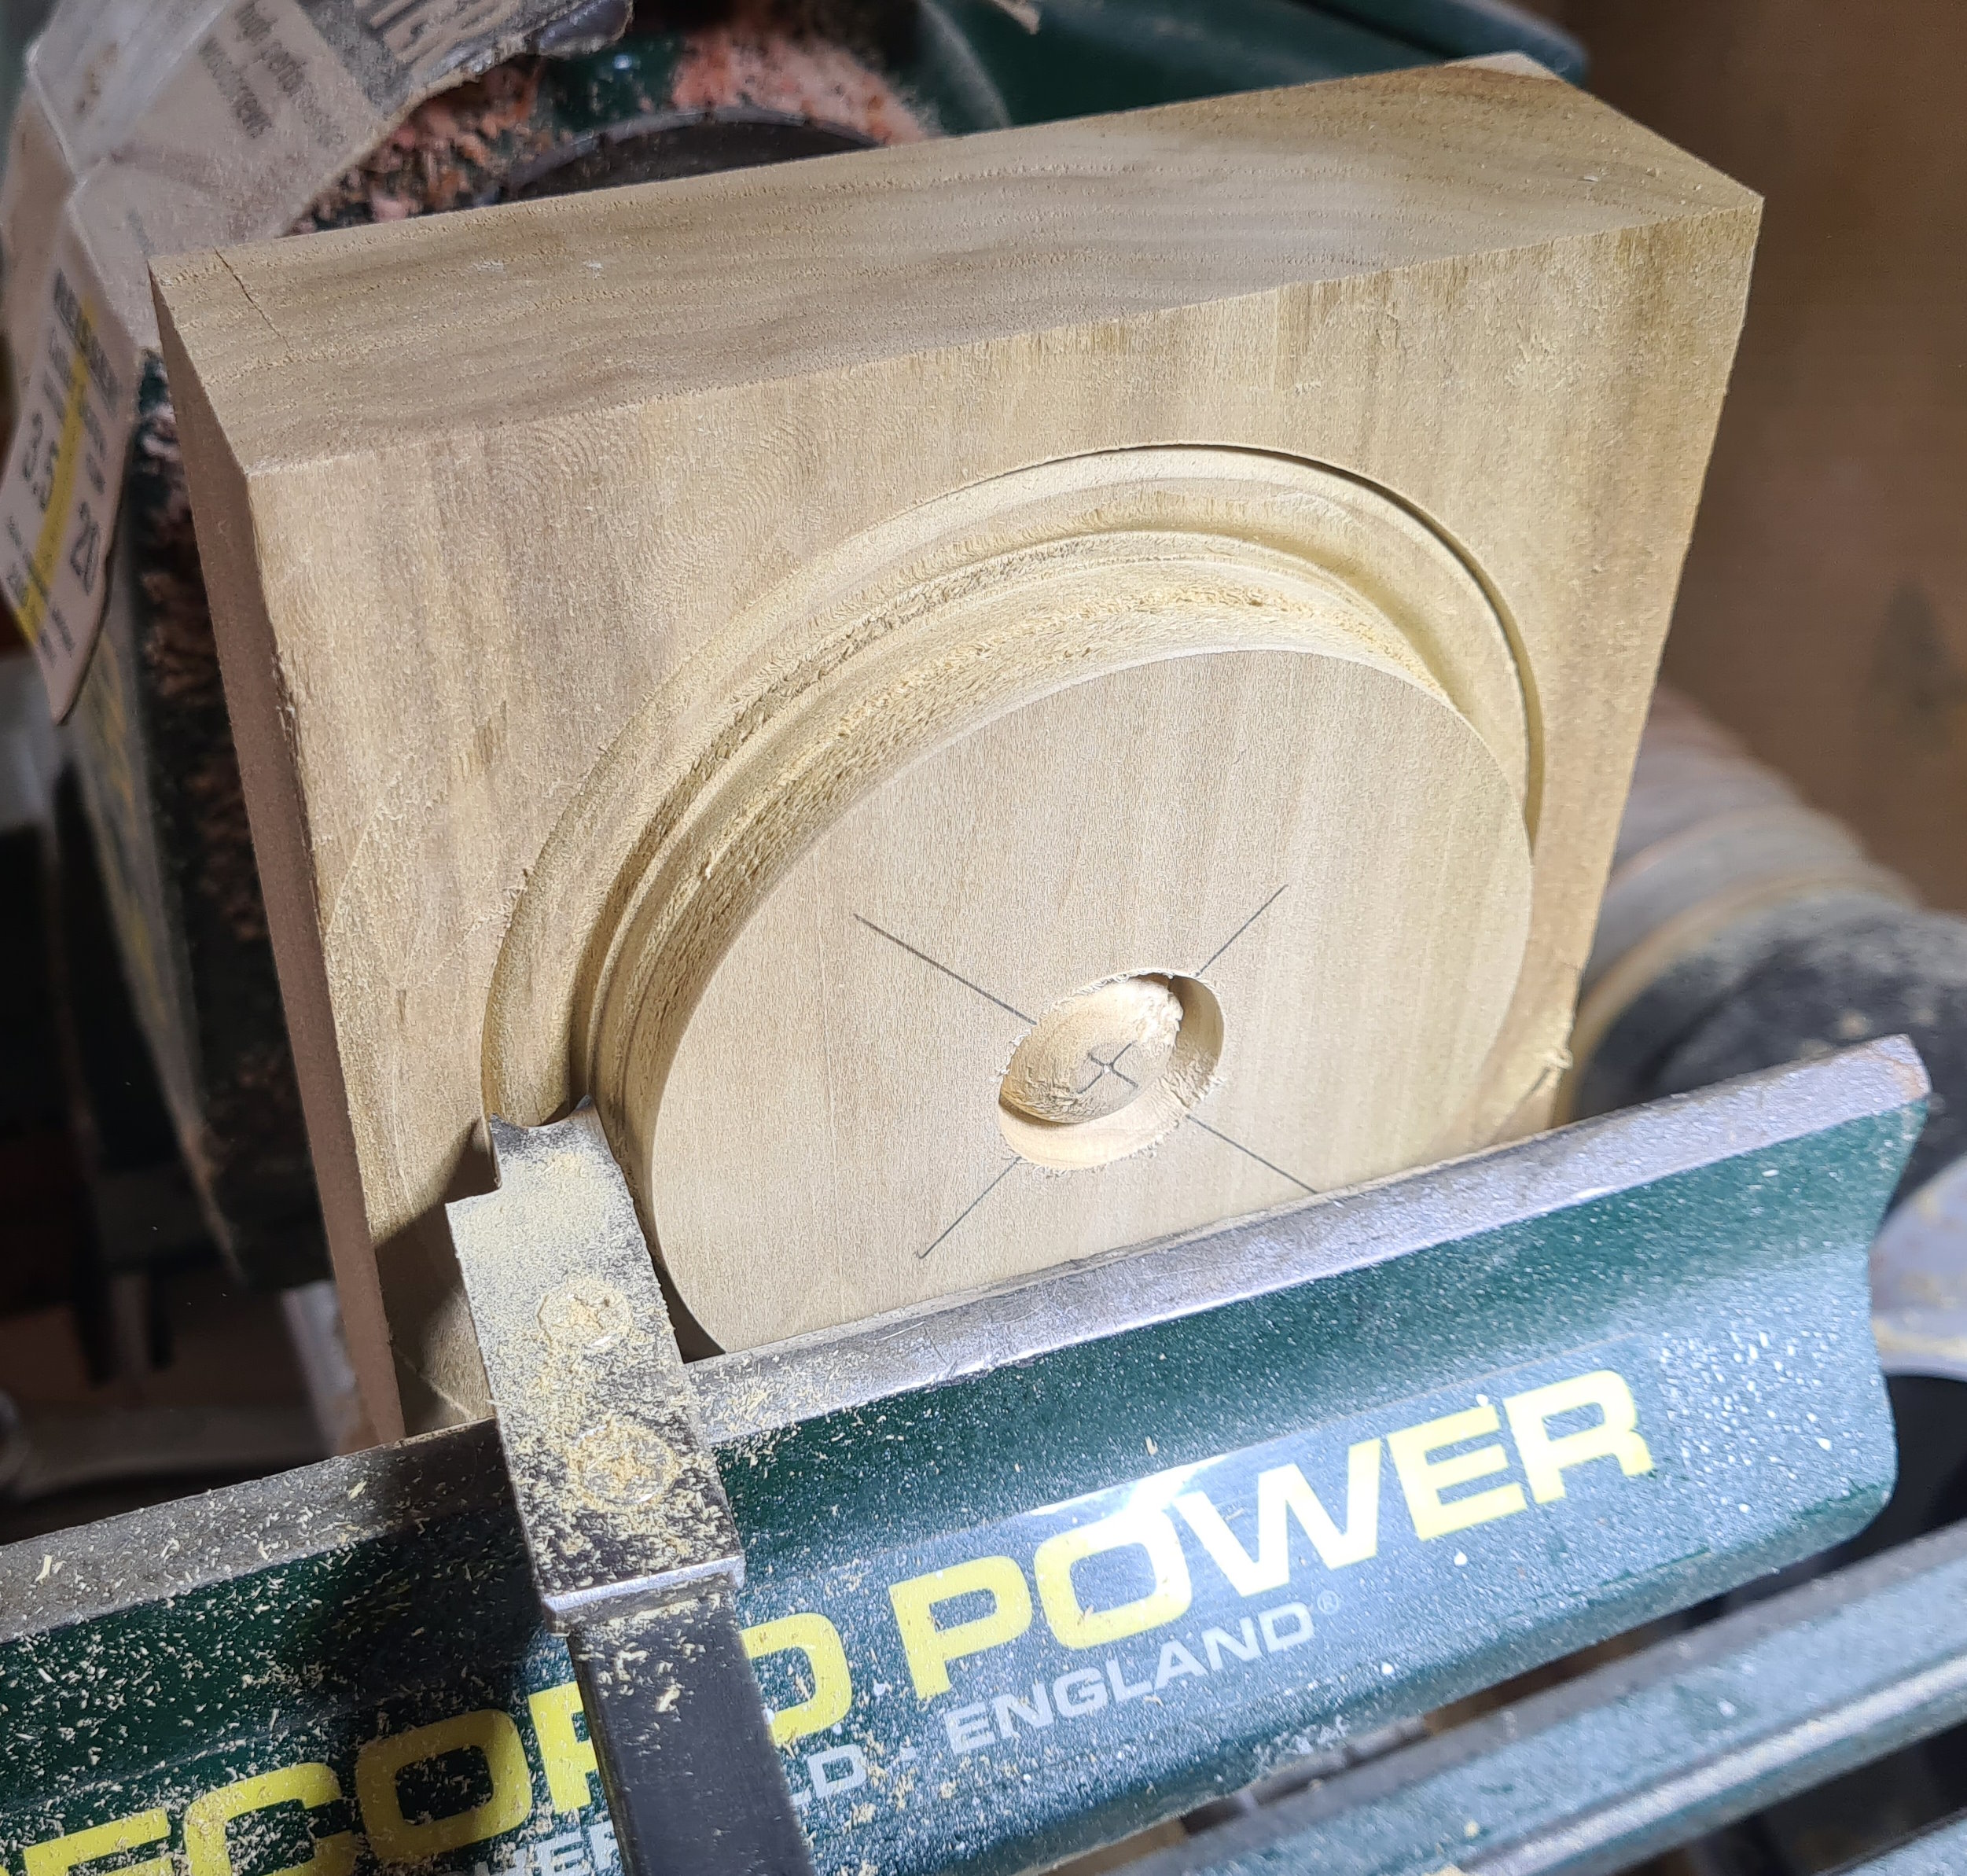
Move the tool rest back and lower then use your custom made form tools to cut the centre of the flower and the ring around the outside. What? You don’t have custom made form tools! See the end of the article for a it more detail and photos, I might write a complete article one day.
Since these are scraping tools you will get some tear out. The blank in the photos went well but the ring is particularly prone to tearing if you aren’t careful. Whatever you do don’t let the tool go below centre height!
If you don’t want to make form tools you can do this with a small skew chisel but it requires a careful hand and fair bit of sanding.
Use a bowl gouge to rough the outside of the petal area. You could use a scraper here but the bowl gouge is faster and leaves a better finish.

Next, use a small scraper to refine the shape and get in closer to the centre. I was just about able to get this small half round scraper in to do the job, a diamond point would have been nice near the centre though.
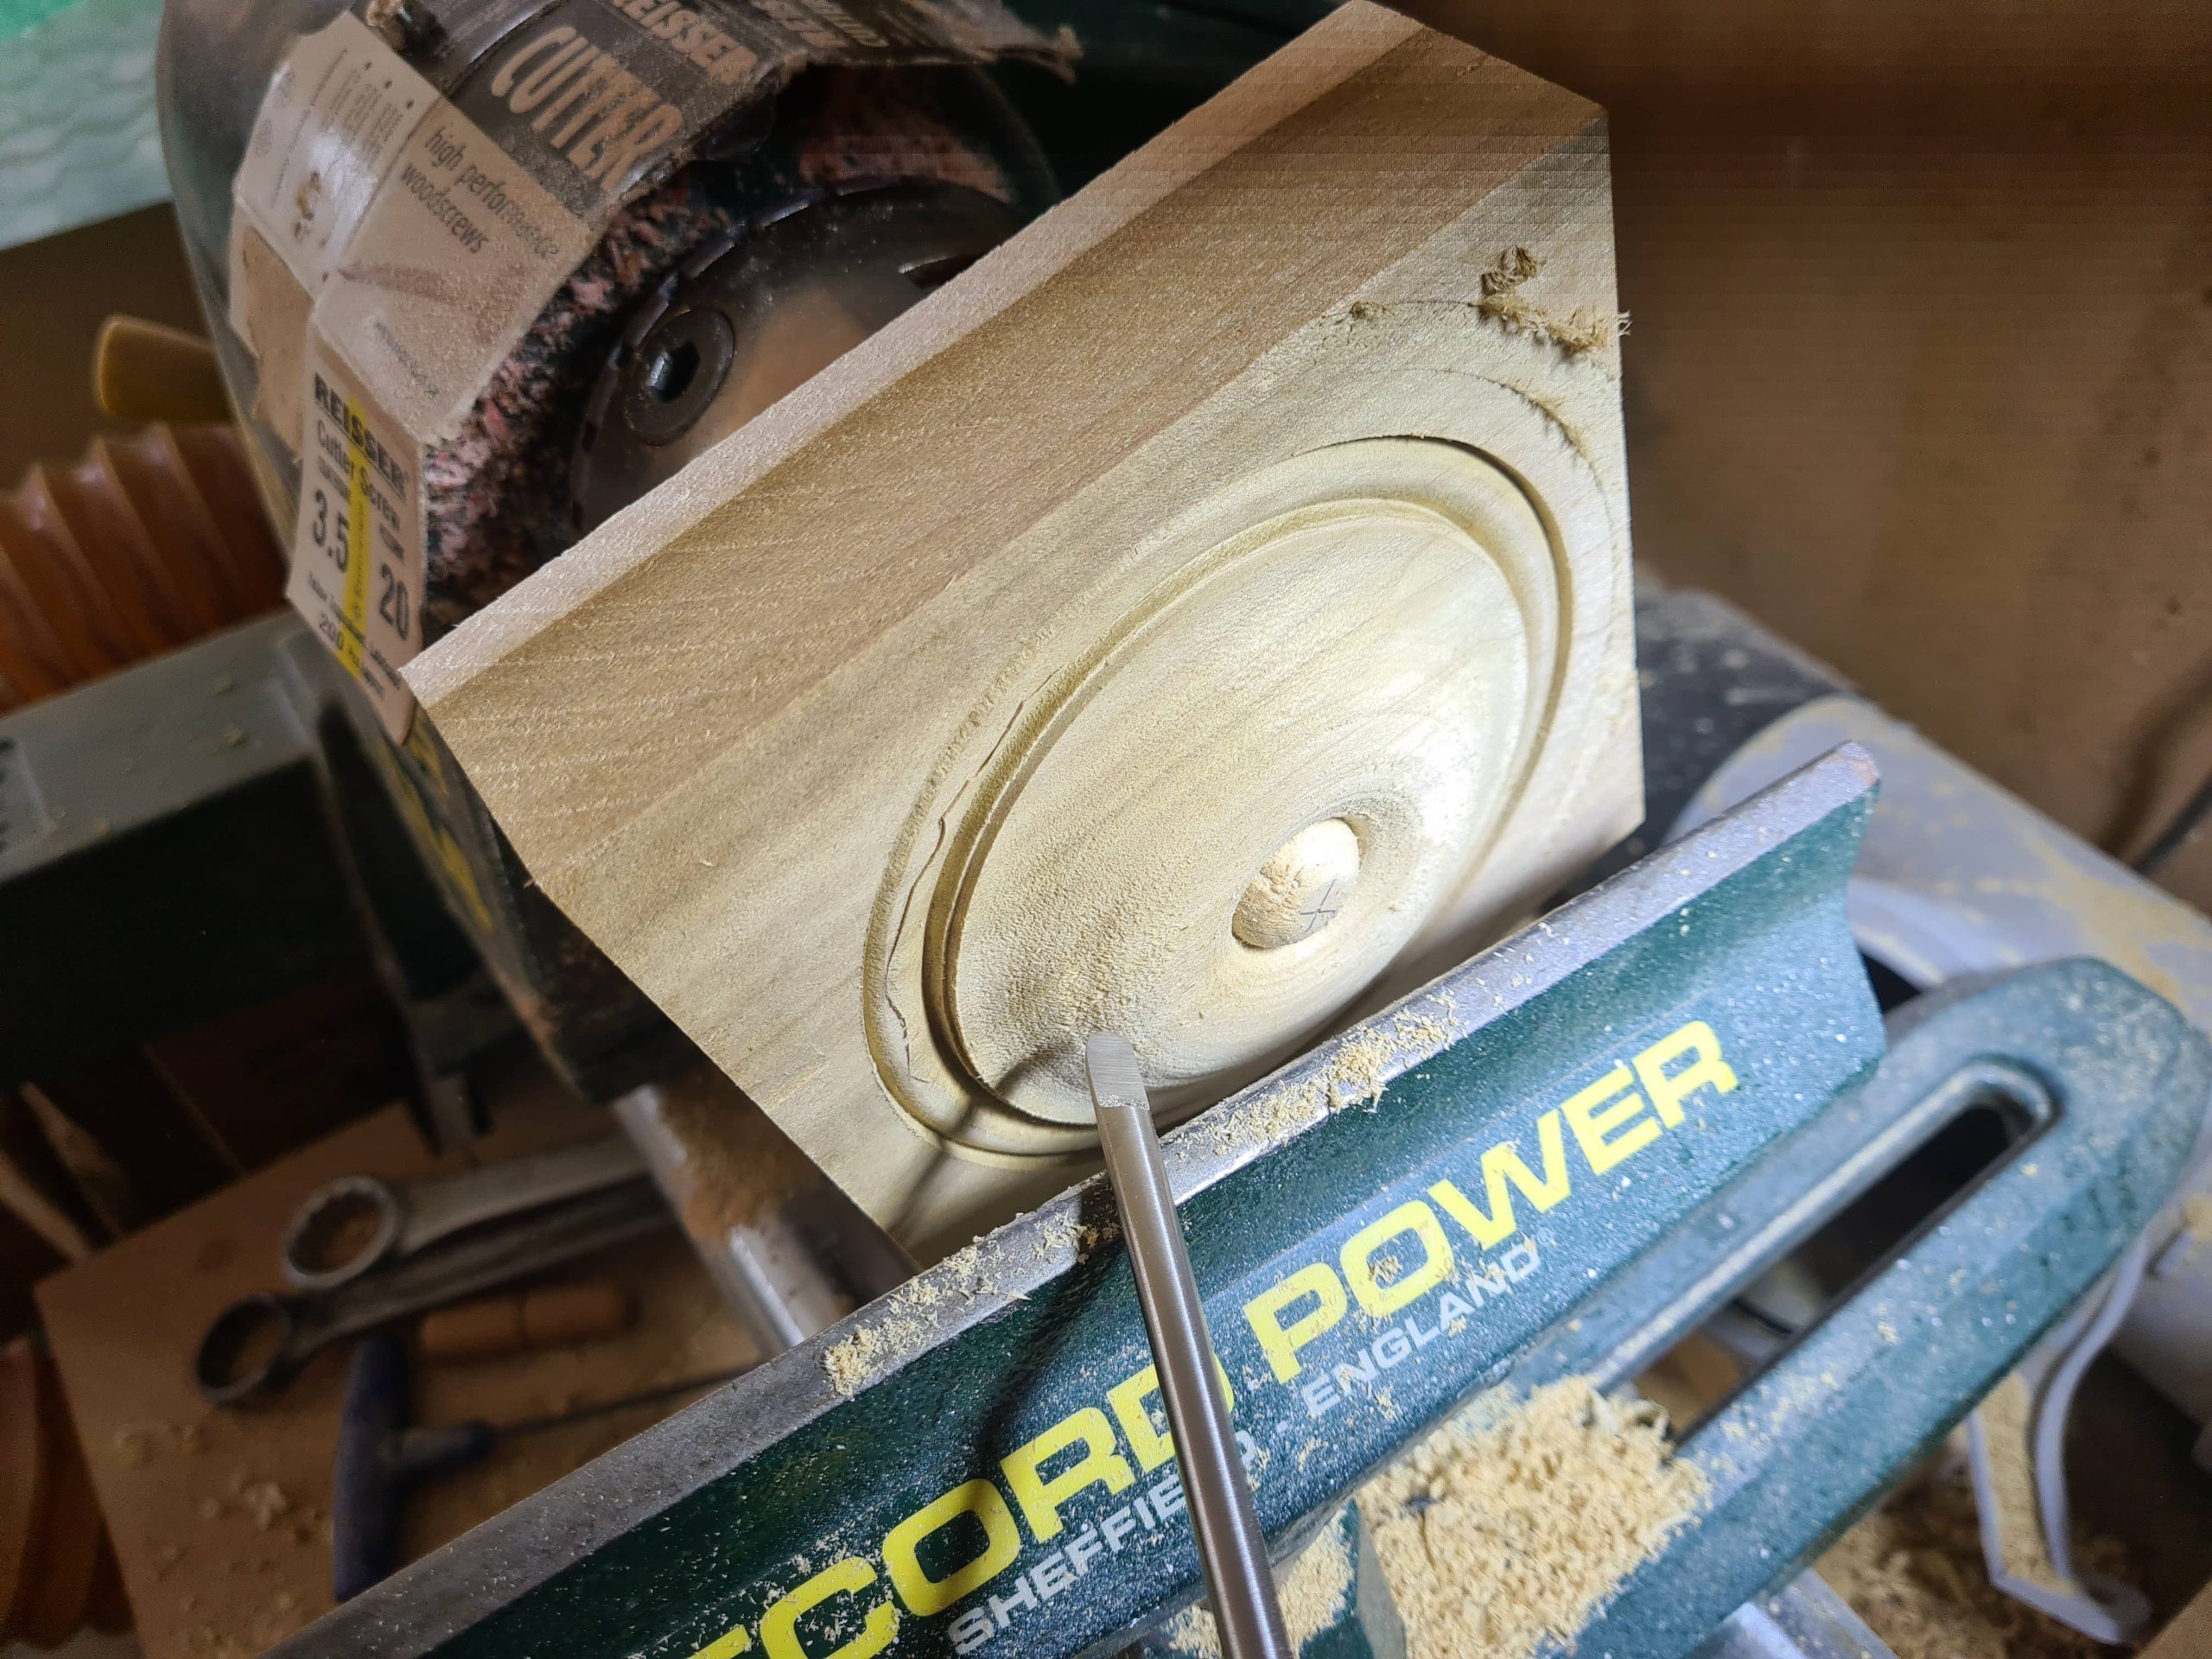
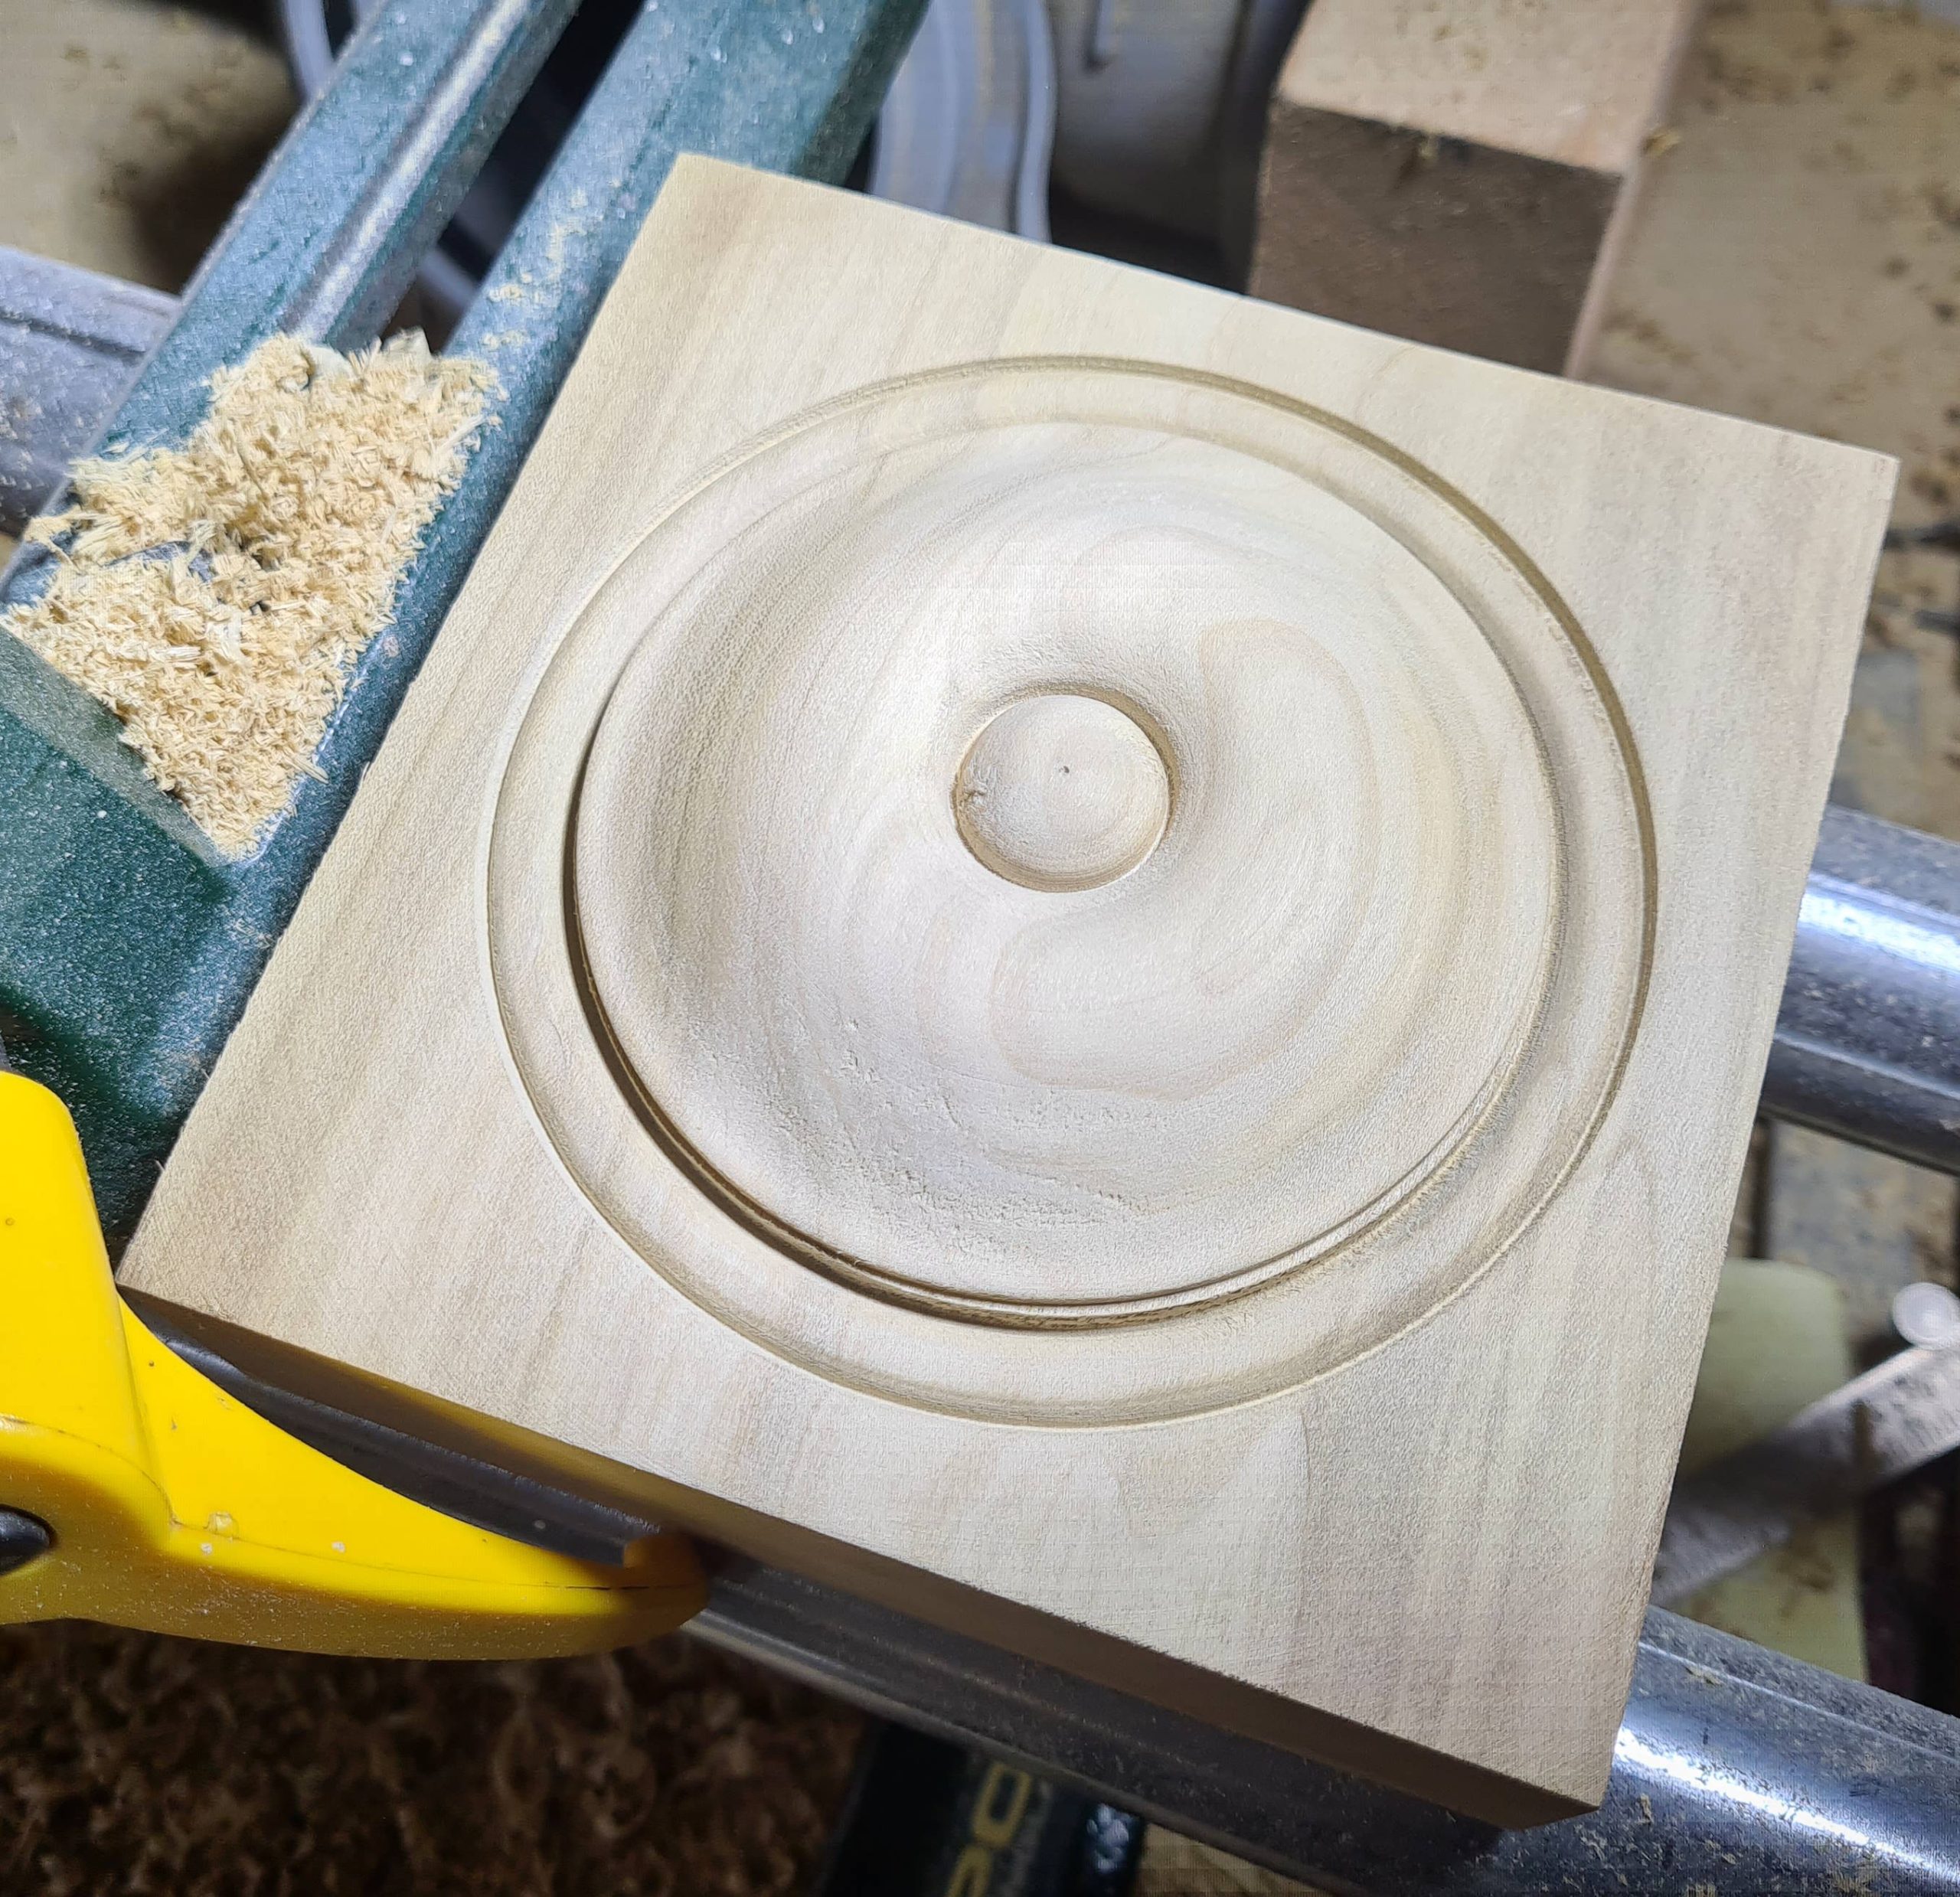
What you are looking for is a nice smooth curve with the centre portion sticking out ever so slightly. Take some 80 grit paper and refine any less than perfect turning and then use some 120 or 180 to improve the finish. You should have something that looks like the image below.
Carving Layout
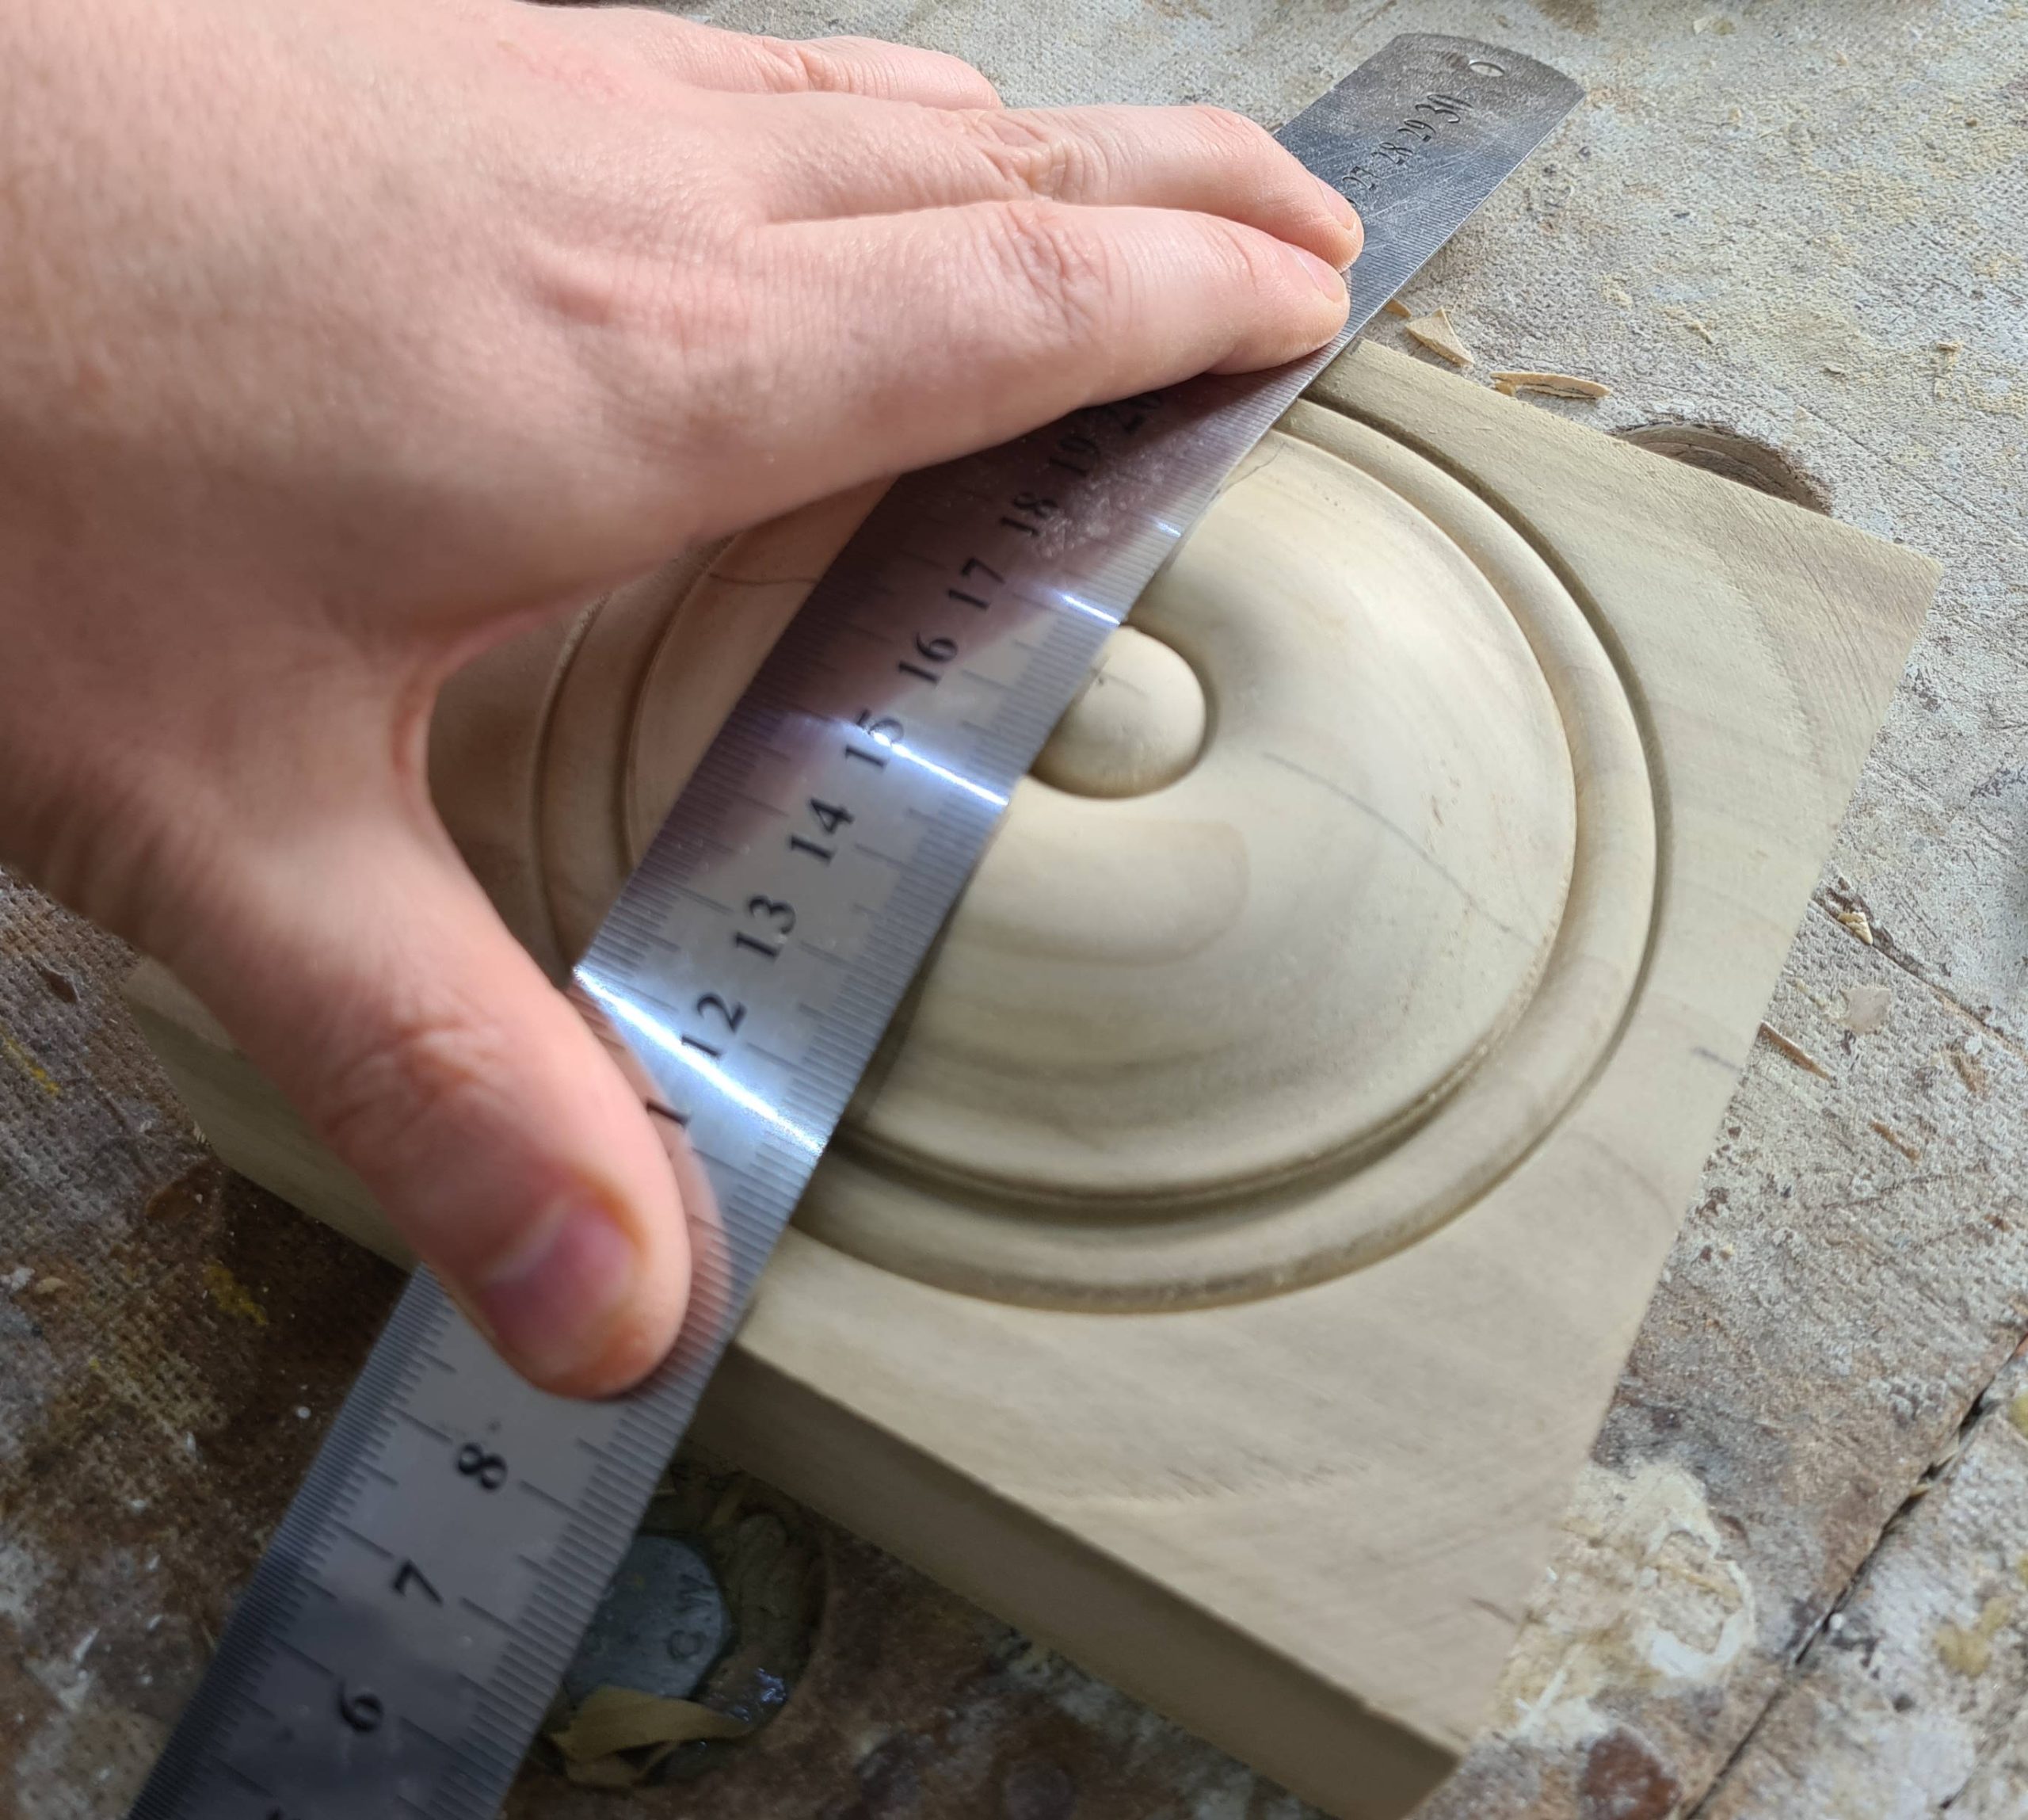
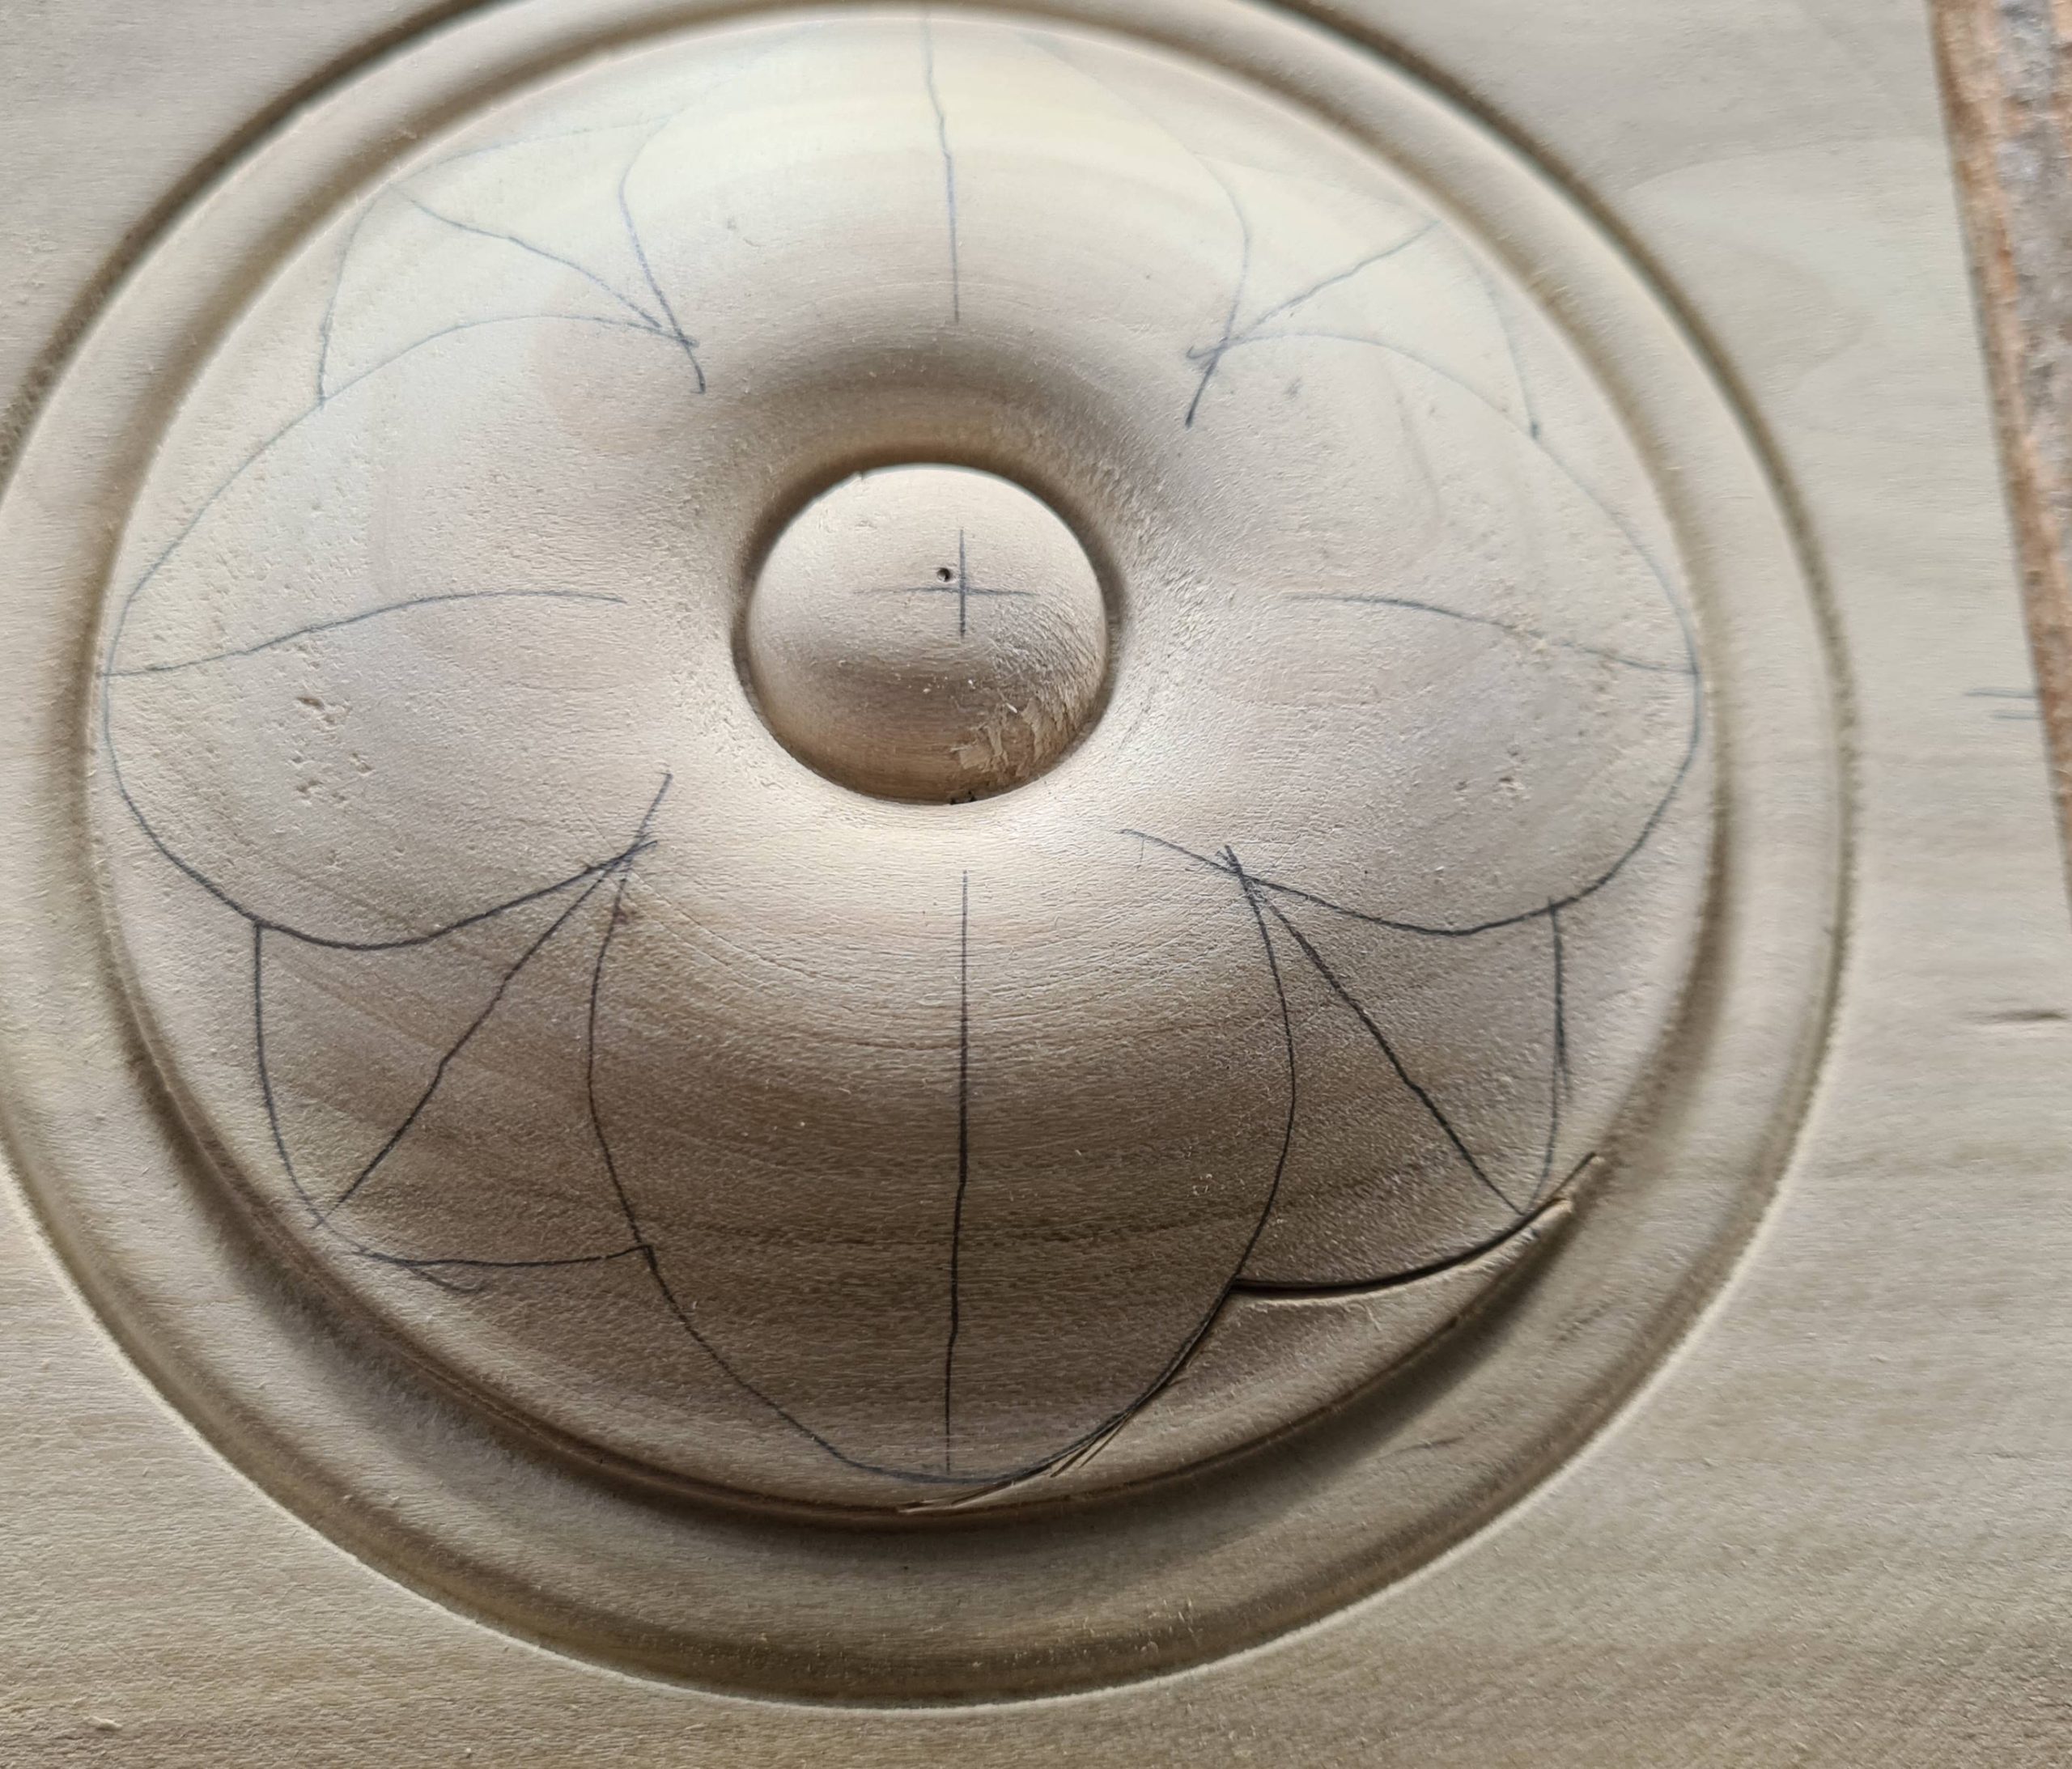
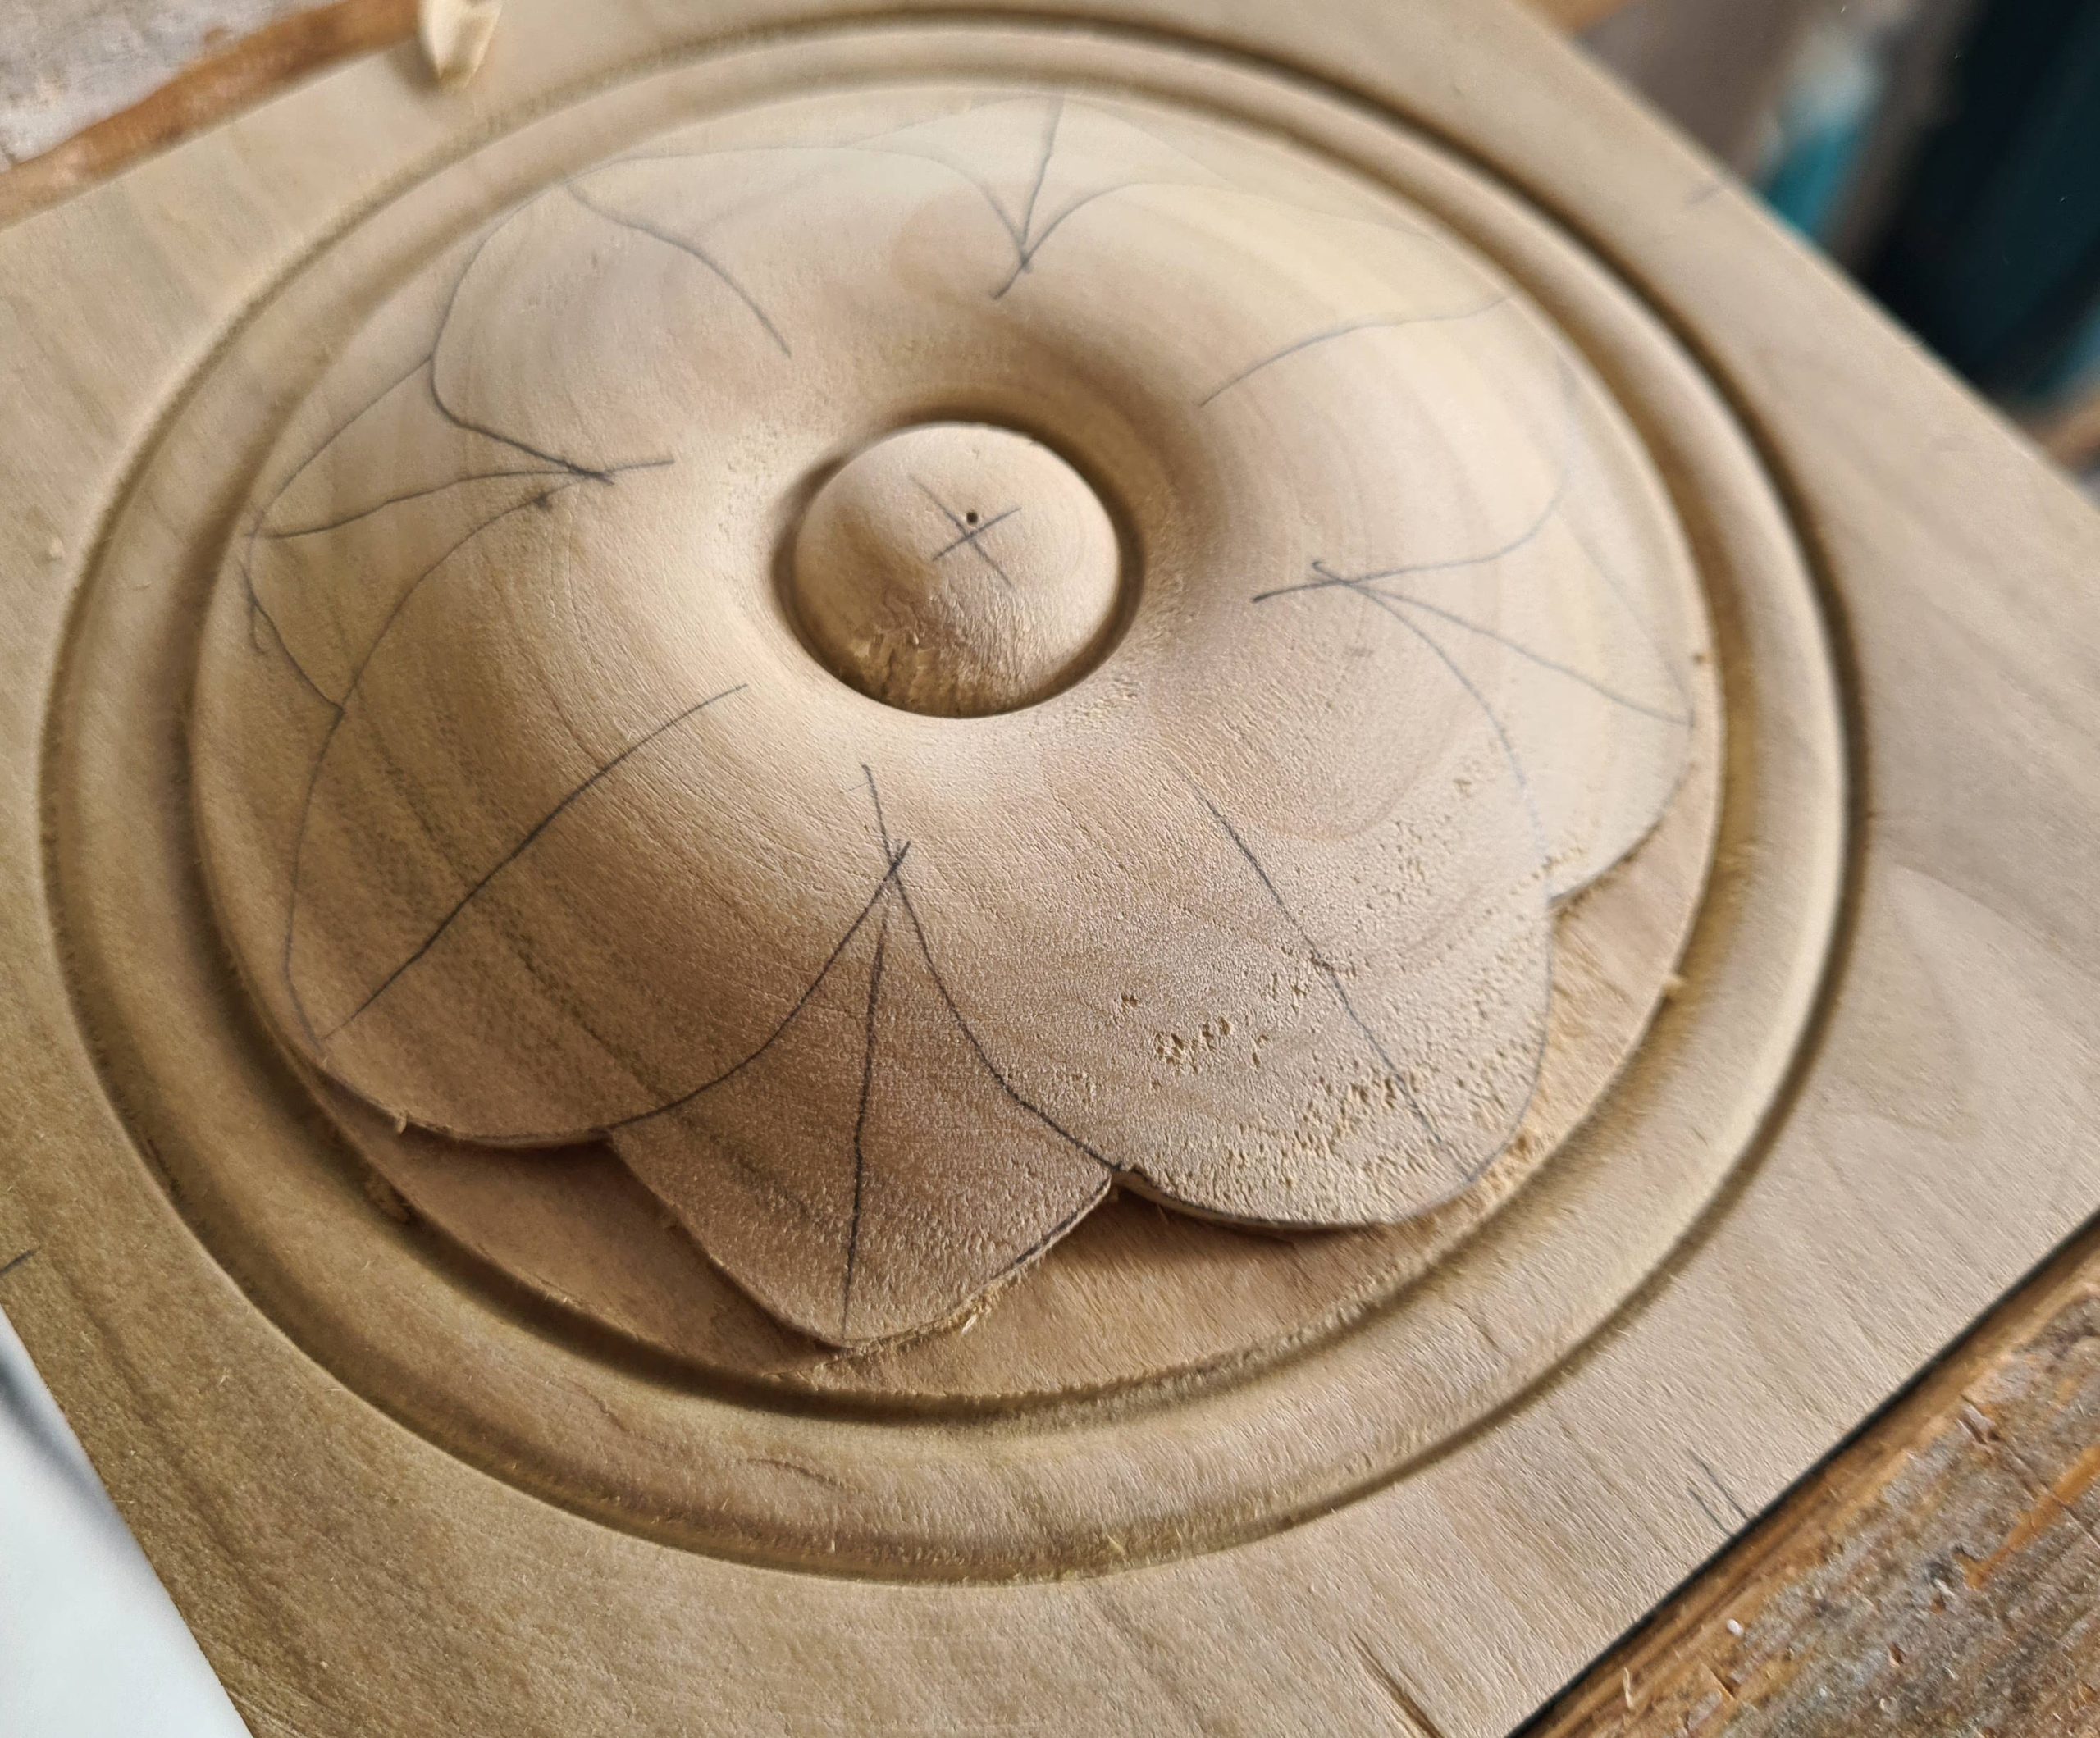
Use an adjustable square to mark the centre of each side and then lay out a cross as shown below. A flexible steel ruler can be helpful.
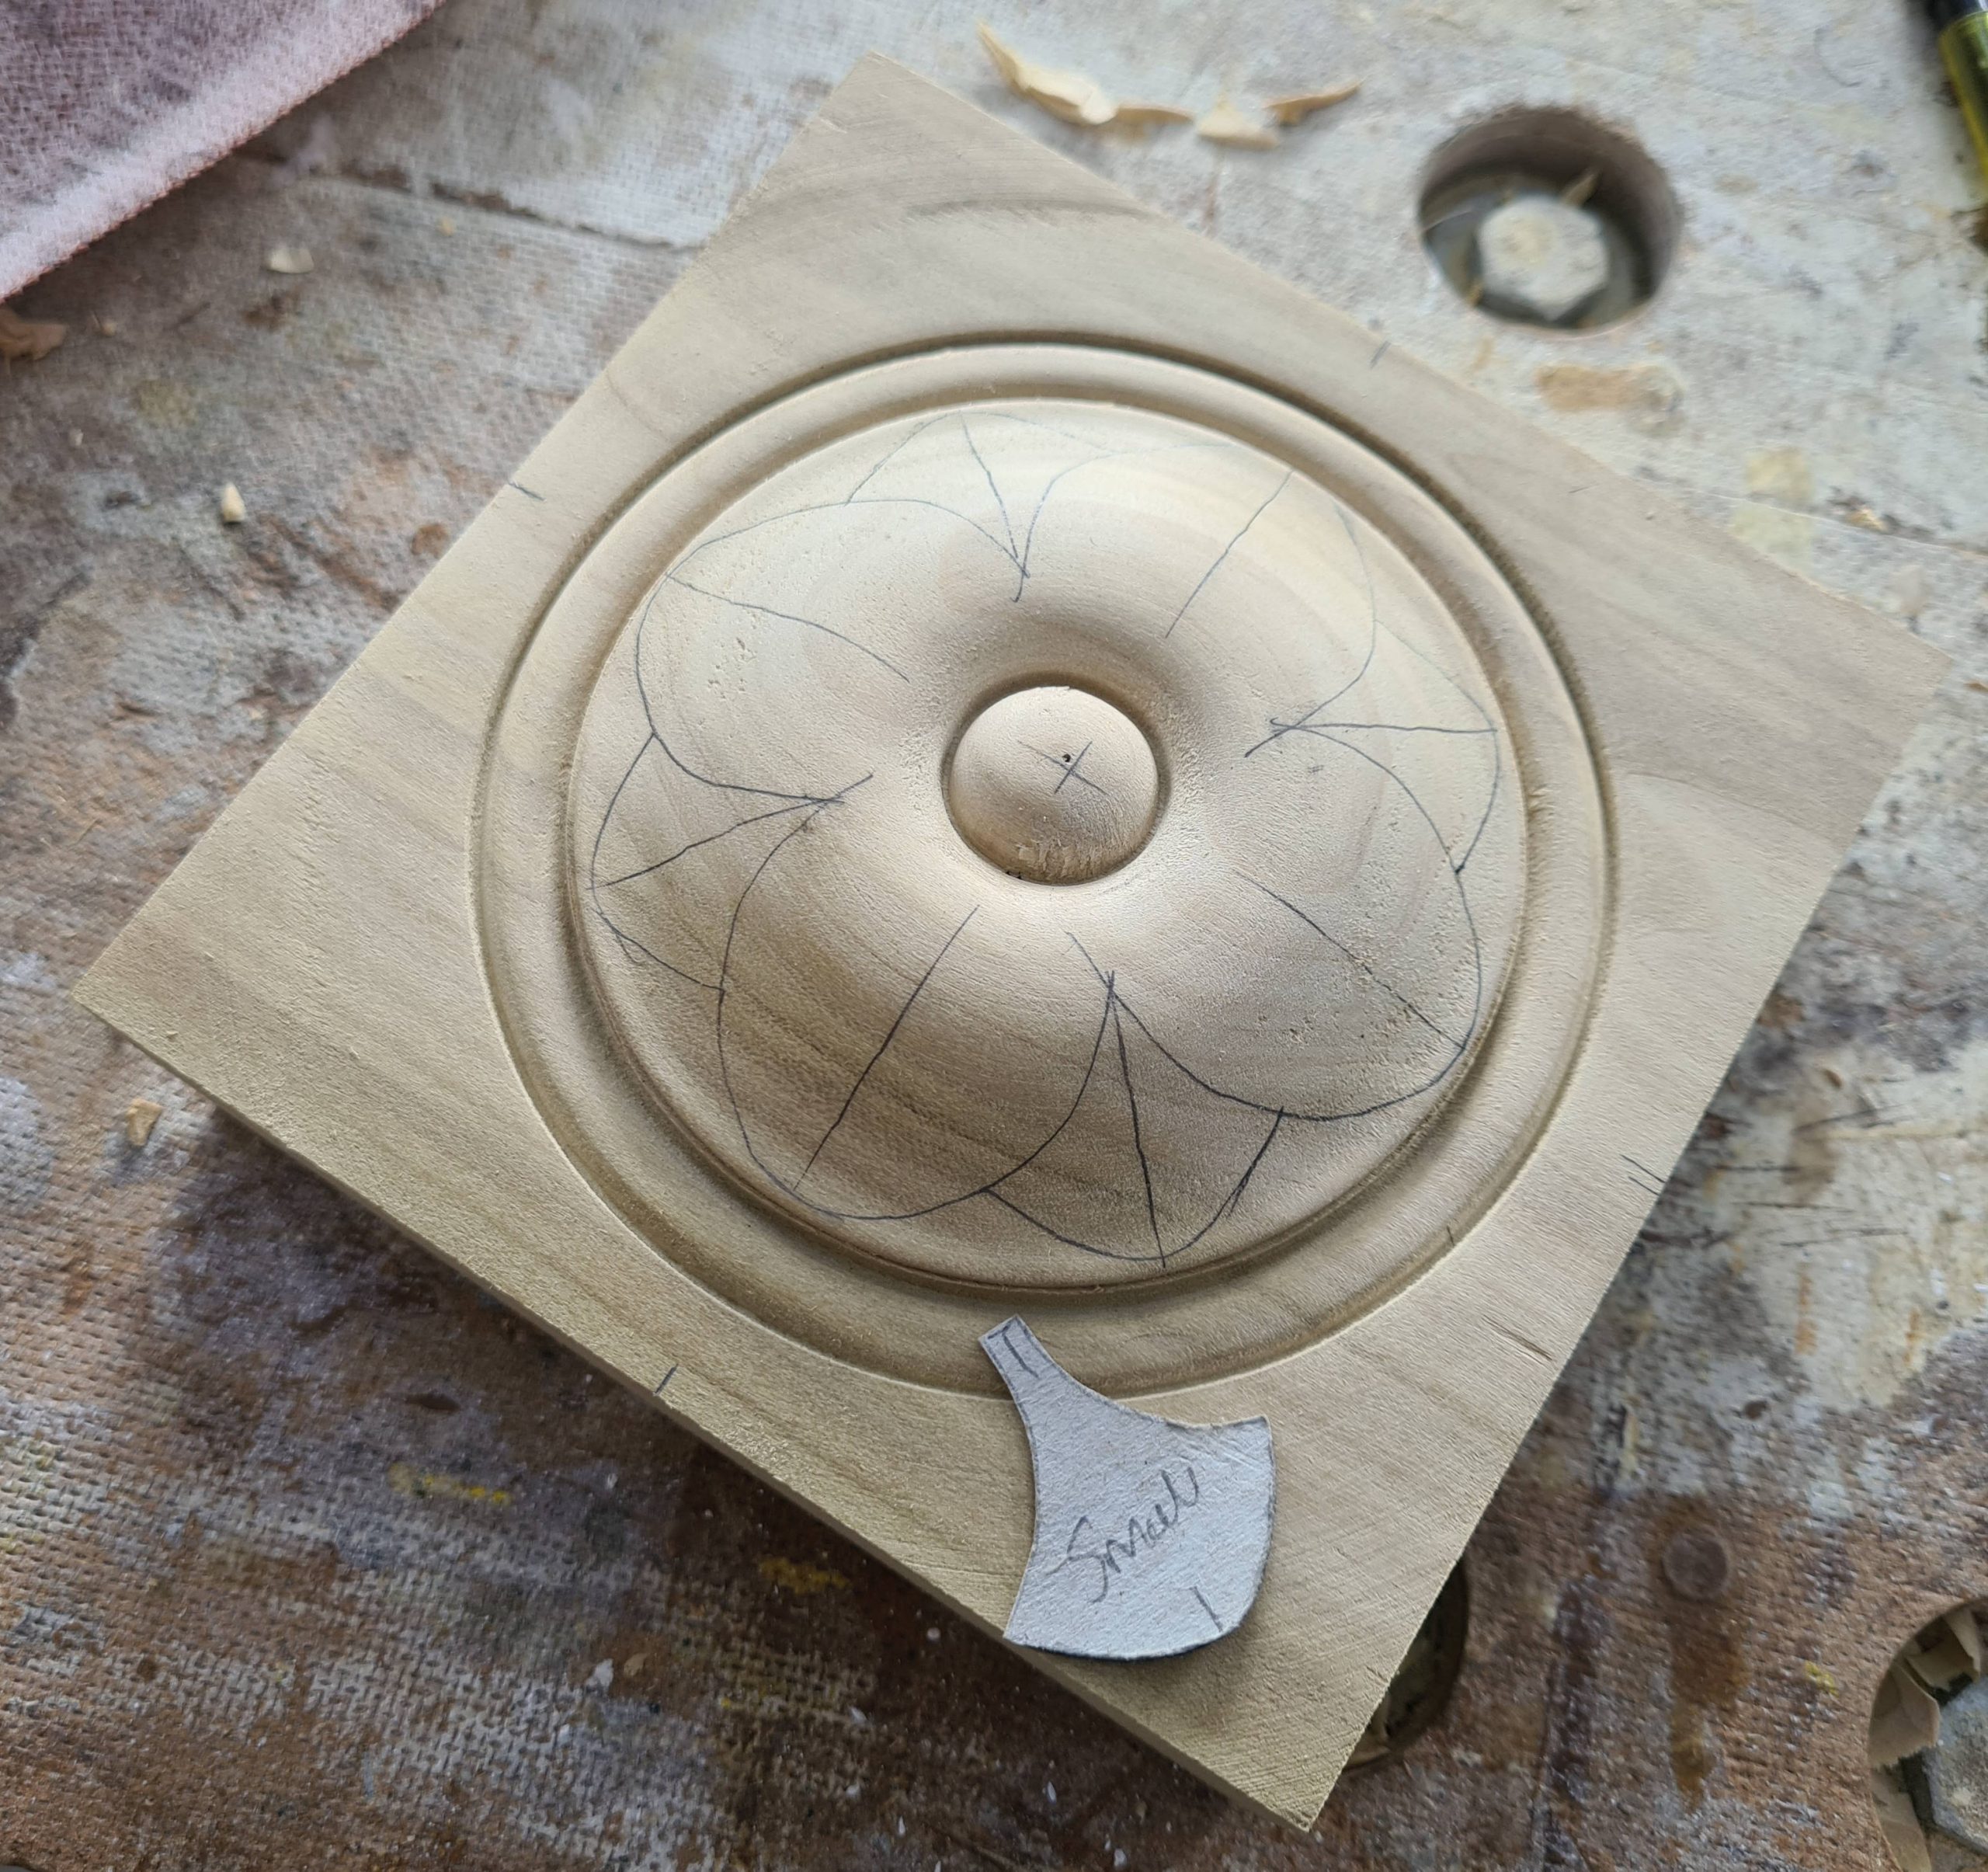
Grab your large petal template and draw on some guide lines. You can, of course, do this by hand but I found templating gave a much more consistent finished piece. The templates are made from the original piece I was copying. I placed paper over the piece and then creased it to the original shape. To be honest even doing this there was a lot of fiddly back and forth refinement until I was happy with the shape. The original piece was all over the place so I think they probably just did them by eye.
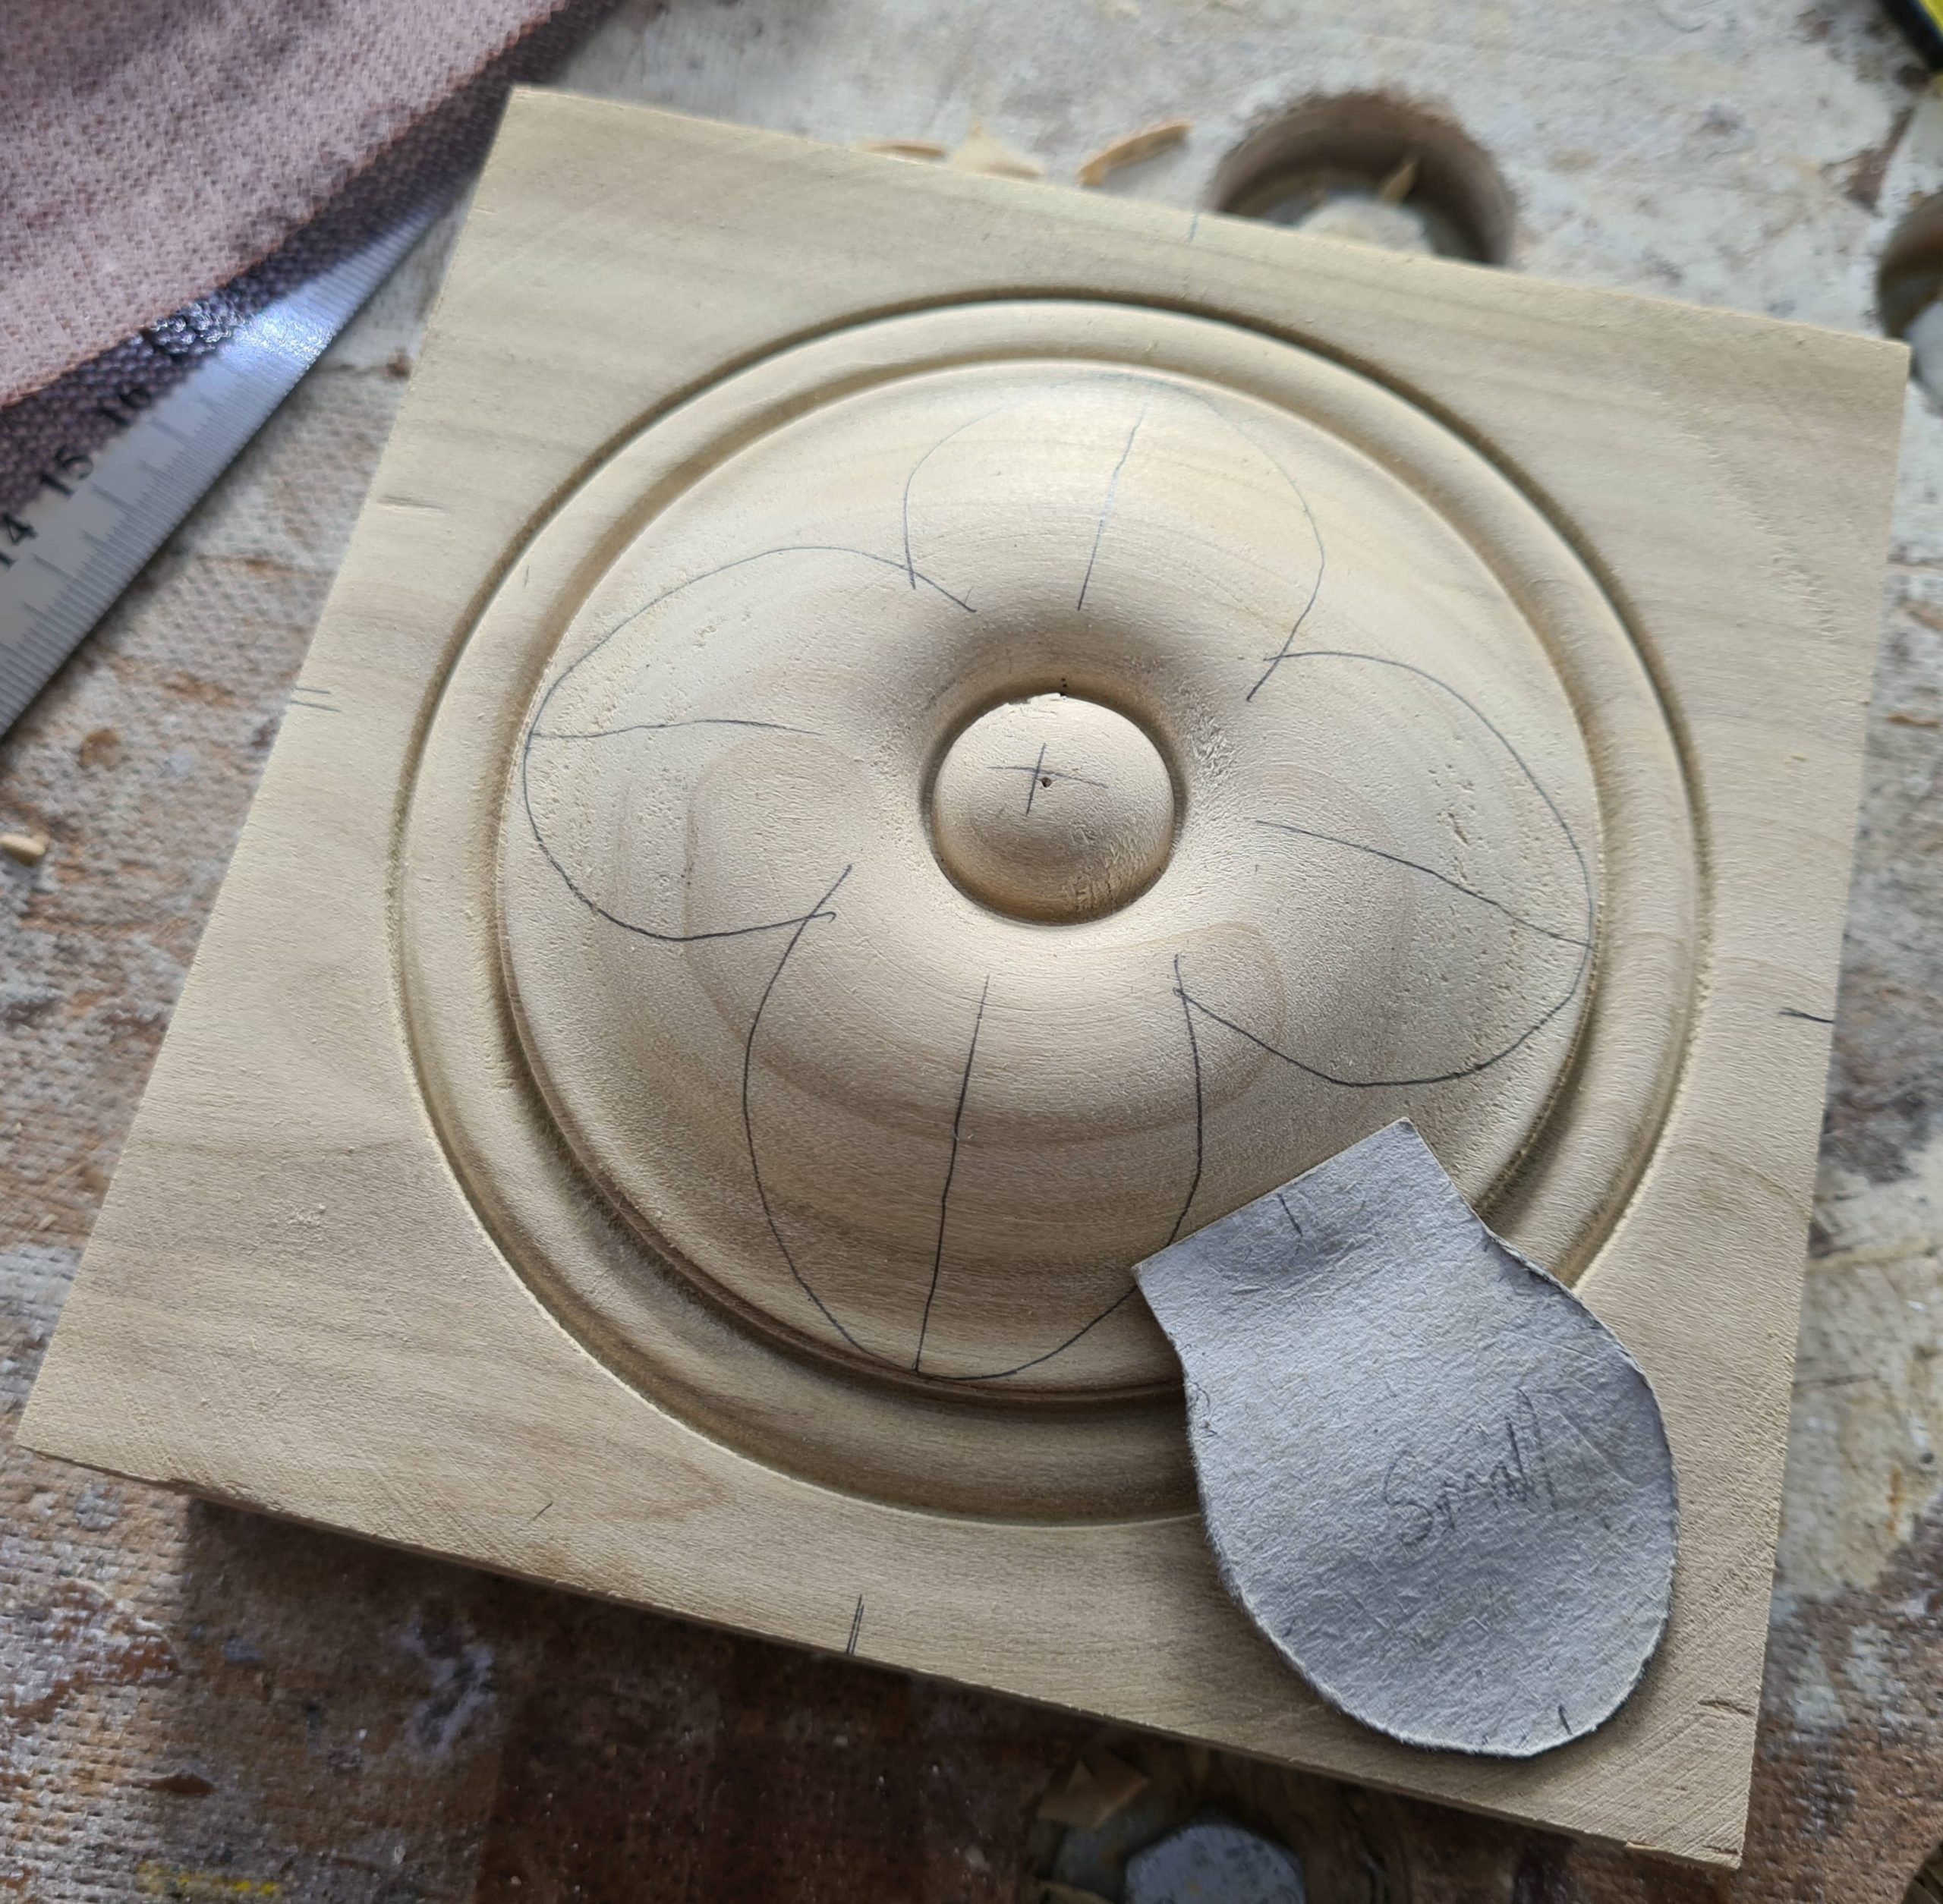
Draw diagonals from the intersections of the large petals to the corners and then use the small petal template to draw guide lines.
Carving
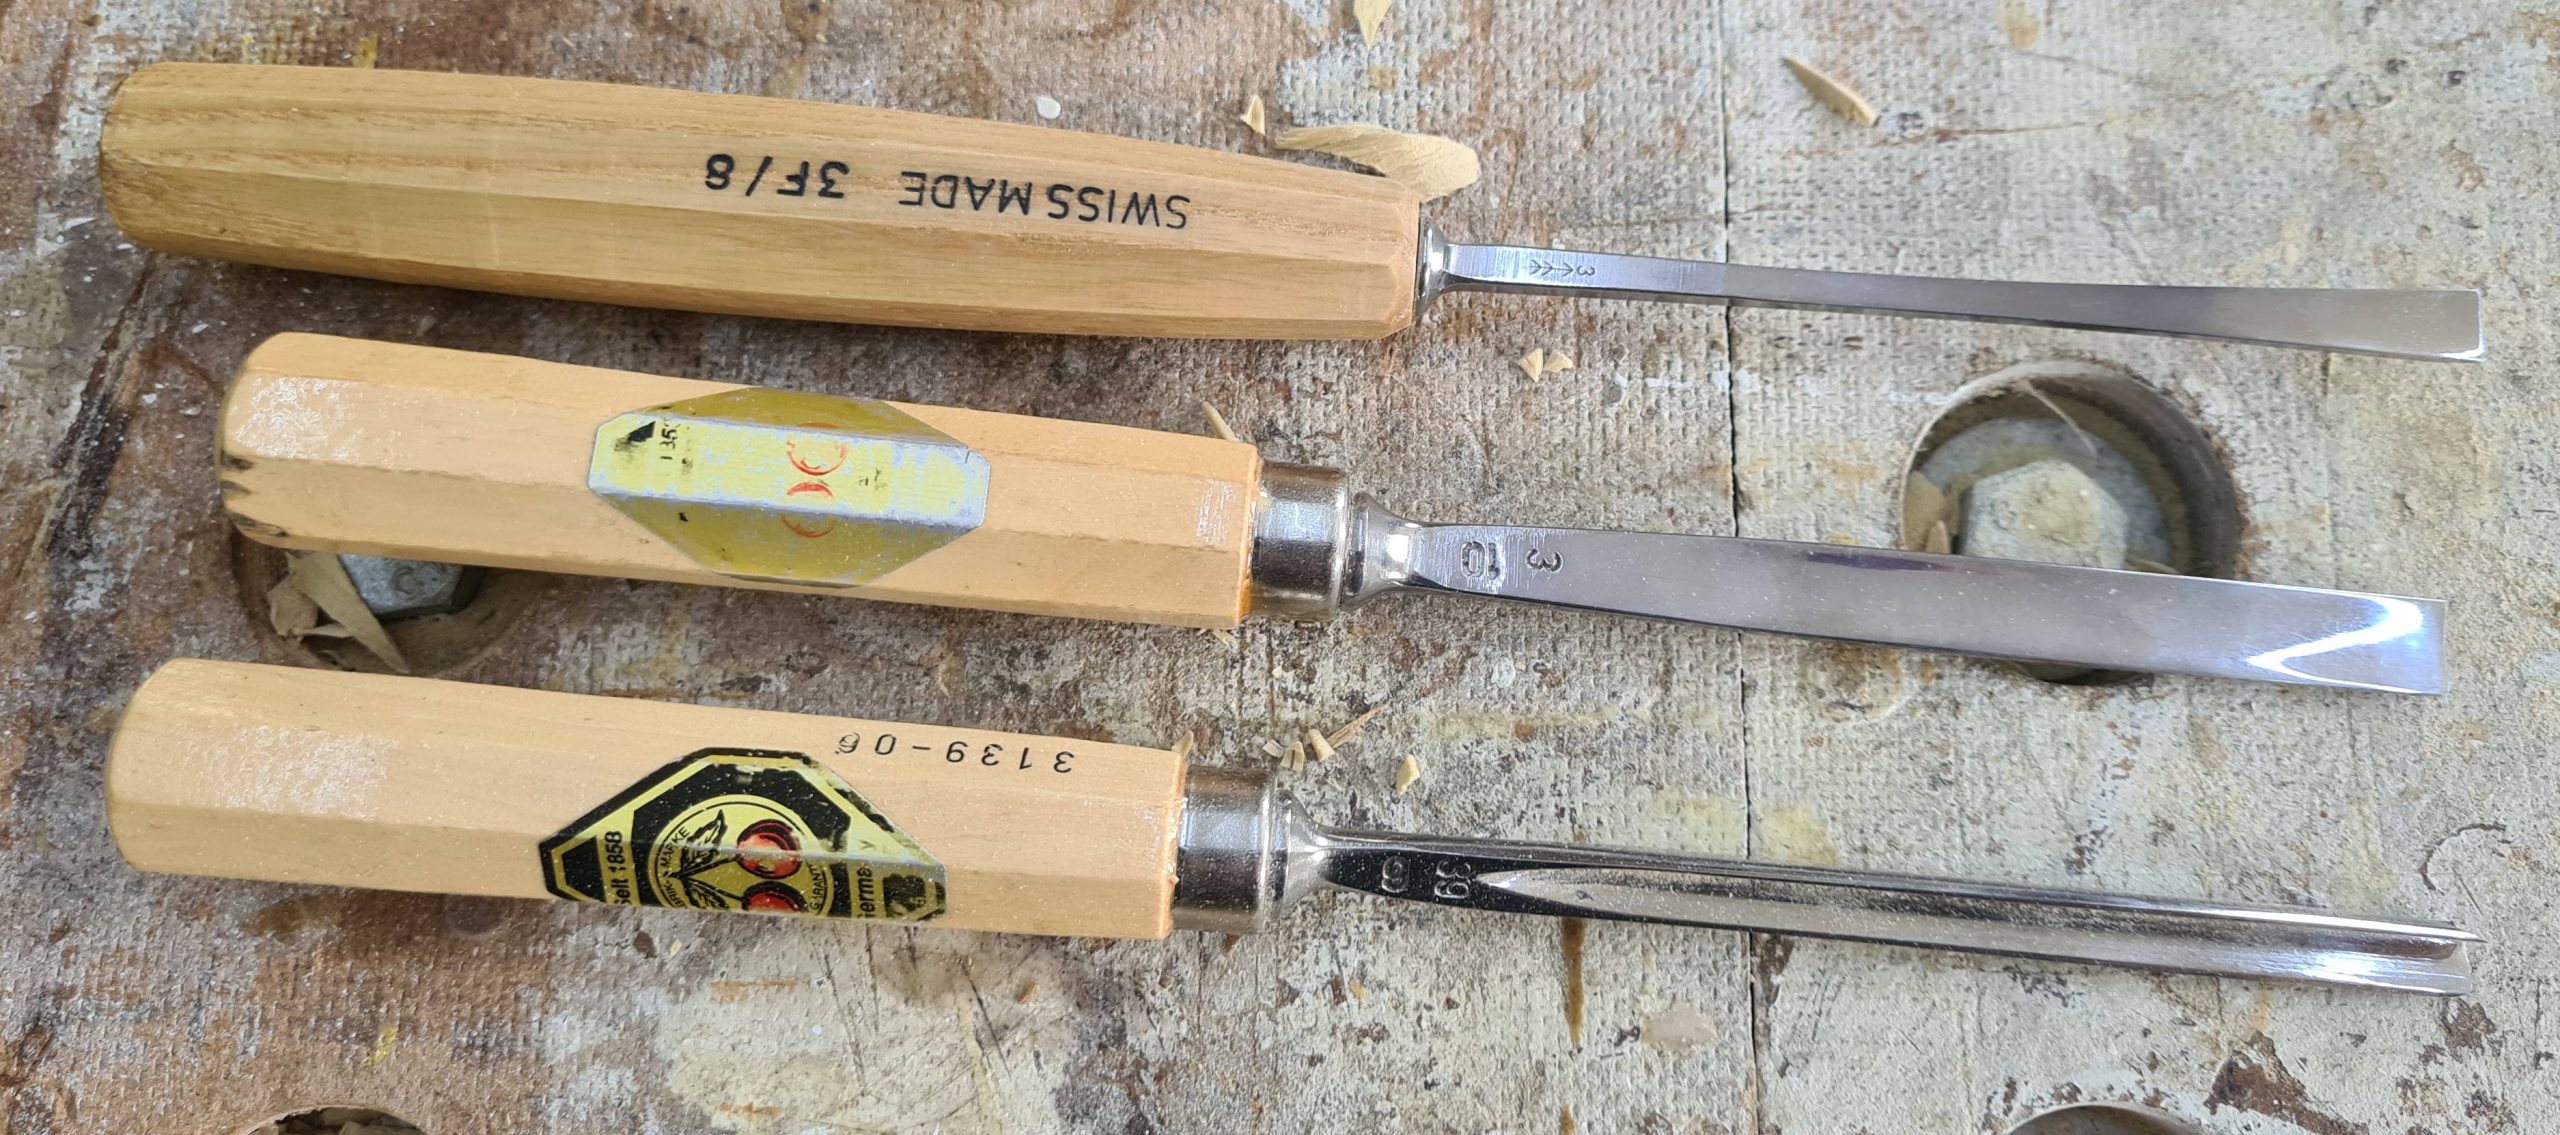
With a bit of practice you only need three tools to carve this design. In the centre is the gouge that will do most of the work. It’s a good match for the curves on the petals. The V tool is only used on the large petals and the fishtail gouge is used to carve out the small petals.
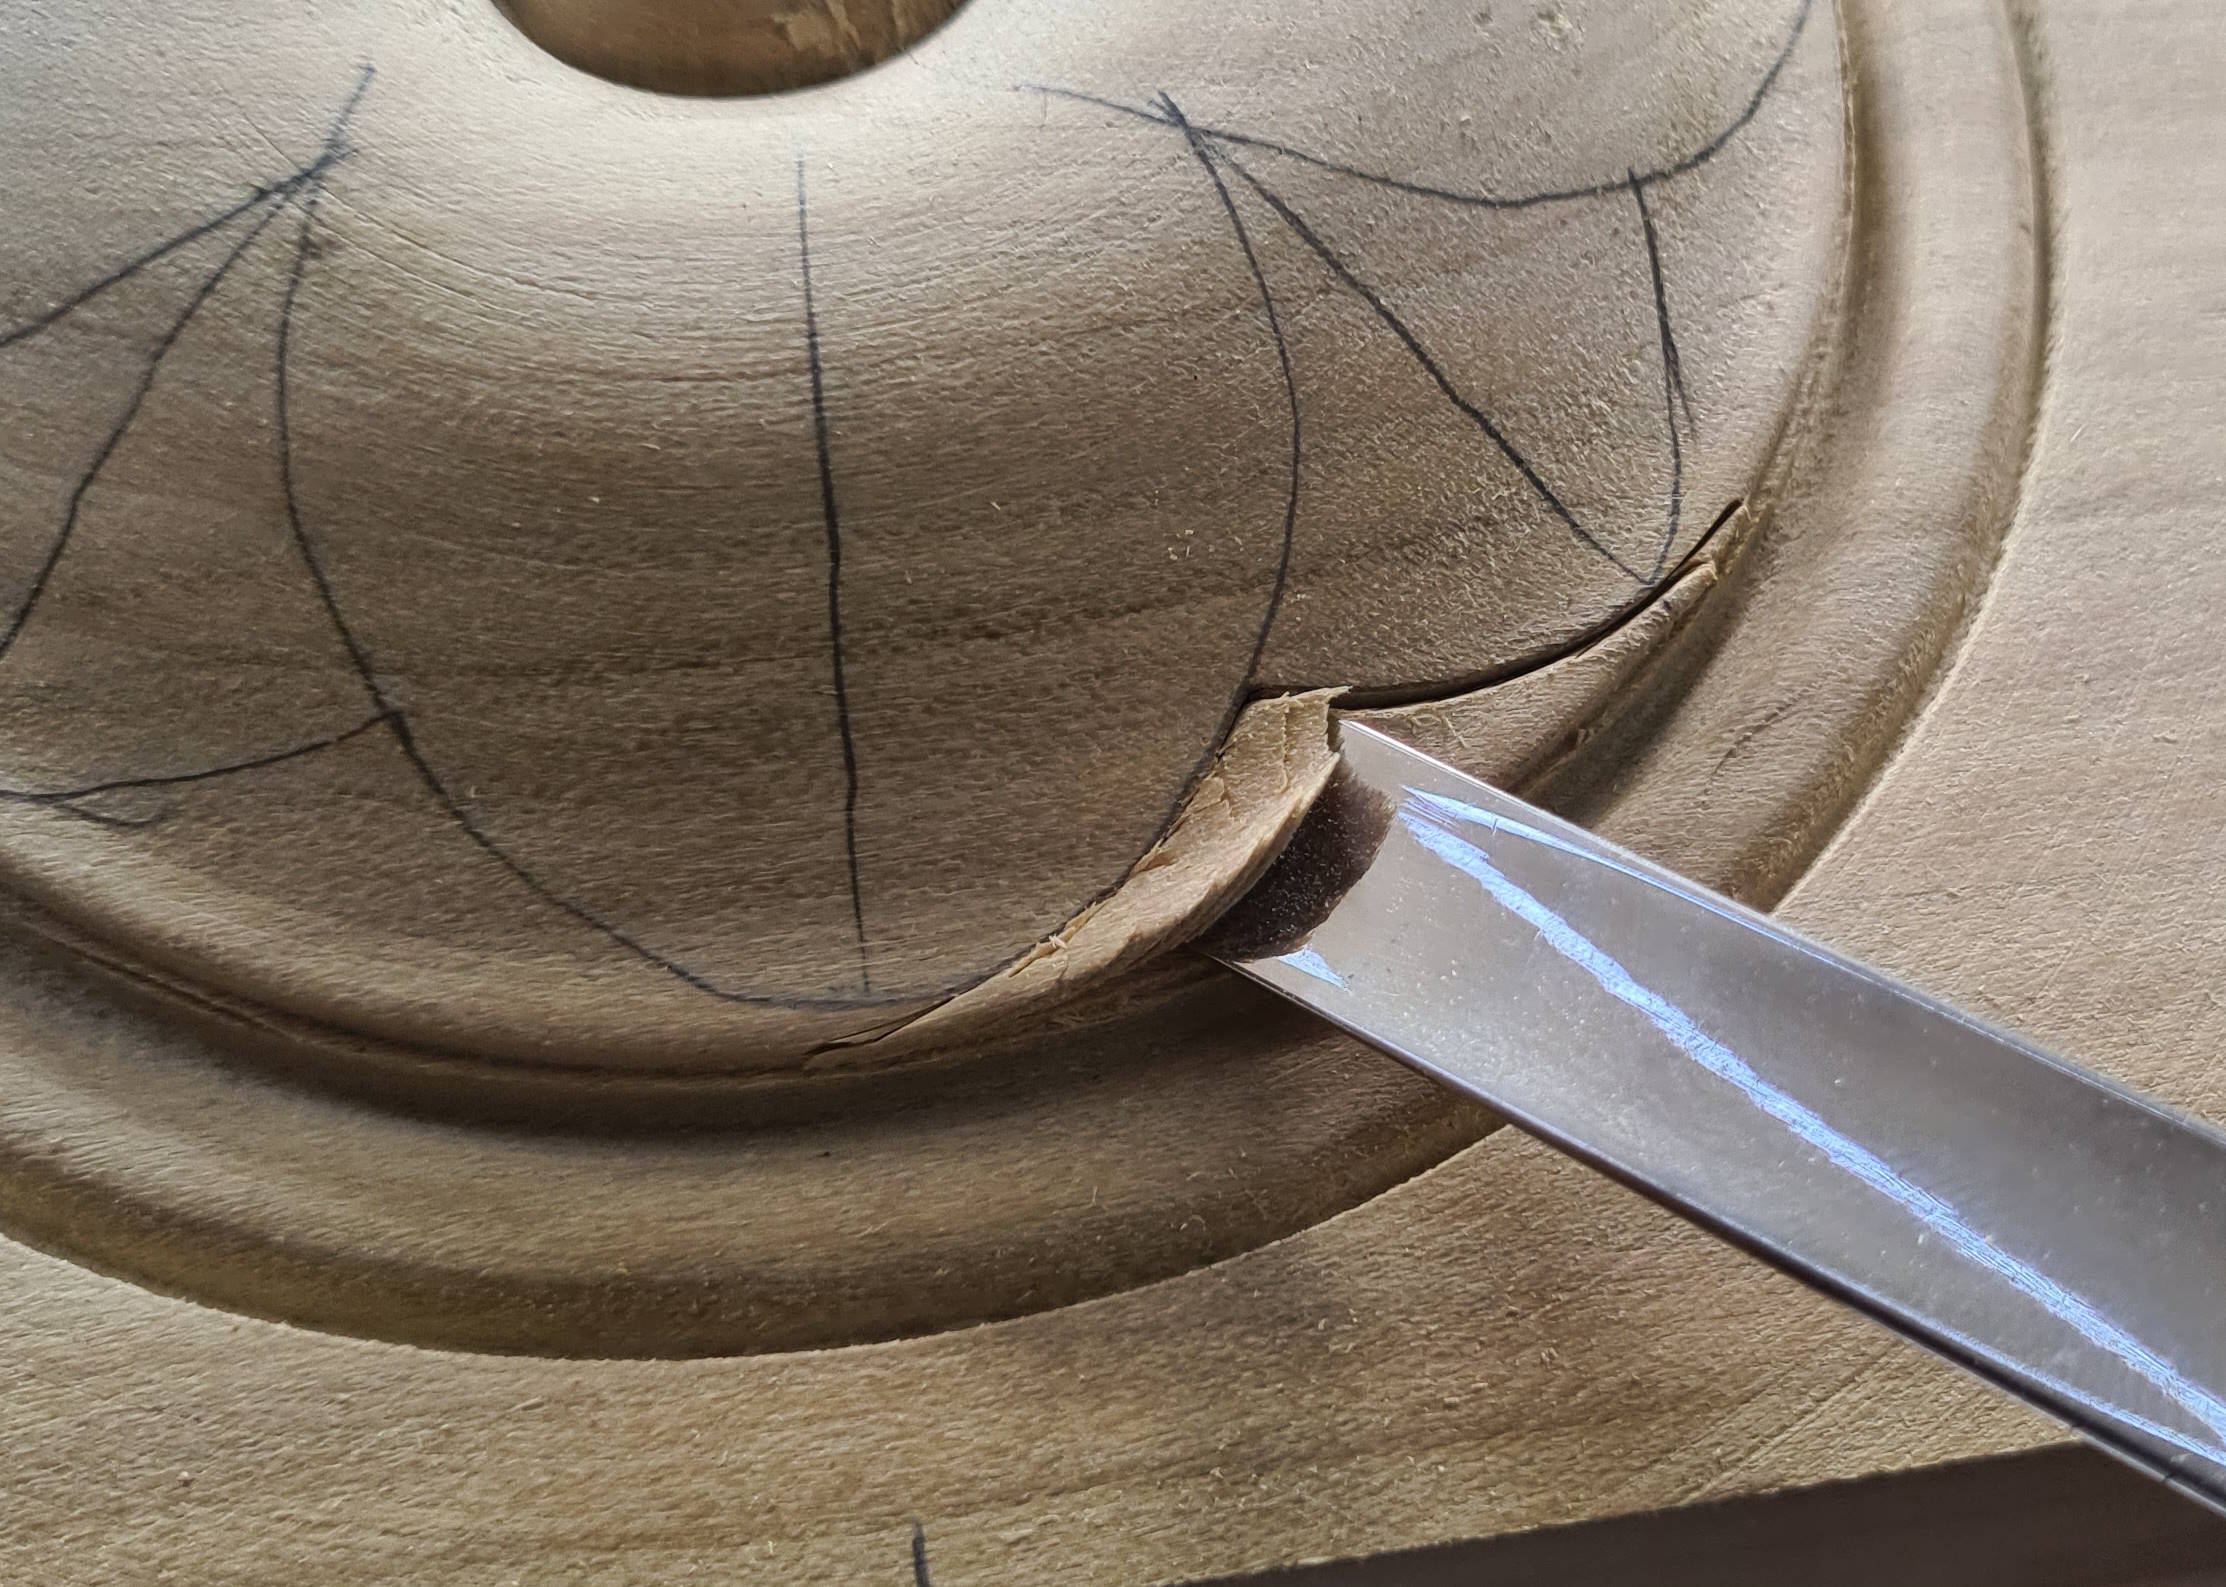
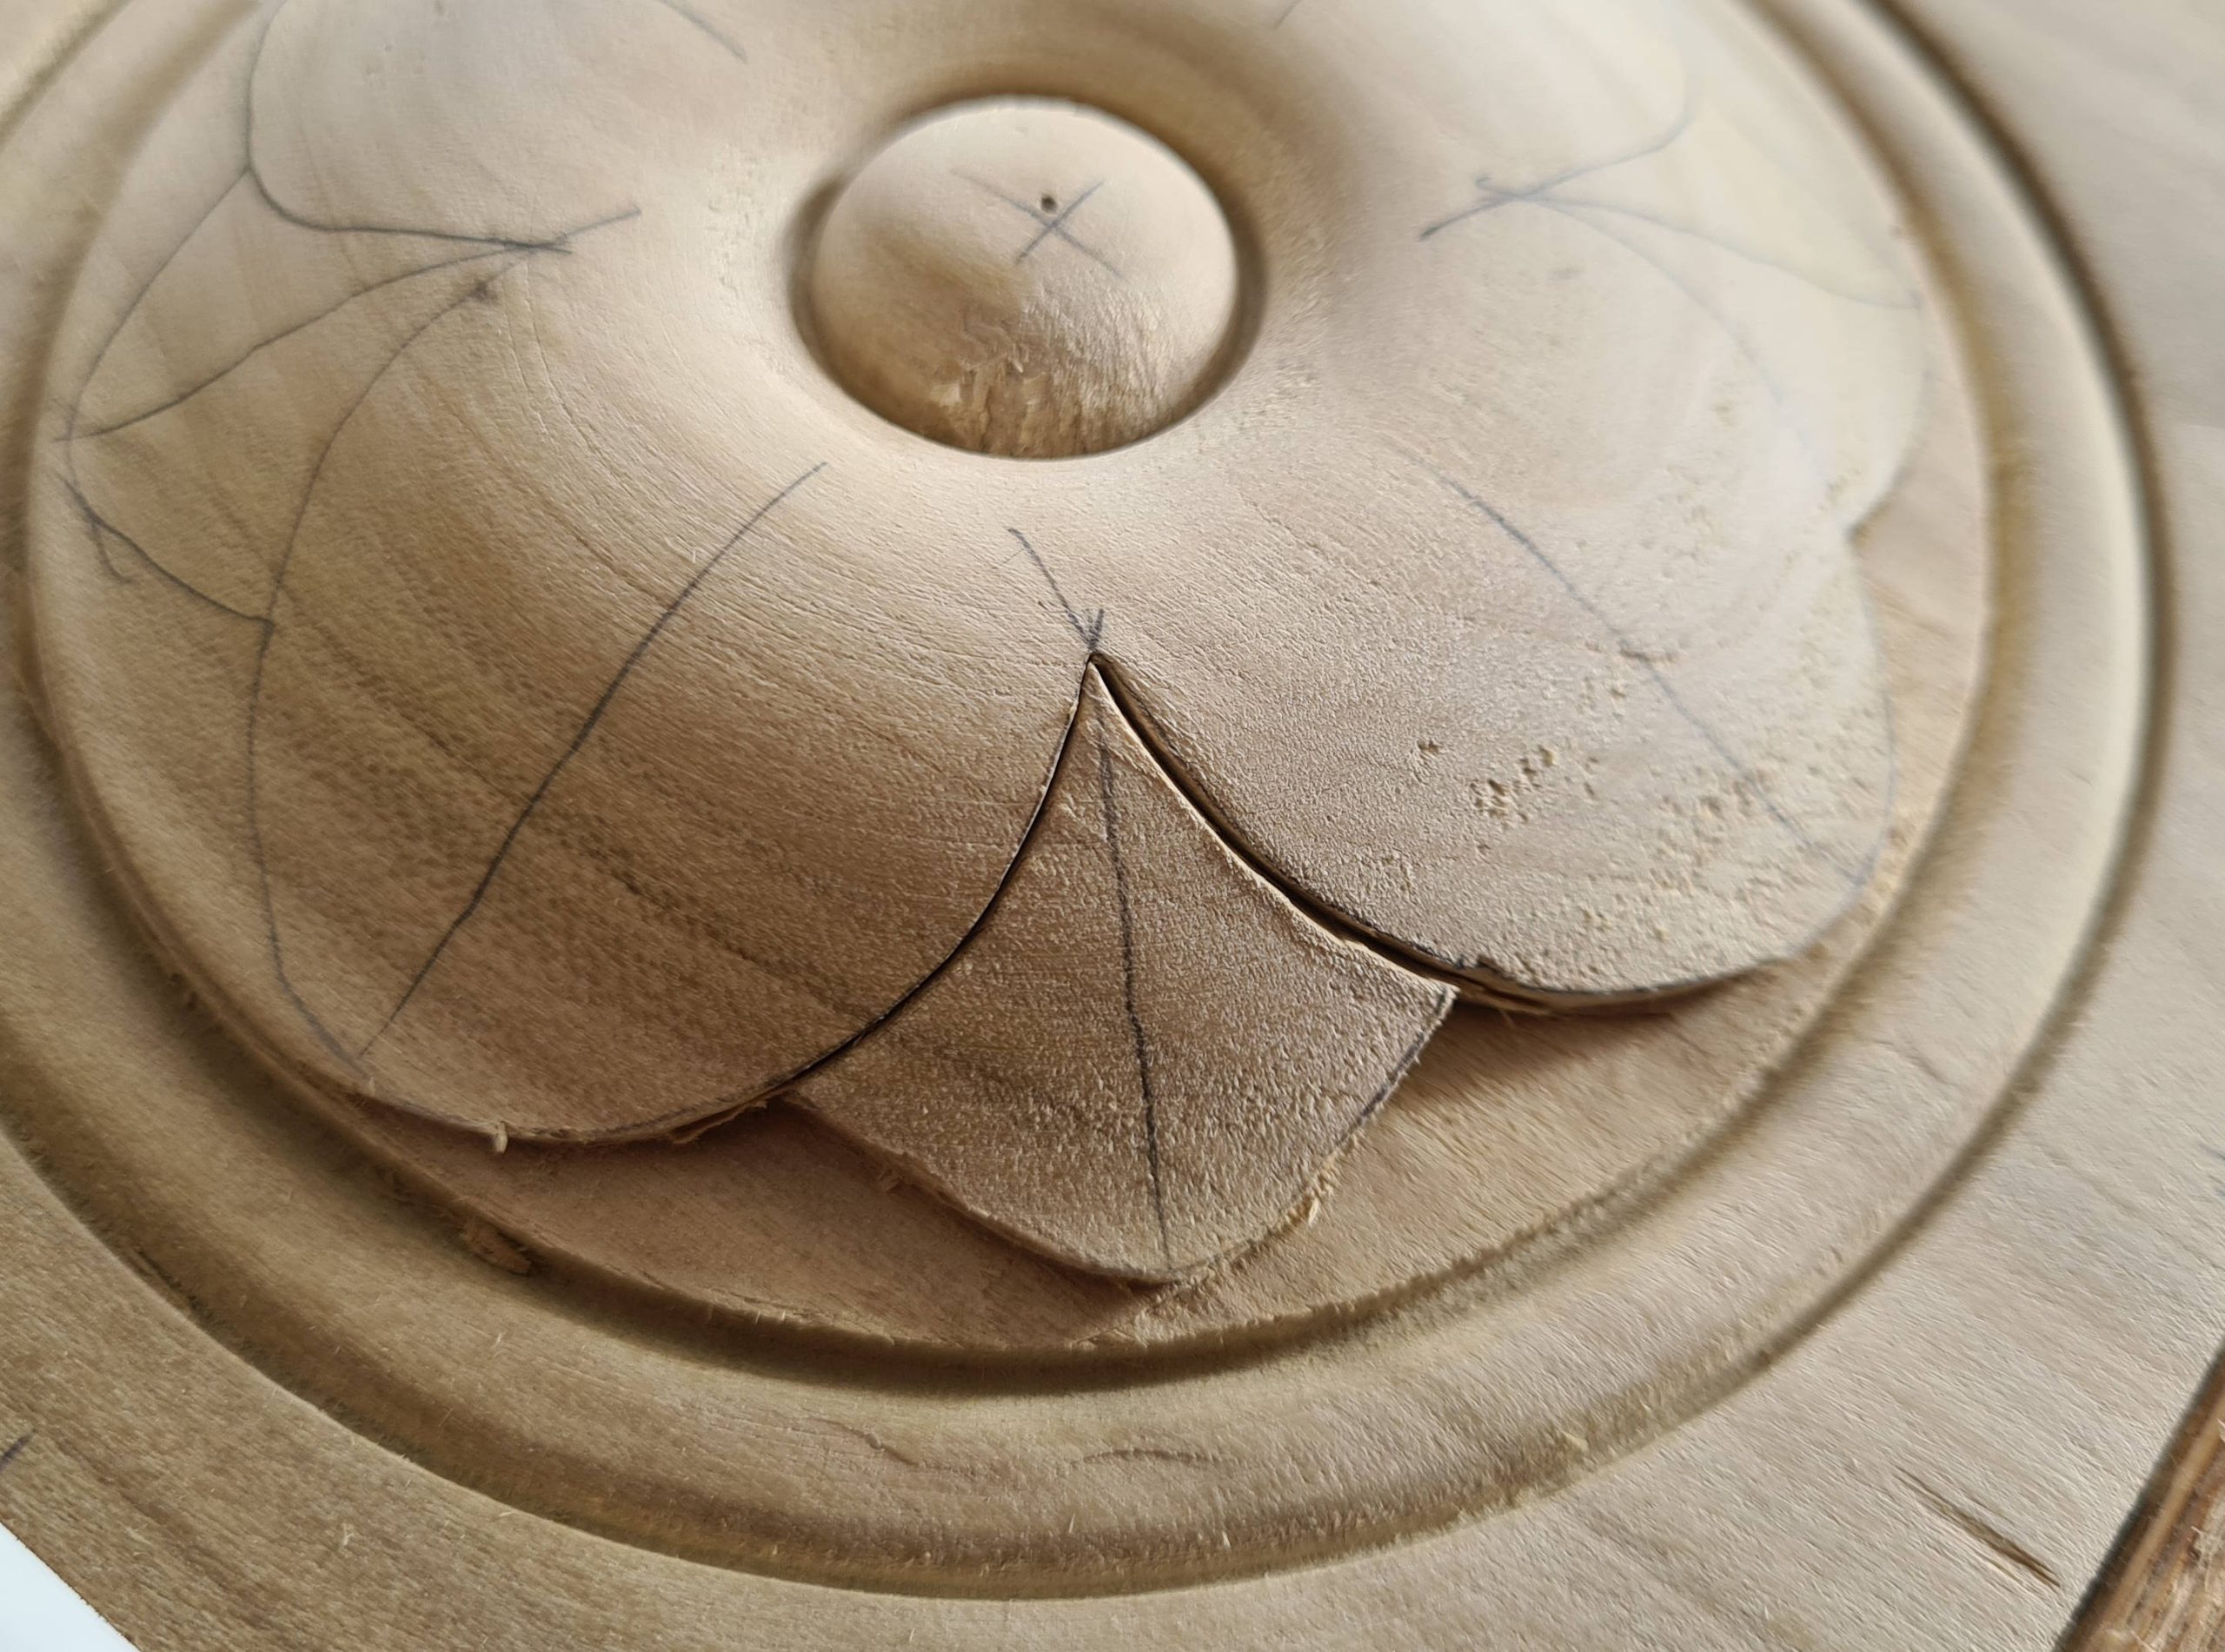
Mount the piece firmly. I clamped it in my bench vice and found a seat high enough for me to work. You could also use a dedicated carving bench. Incise around the small petal using the number 3 gouge. You likely won’t be able to get to full depth on the first pass.
Carefully pare away the waste timber.
After a little while you should have the first area cleaned out. Don’t worry about a few little wispy splinters, they will be cleaned up later and these images are all far larger than real life.
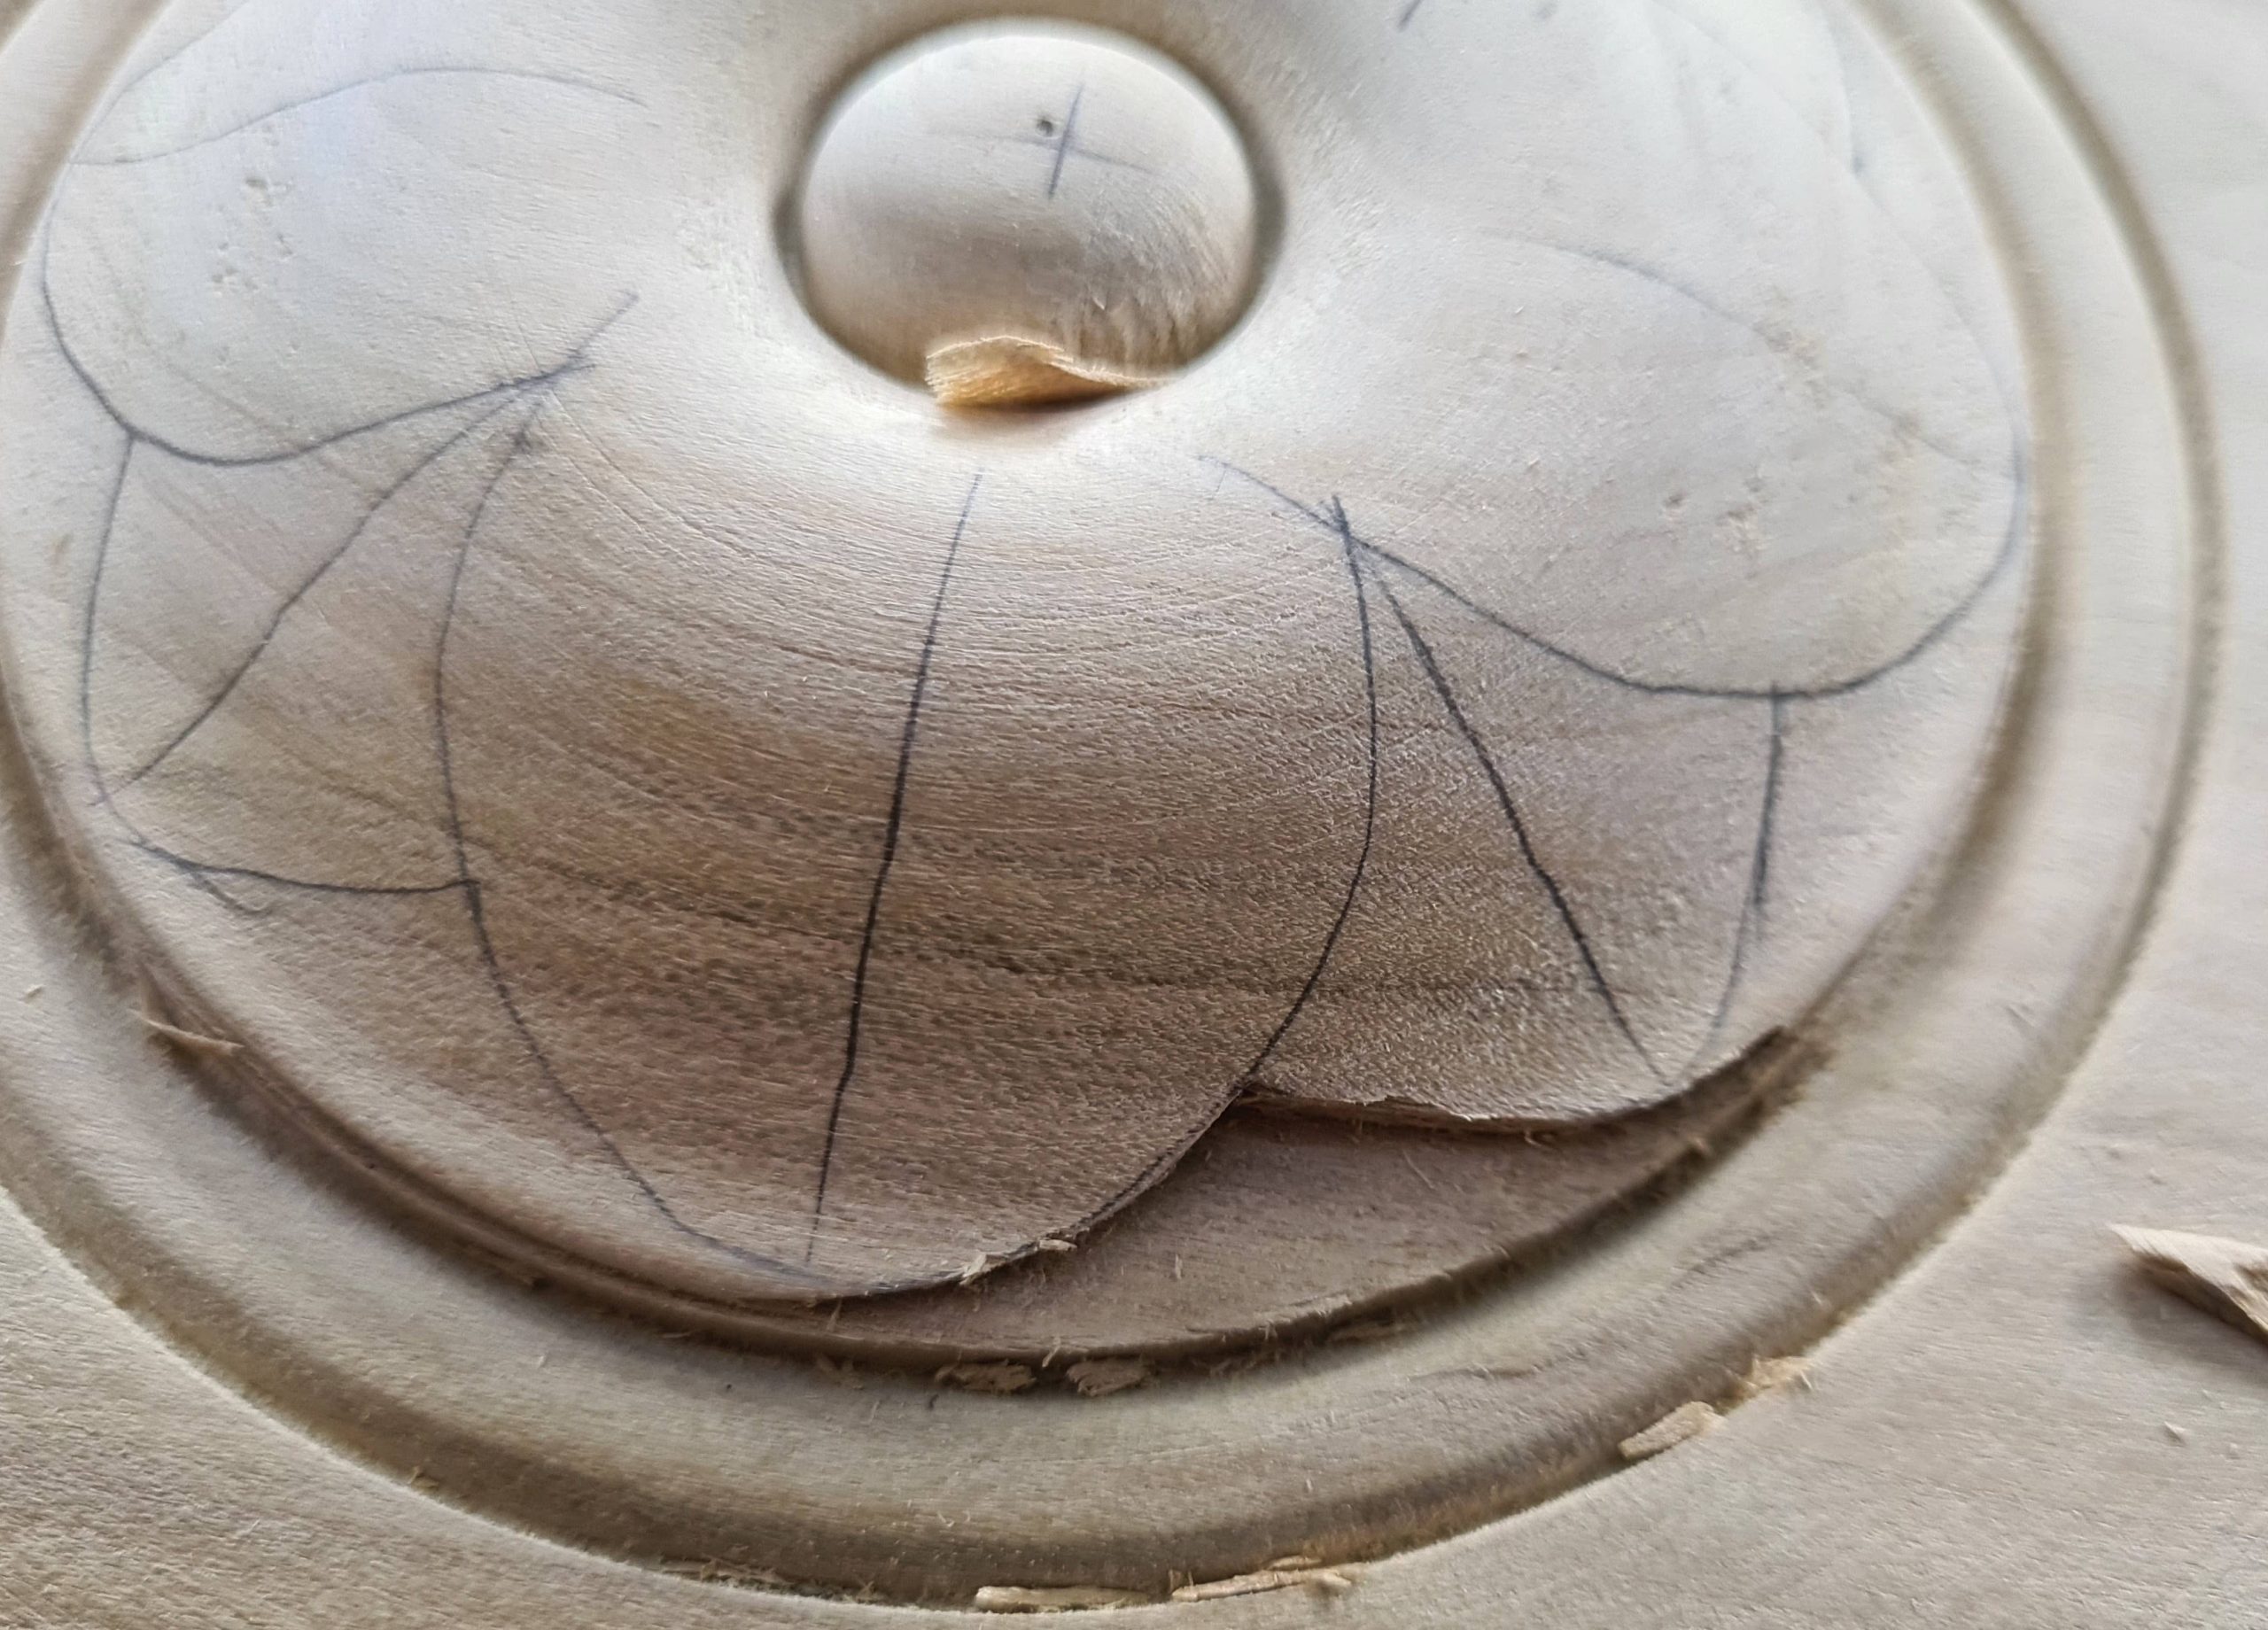
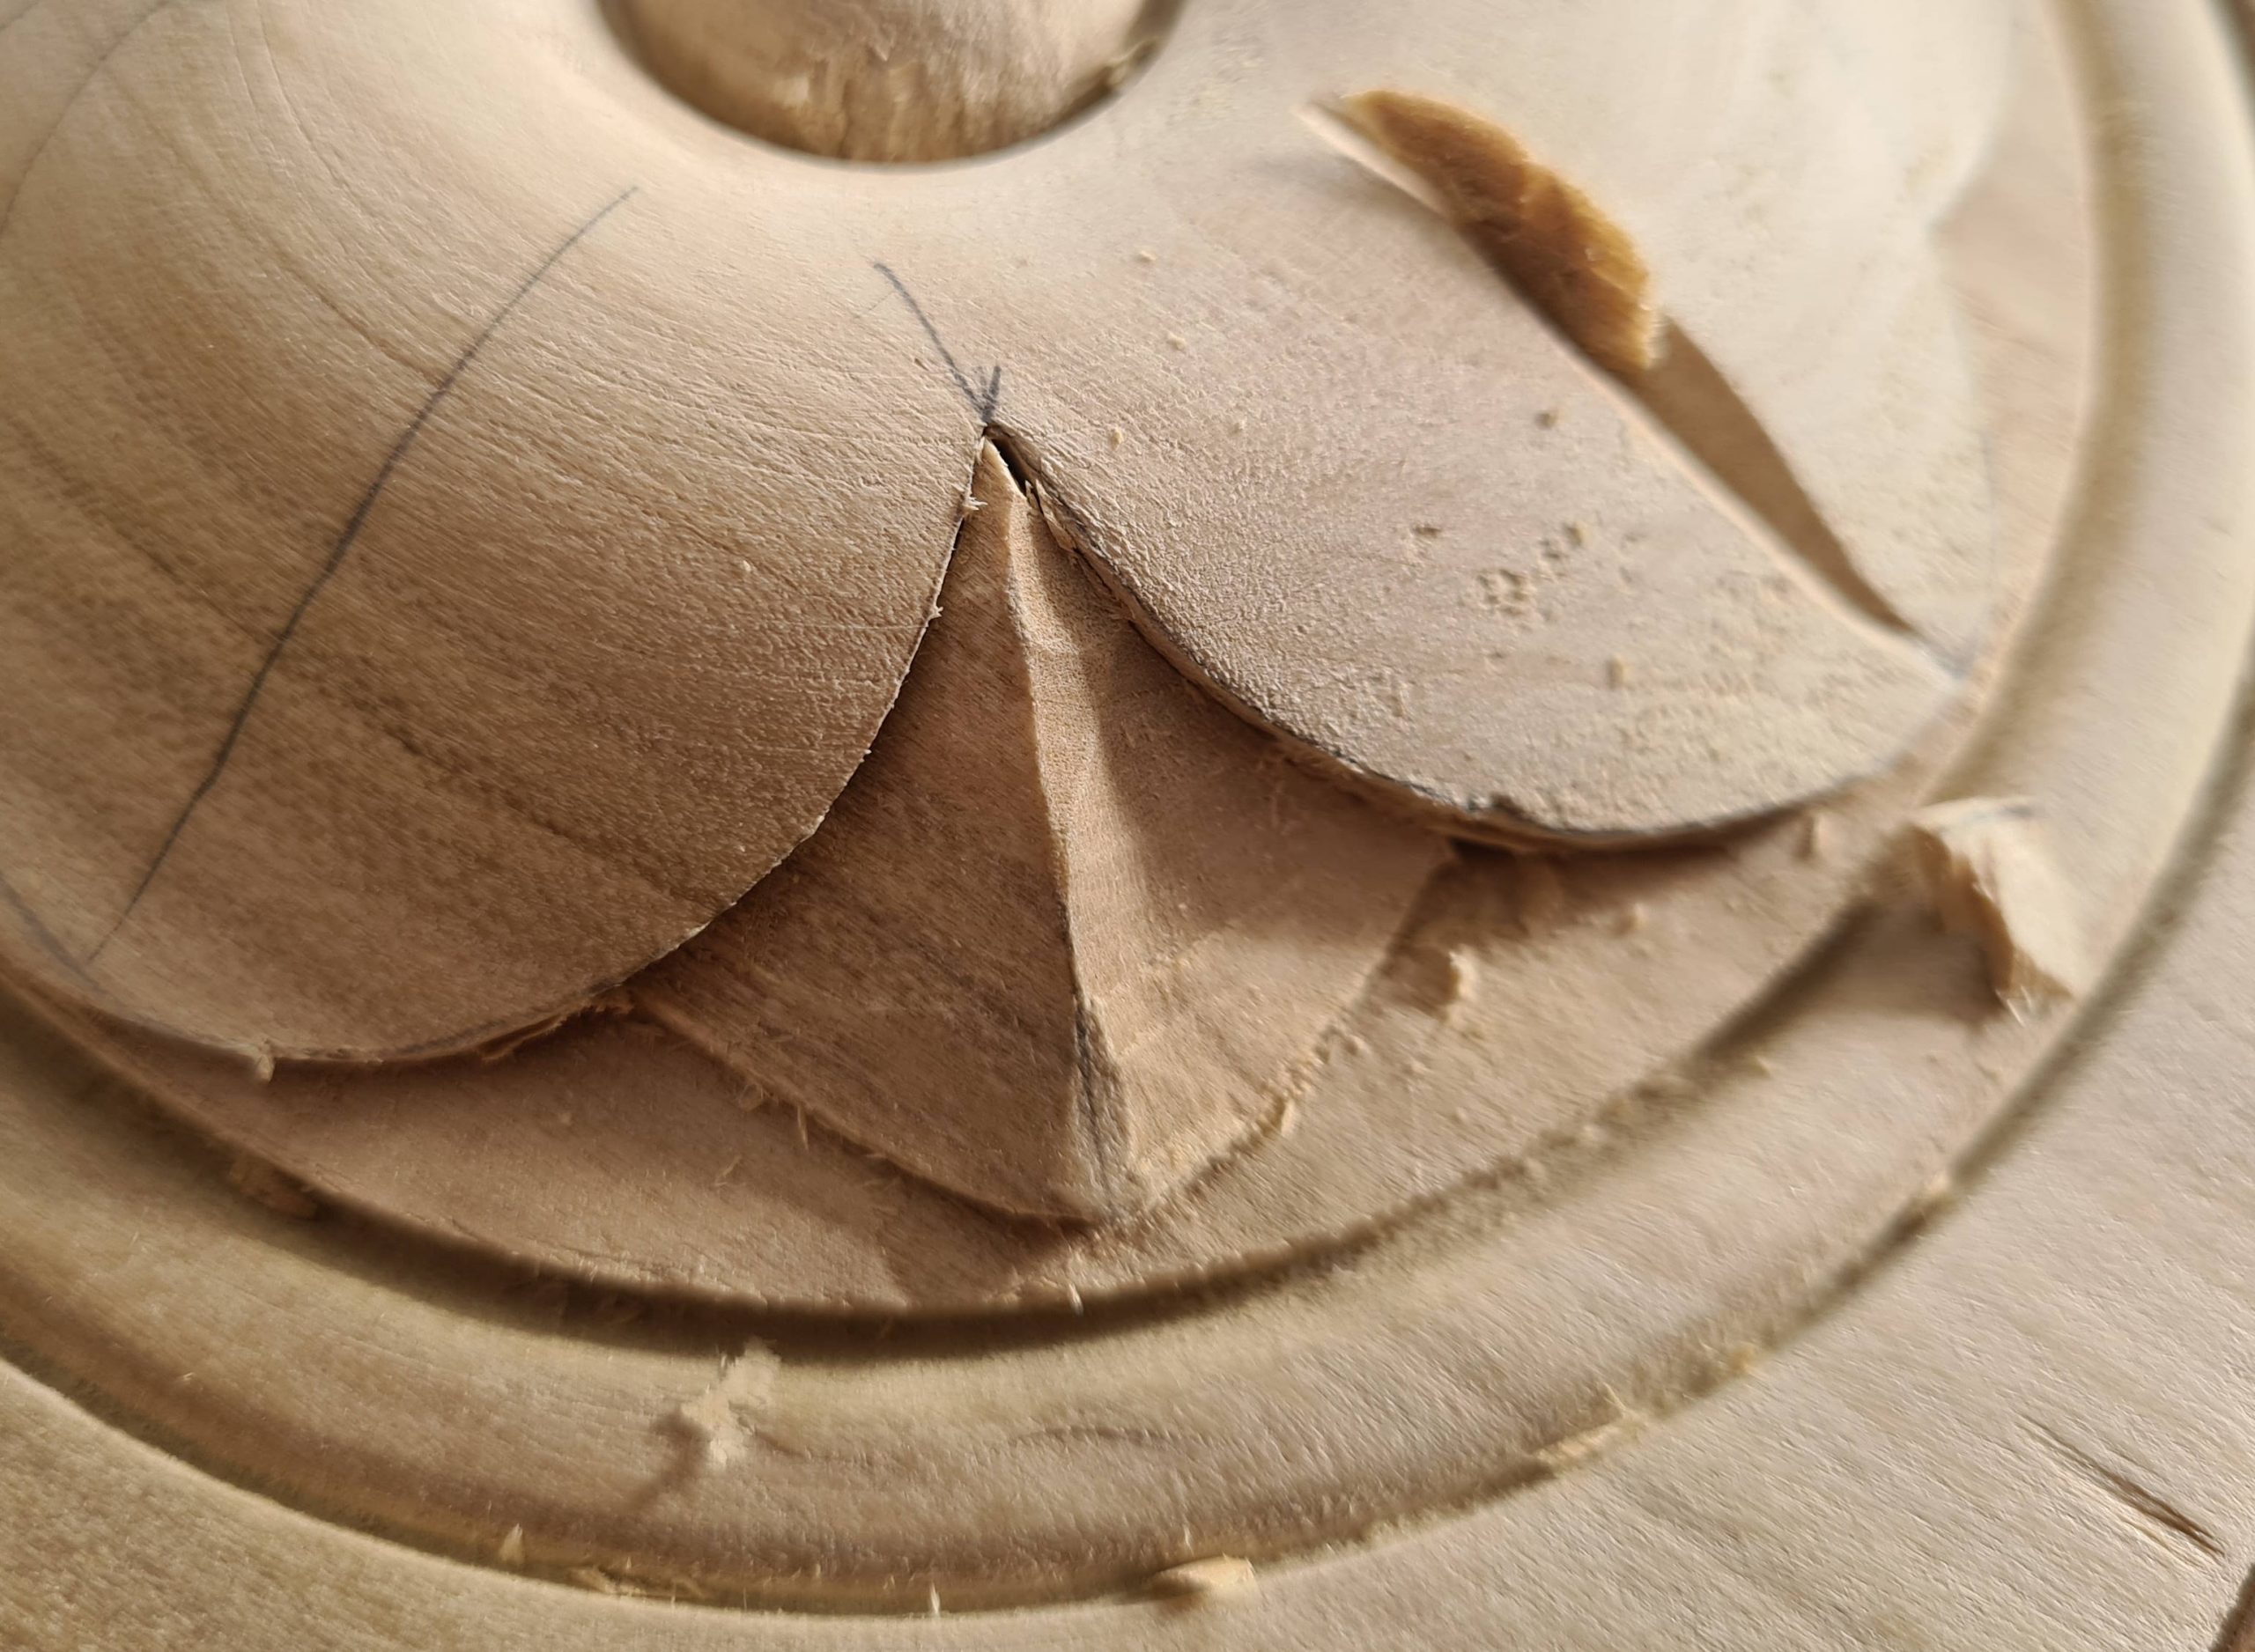
Clean up another two sections.
Still using the number 3 gouge incise the edge of the small petal.
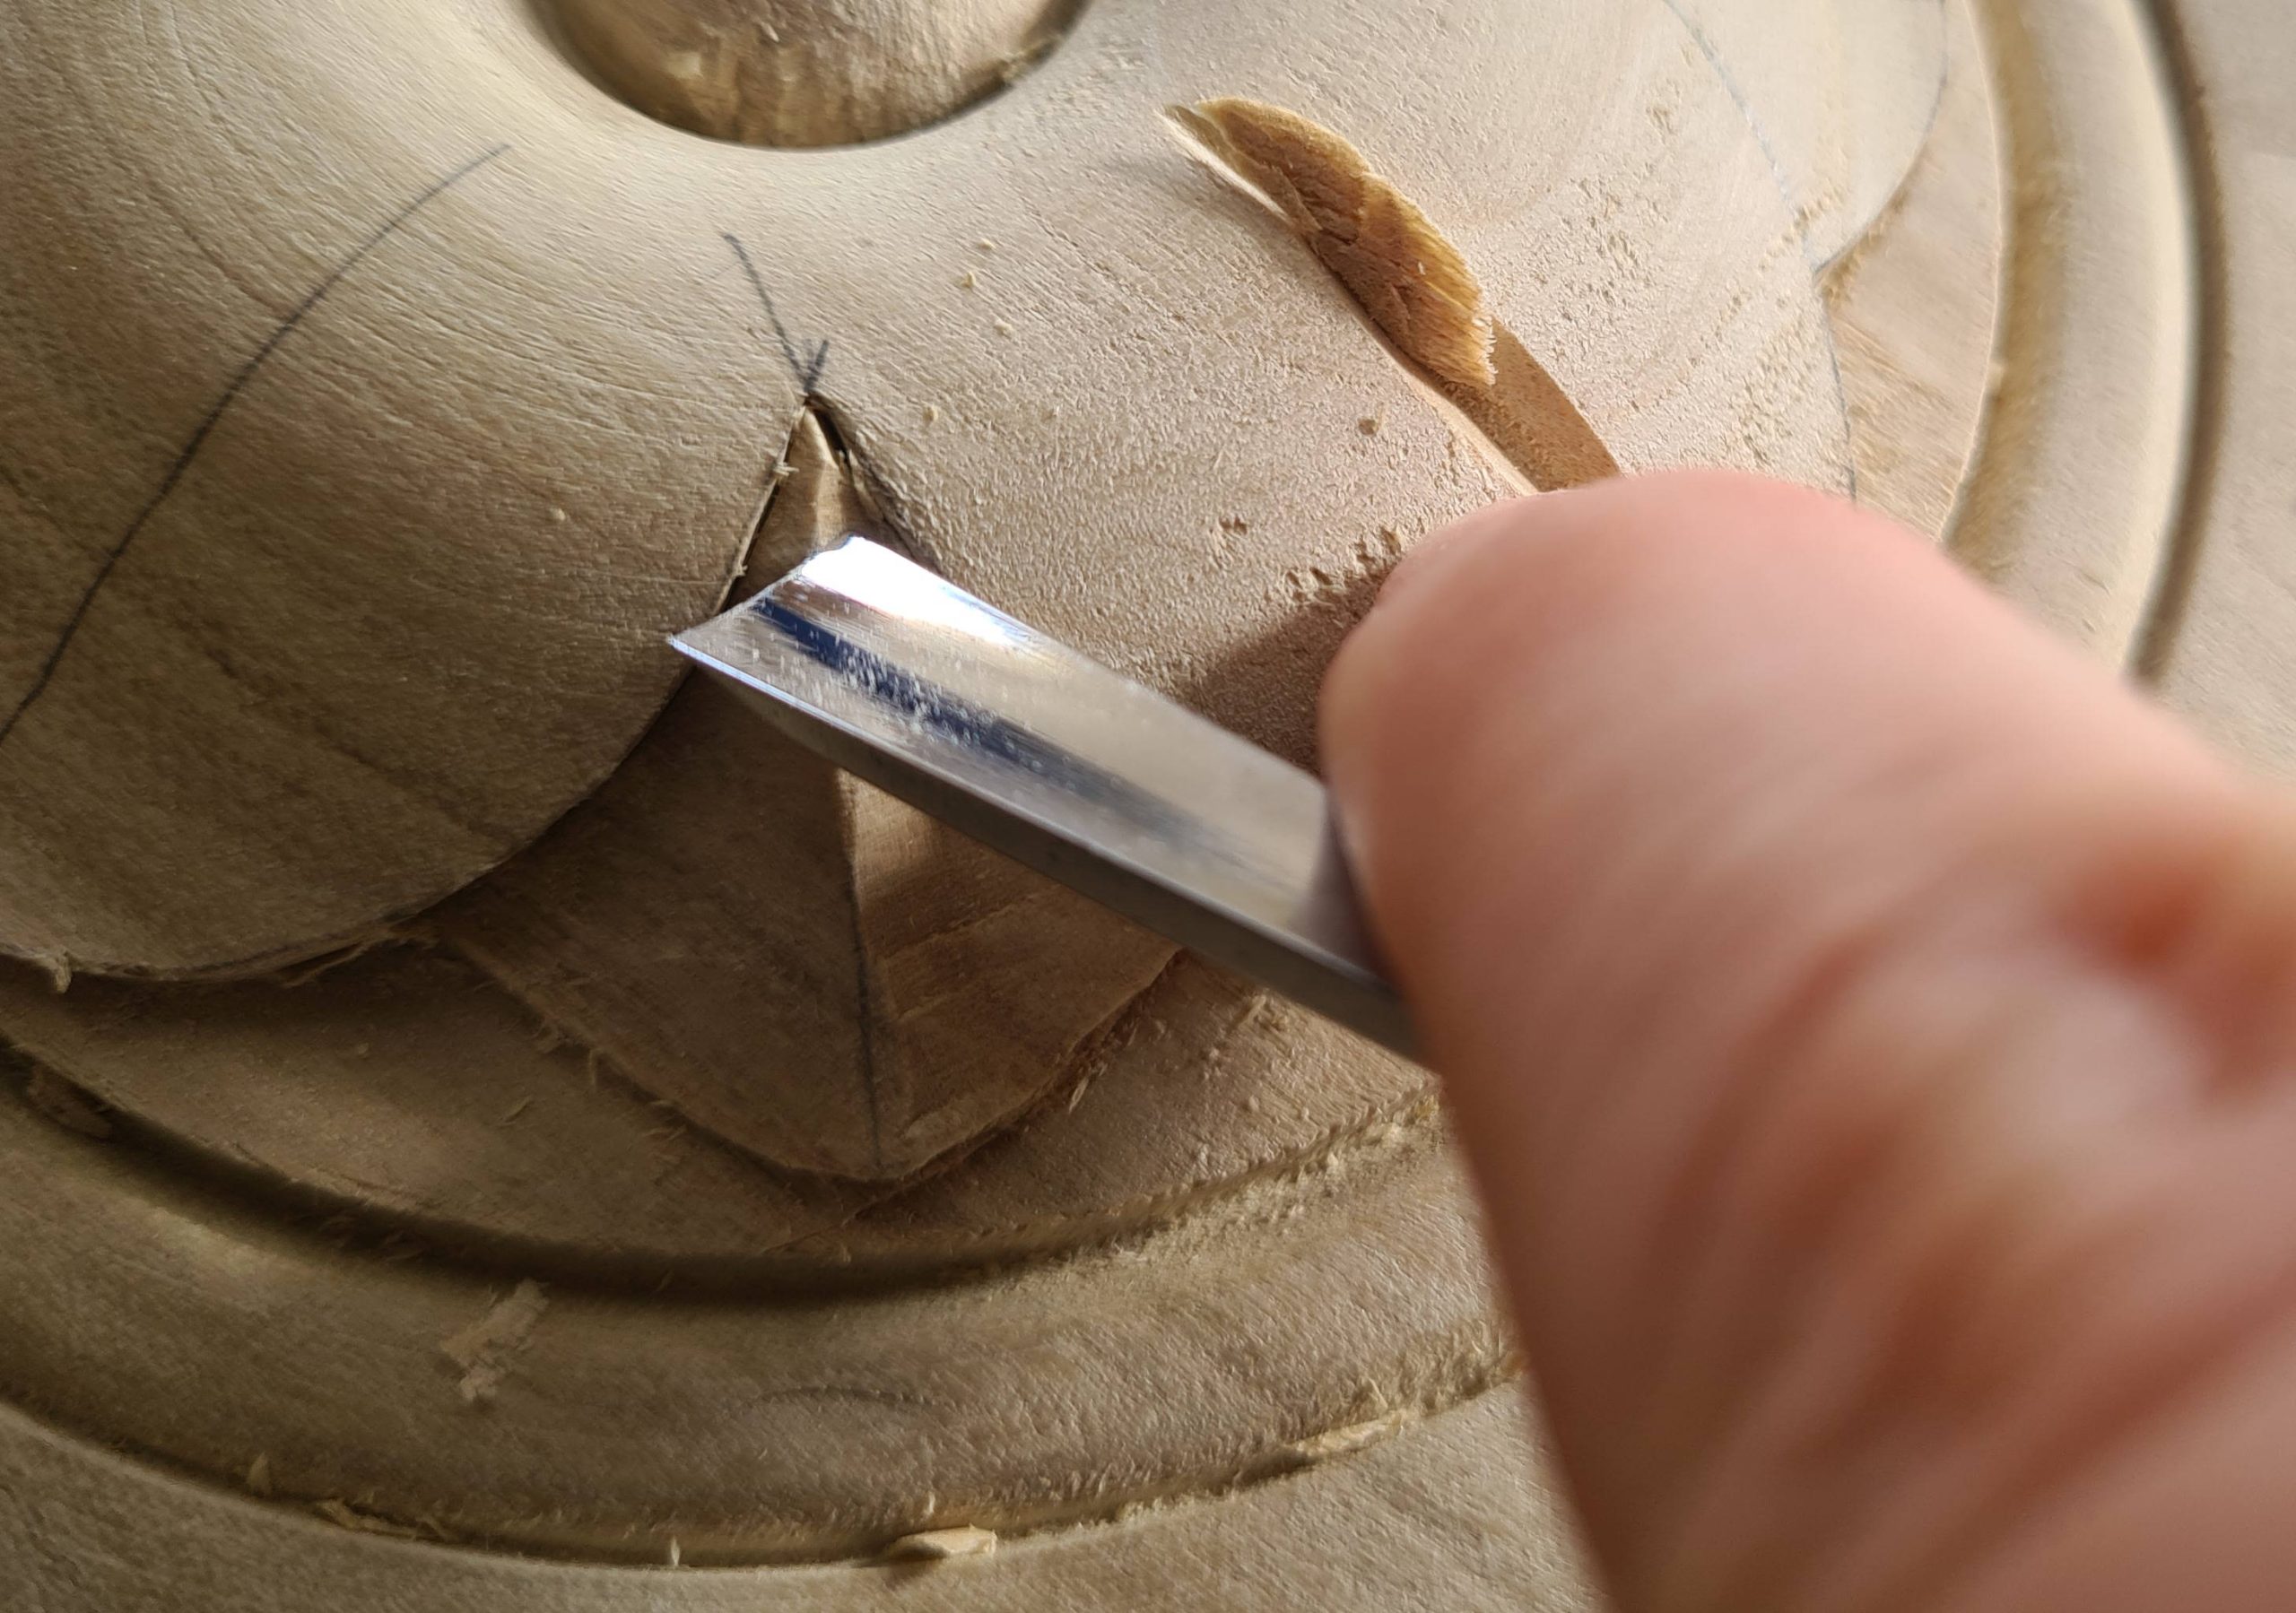
Use the V gouge to carve the large petal. Going from just the outside in gives a better looking cut but you risk clipping the centre (which I did later).
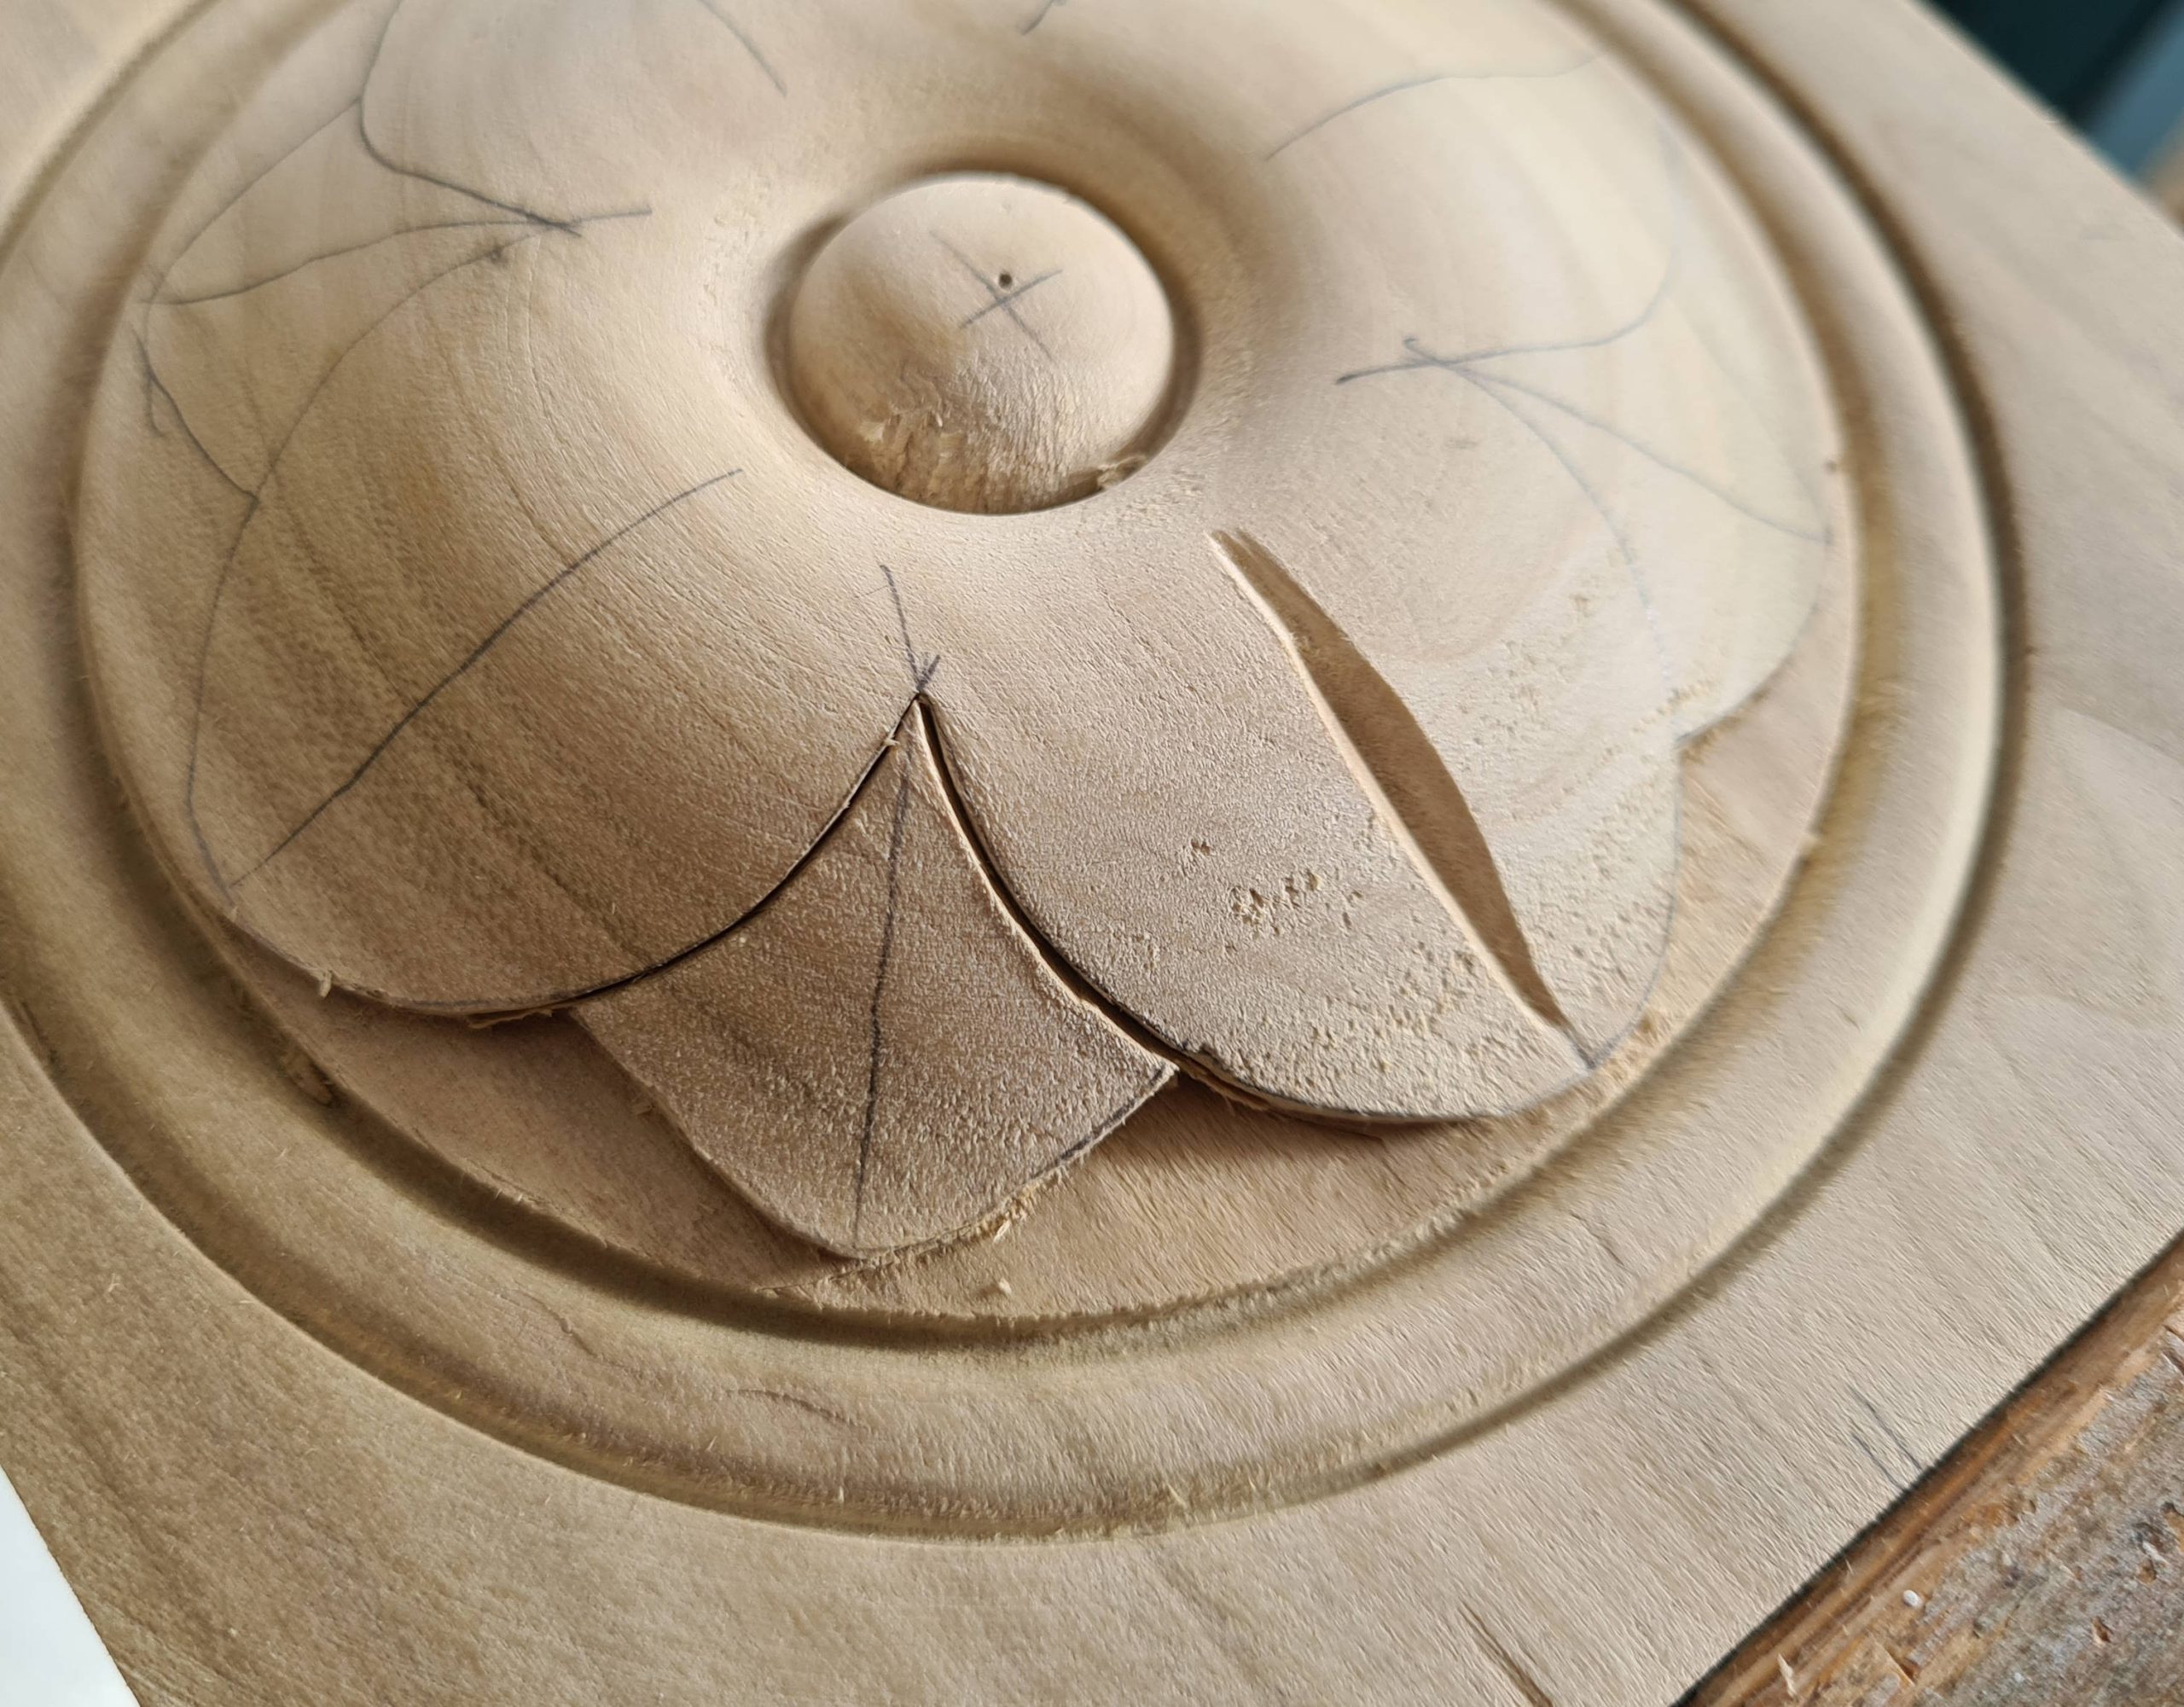
Use the fishtail gouge to now form the small petal. This is the hardest part of the carving. The grain on one side will run with the tool which makes it very easy to pull out a large chip. The fishtail I’m using is also not quite curved enough, a number 4F would probably have been a better option. A spoon forming profile would also have helped but we’re talking a rare tool there.
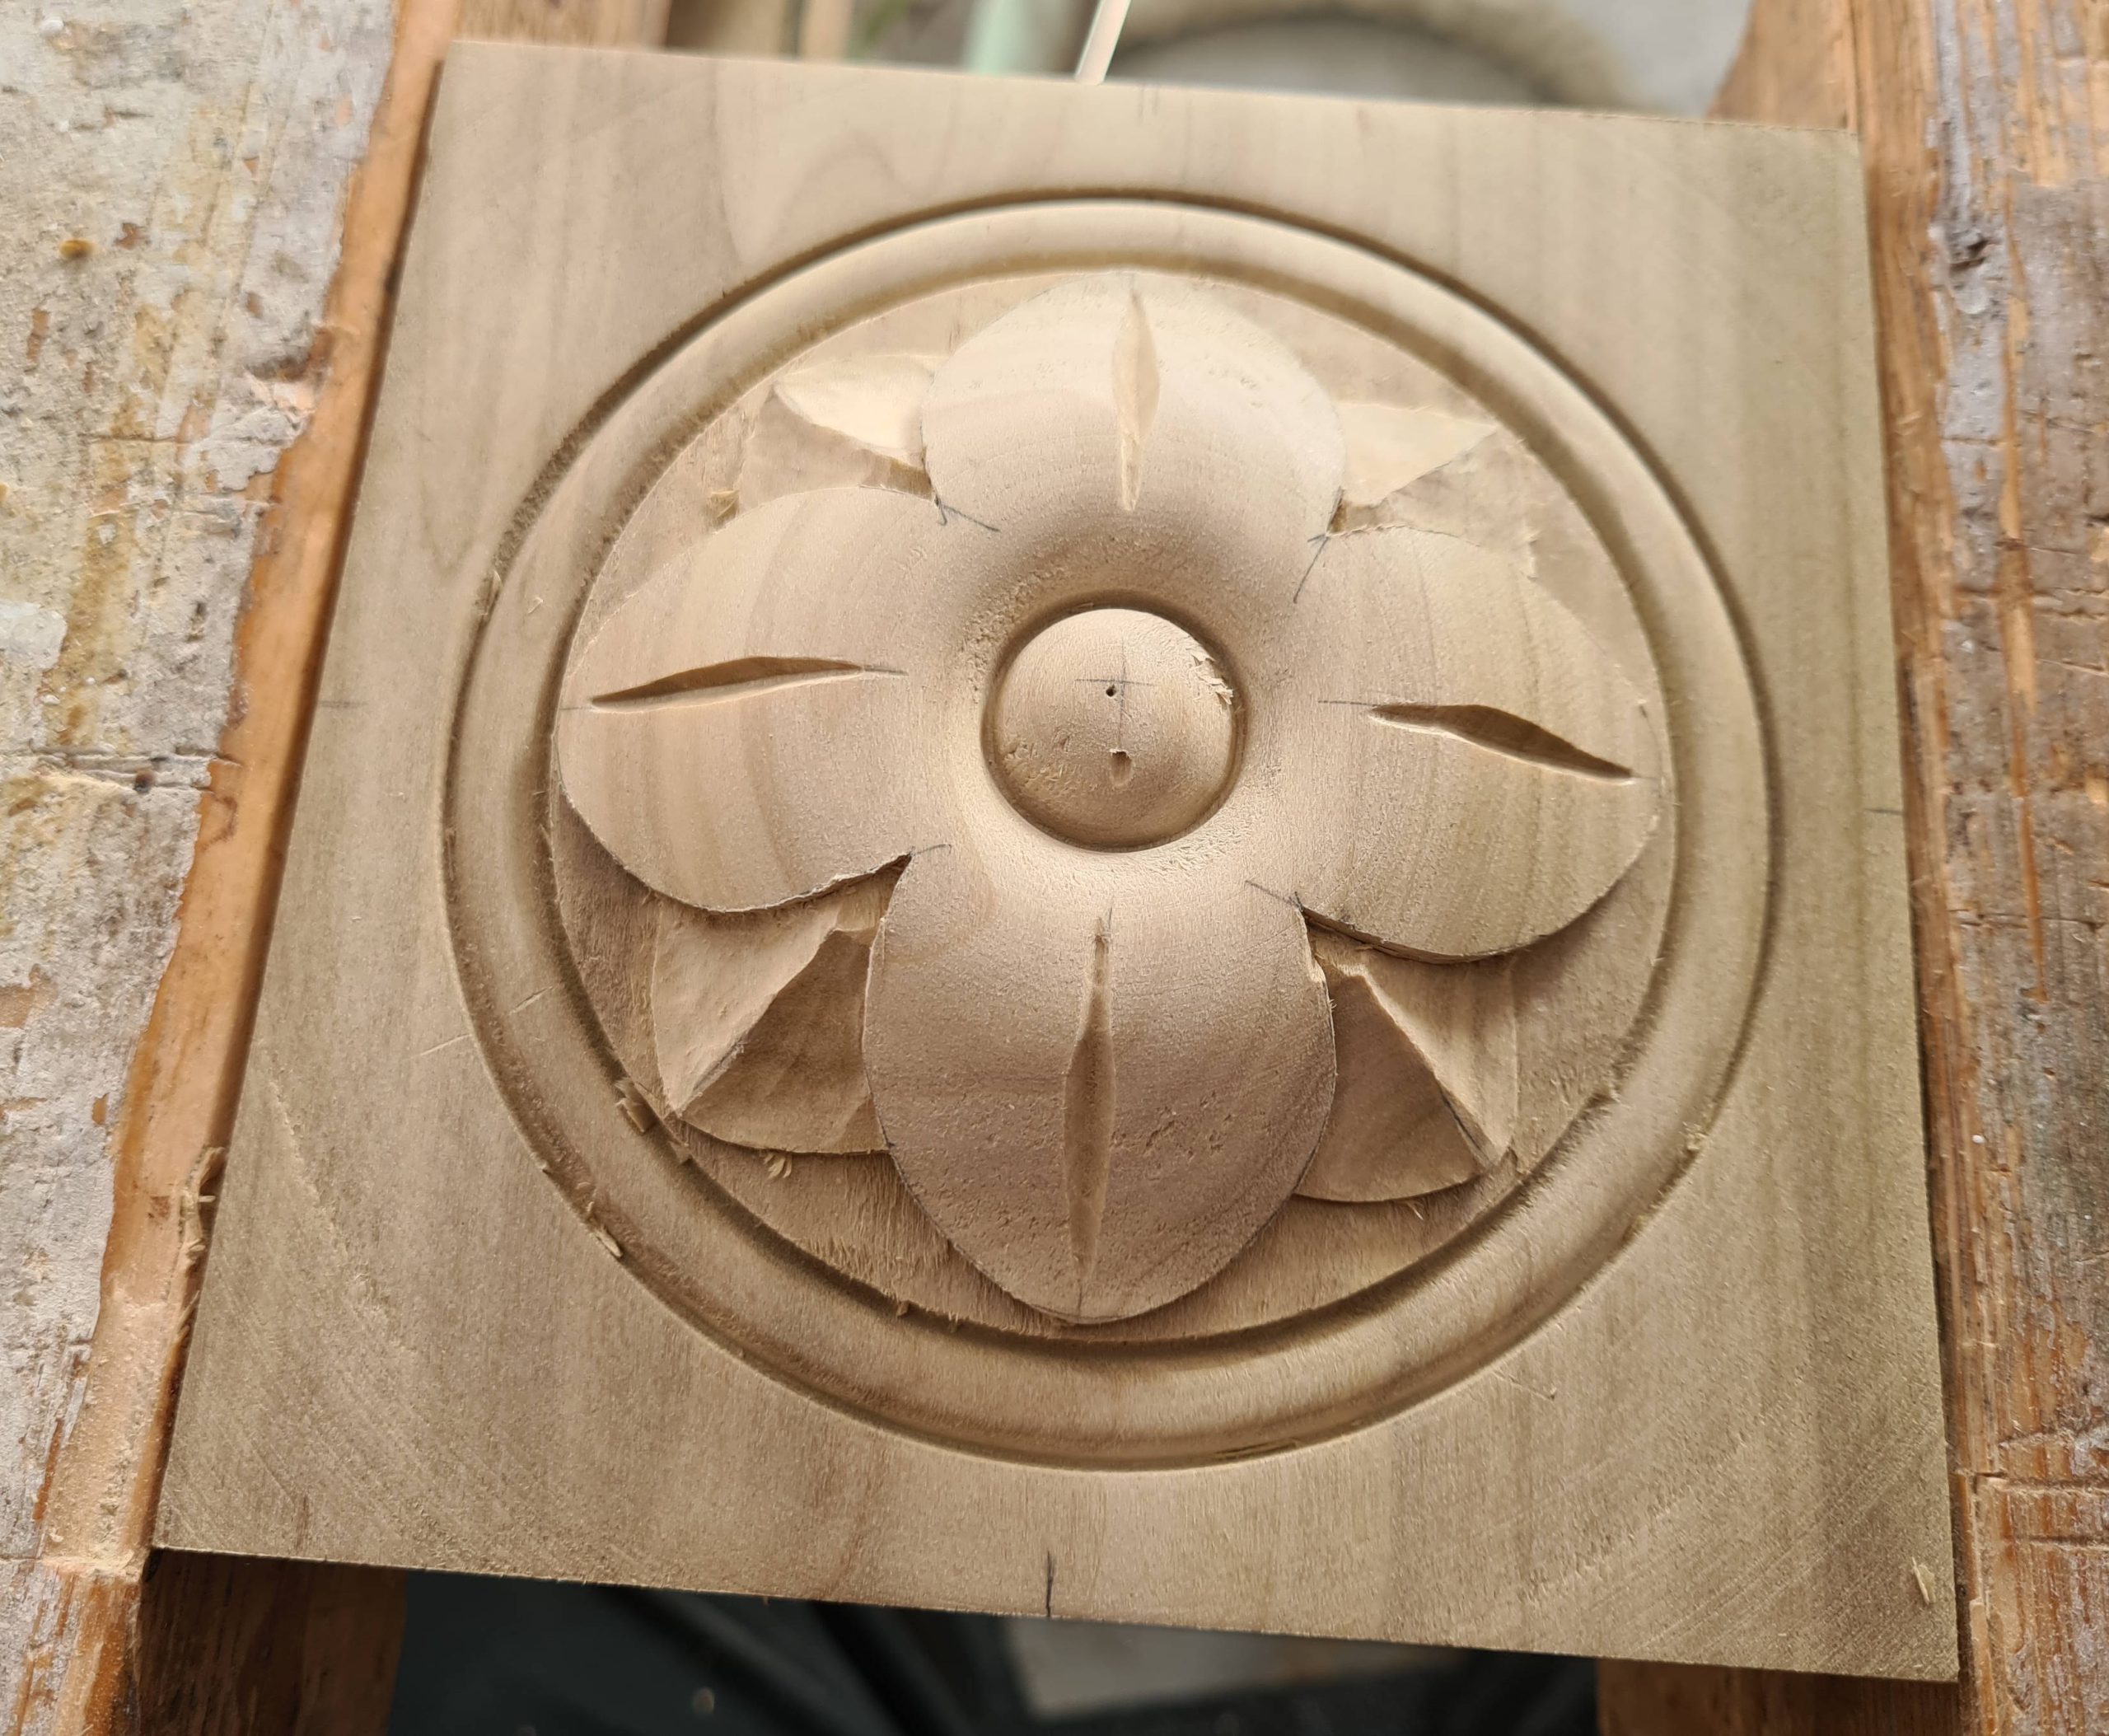
Keep carefully removing material until you have both sides scooped out as shown here. This one went very well, even cutting with the grain on the left hand side went smoothly. The aim here is to develop the ridge line along the centre. It needs to protrude enough to create a solid shadow, be reasonably straight, and point roughly at the corner of the block.
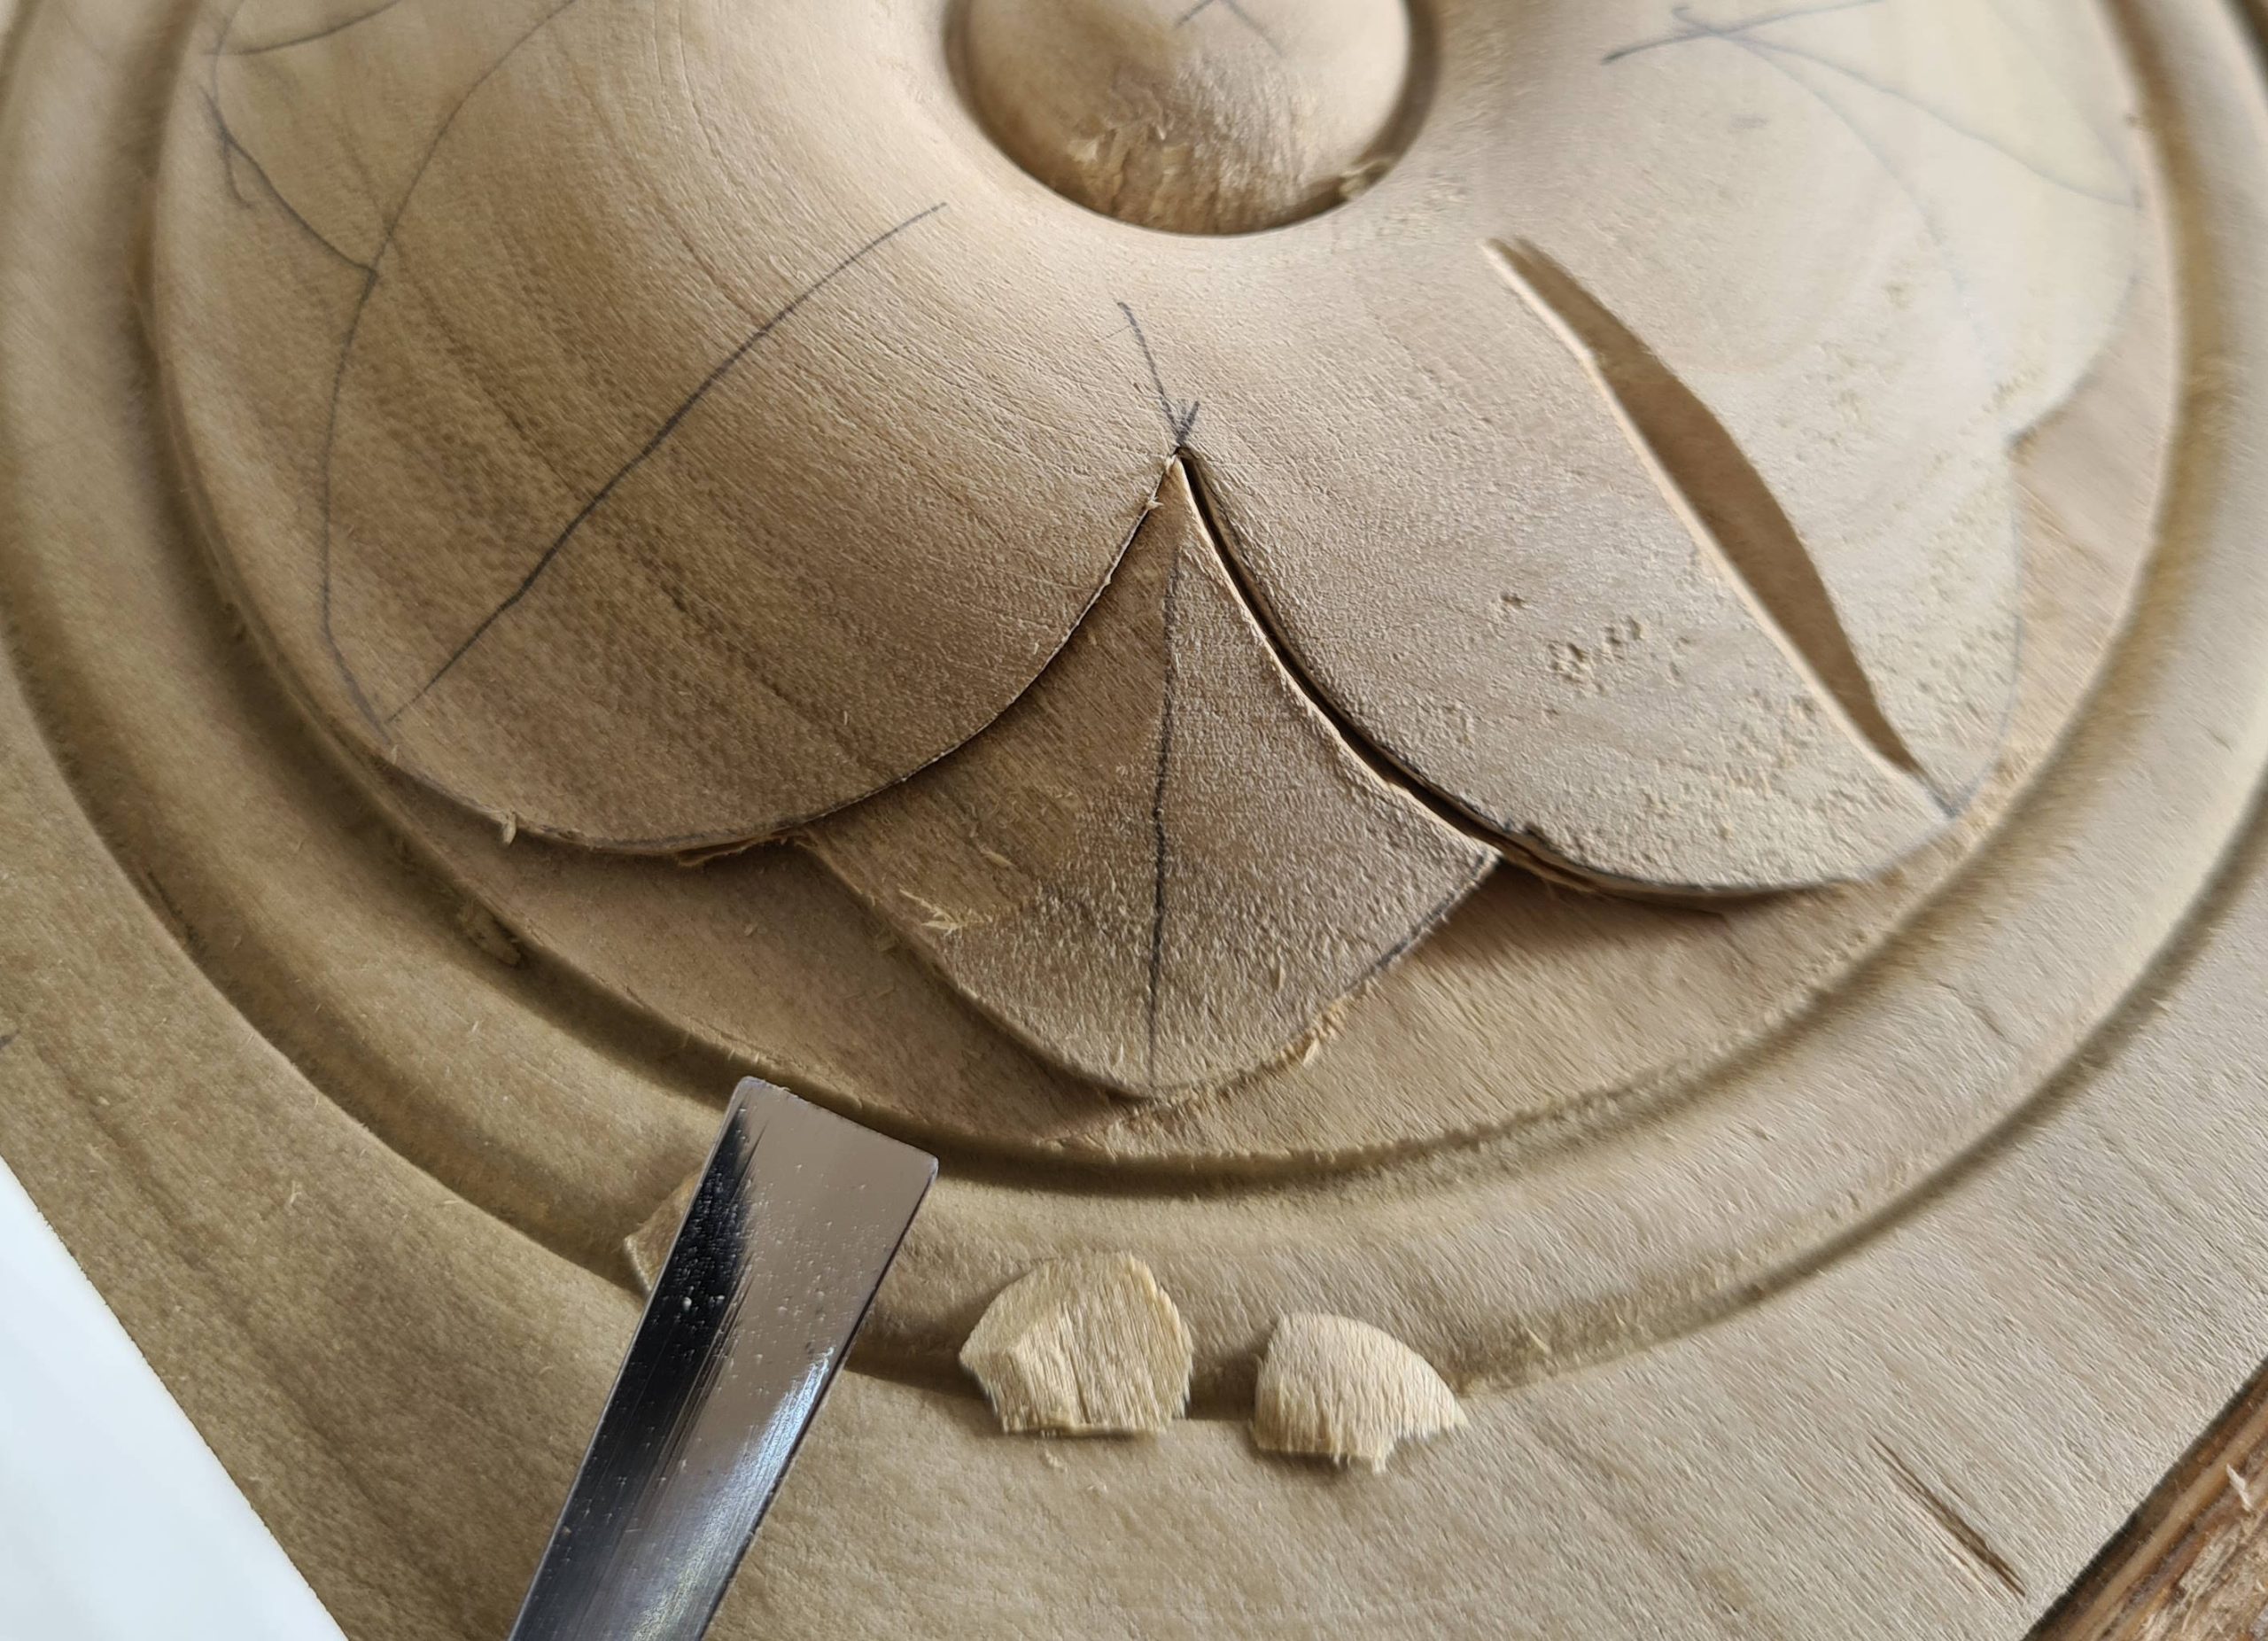
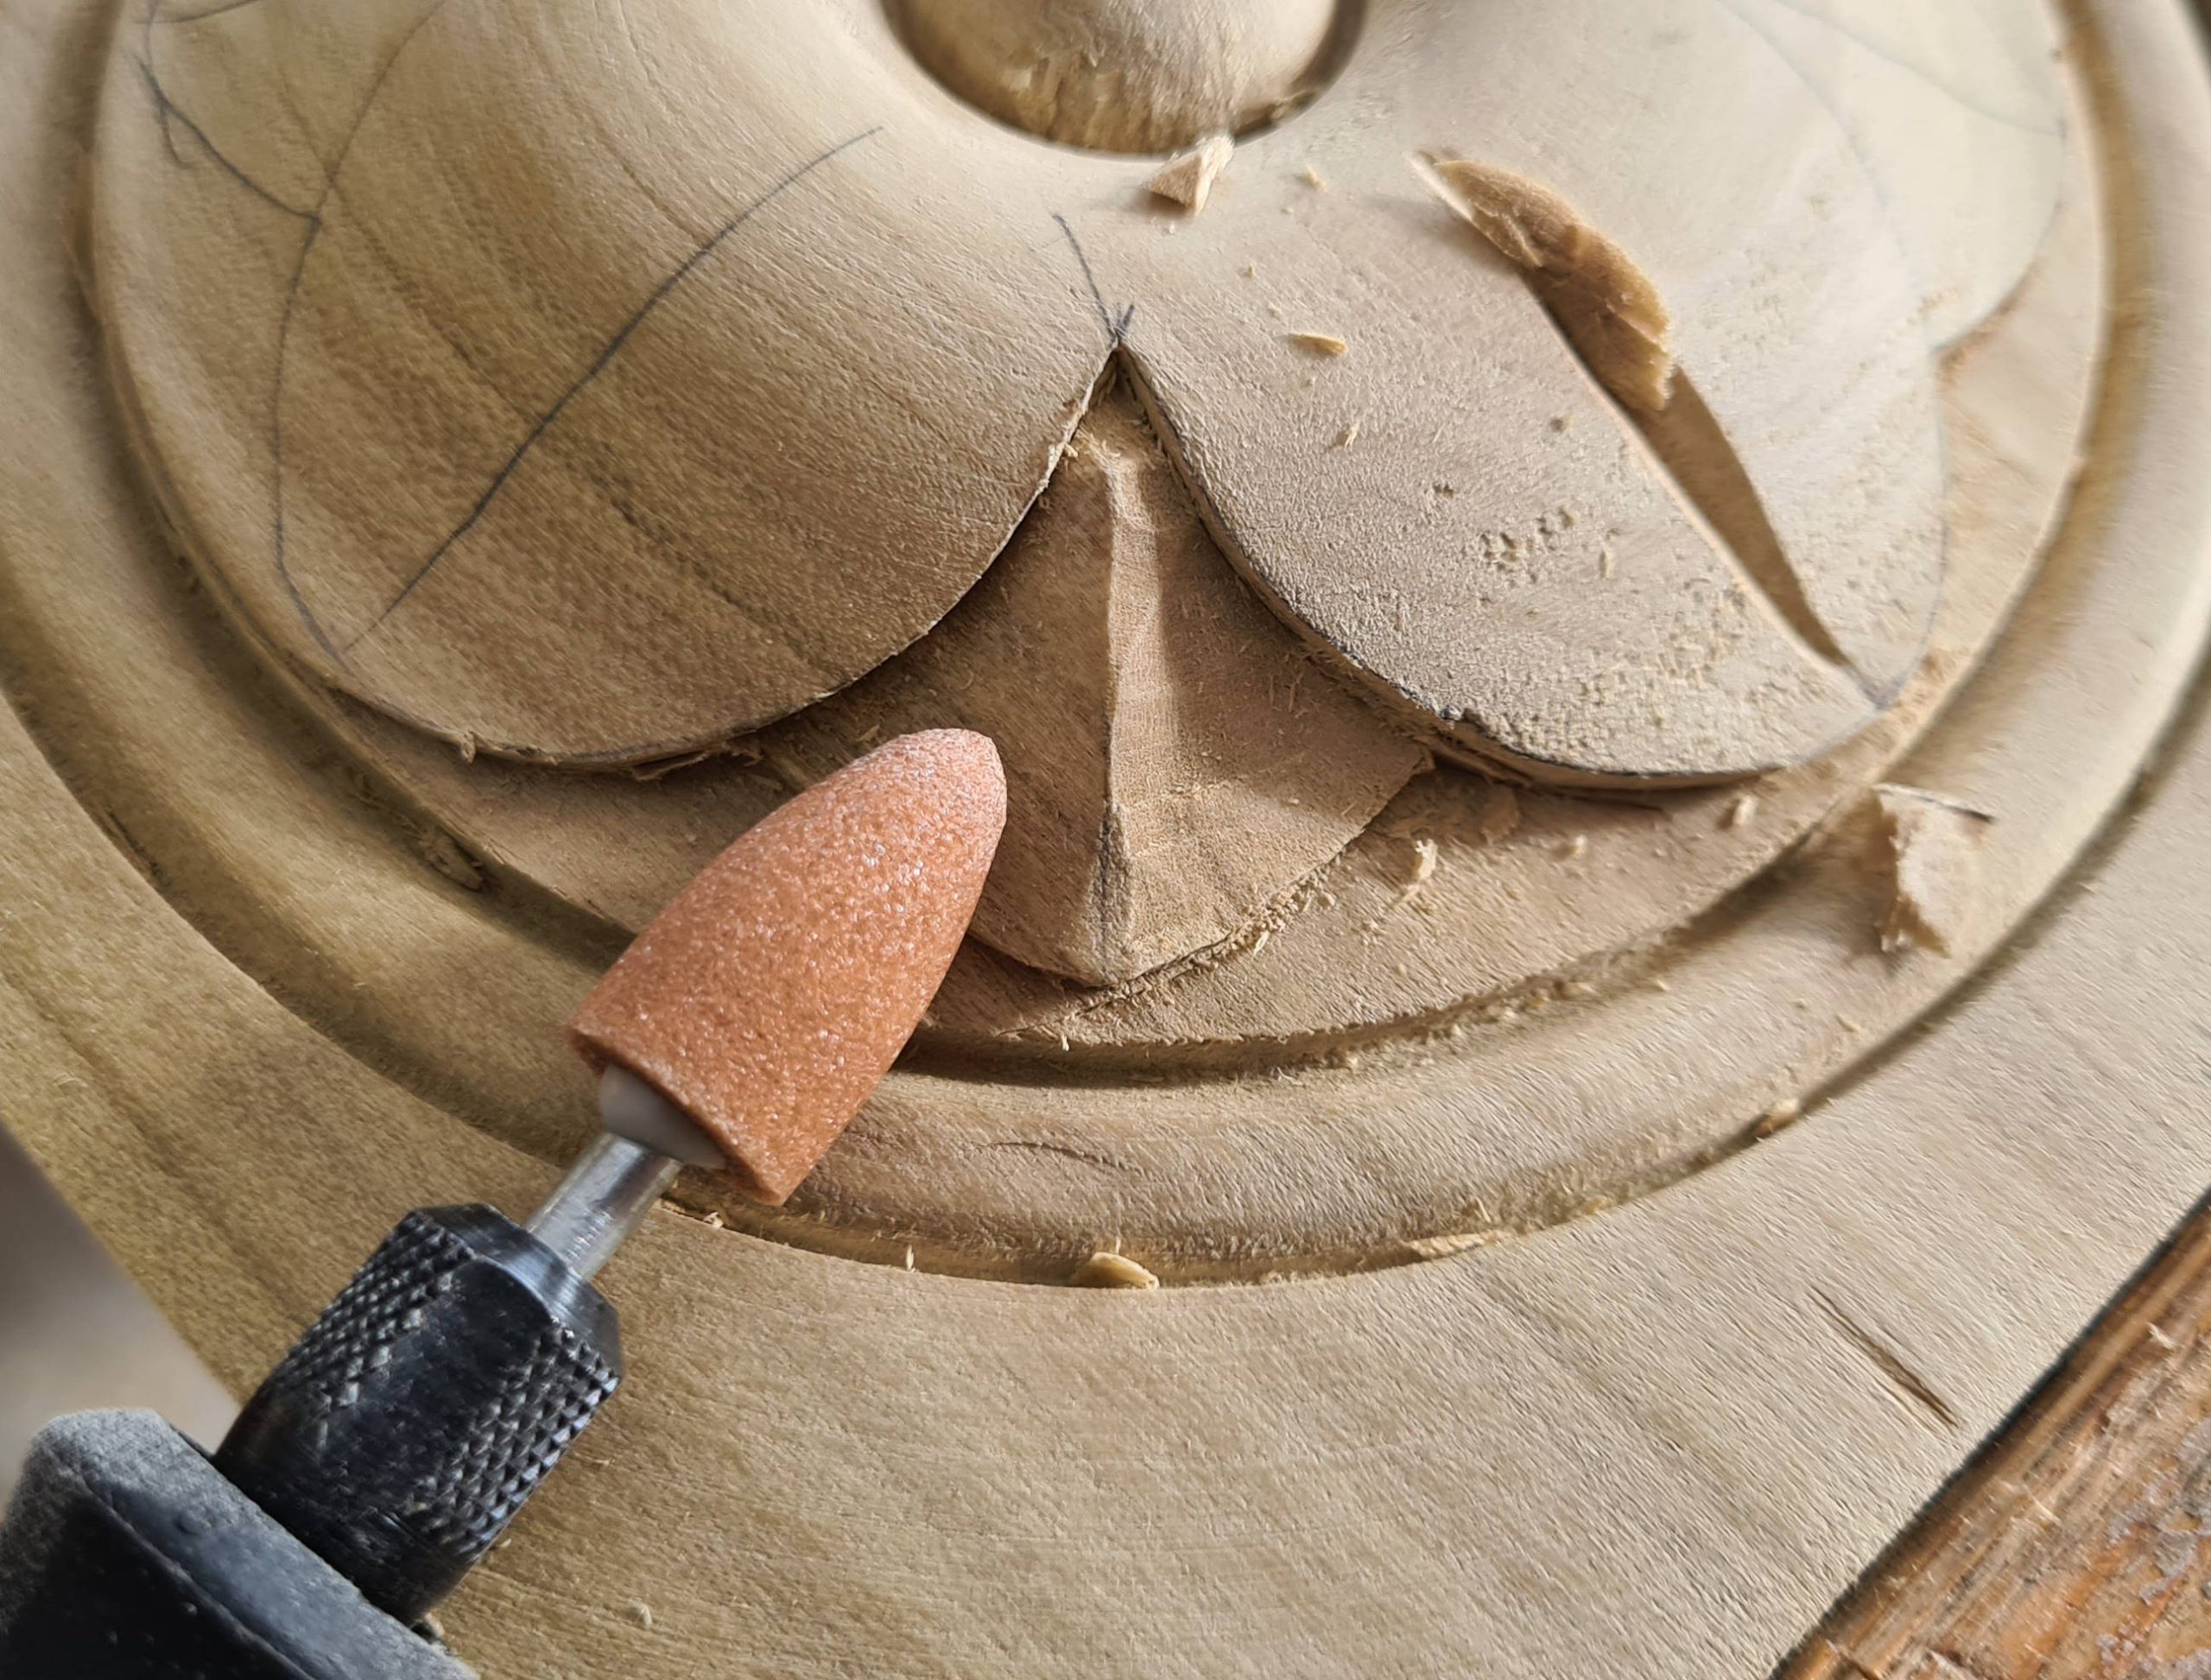
Using the point of the fishtail gouge remove the pip at the top of the small petal. This is really a matter of taste, removing the pip provides more shadow details and will help to retain detail when the piece is painted.

This next step is optional but I found it helped to speed up both the carving and the finishing. Take a Demel fitted with a grinding stone as shown and carefully remove any carving marks on the small petals. The grinding stone has just the right abrasiveness and shape to get into the small petals. The only area it can’t do is up near the large petals but this is an easy cut with the chisel as the large petal acts as a stop.
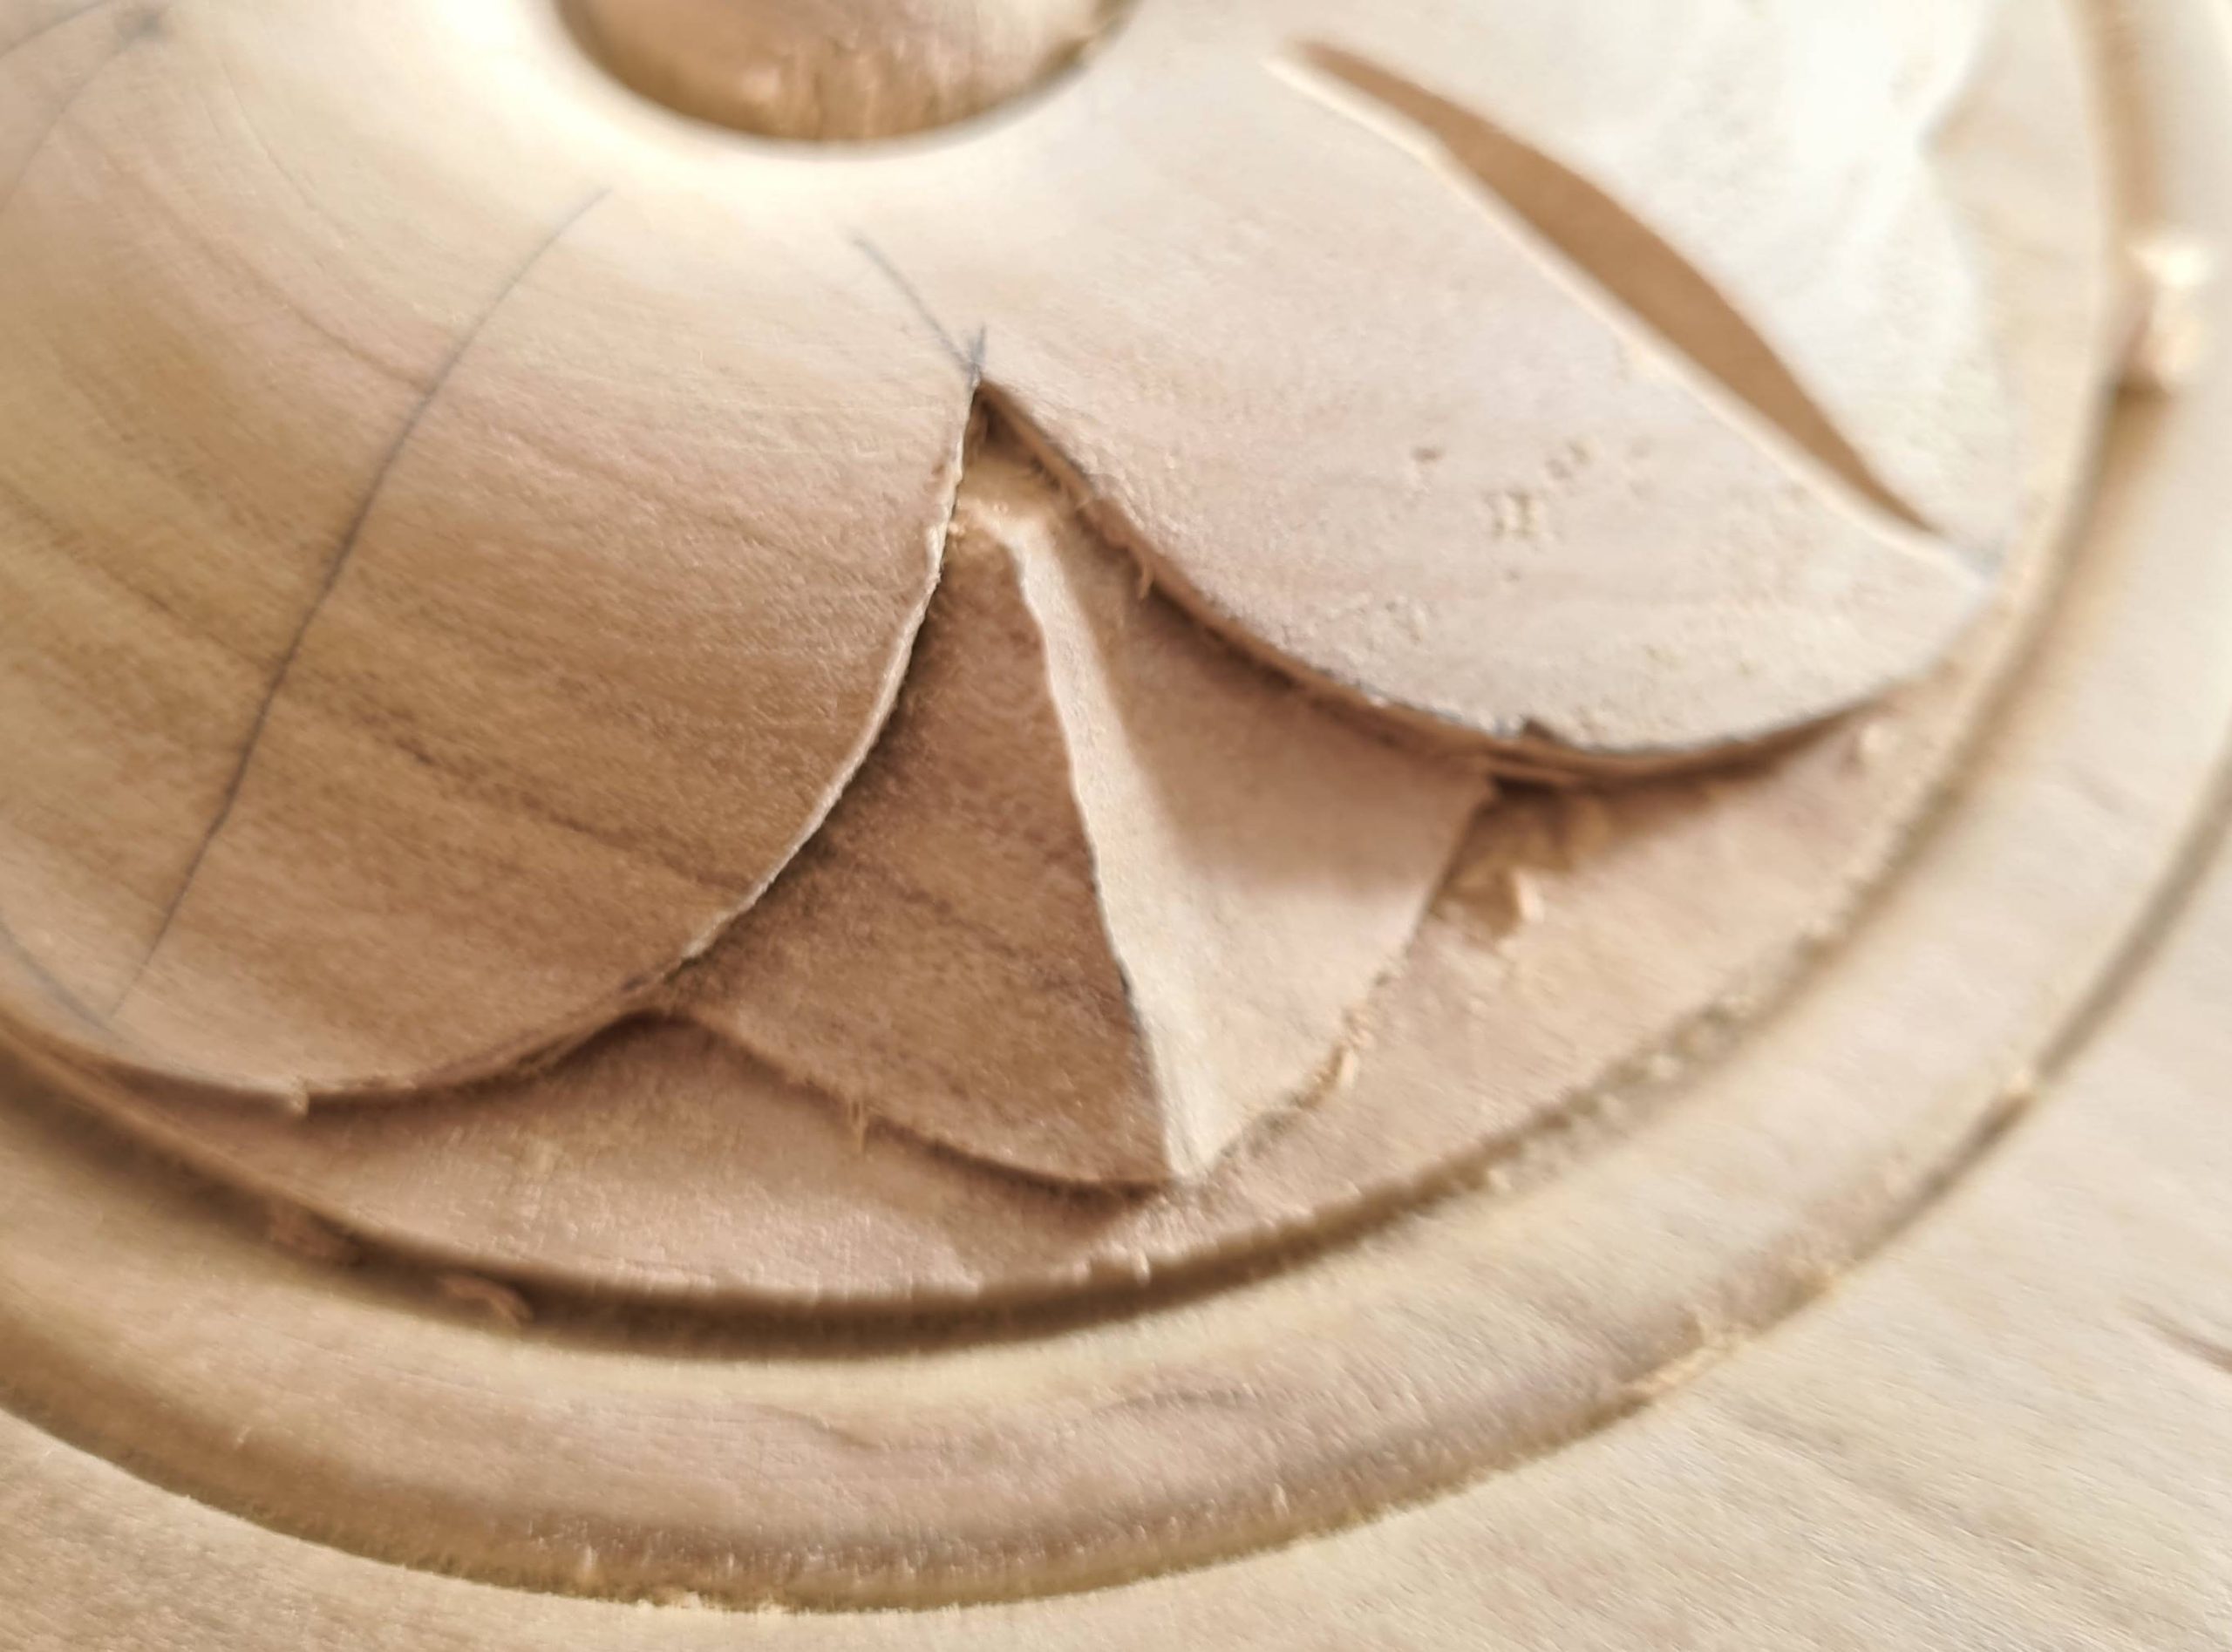
After smoothing with the Dermel you should have something that looks like this. Note that the central ridge is quite sharp, this won’t look right when painted but we’ll fix that in a moment.
Now, rotate the piece 90 degrees in the vice and repeat the carving steps for the next side. Keep rotating and carving until you’ve done all four sides. You should have something that looks like the picture below. Note that I took a chip out of the centre of the flower, I kicked myself for that but fortunately it wasn’t so deep it needed filler.
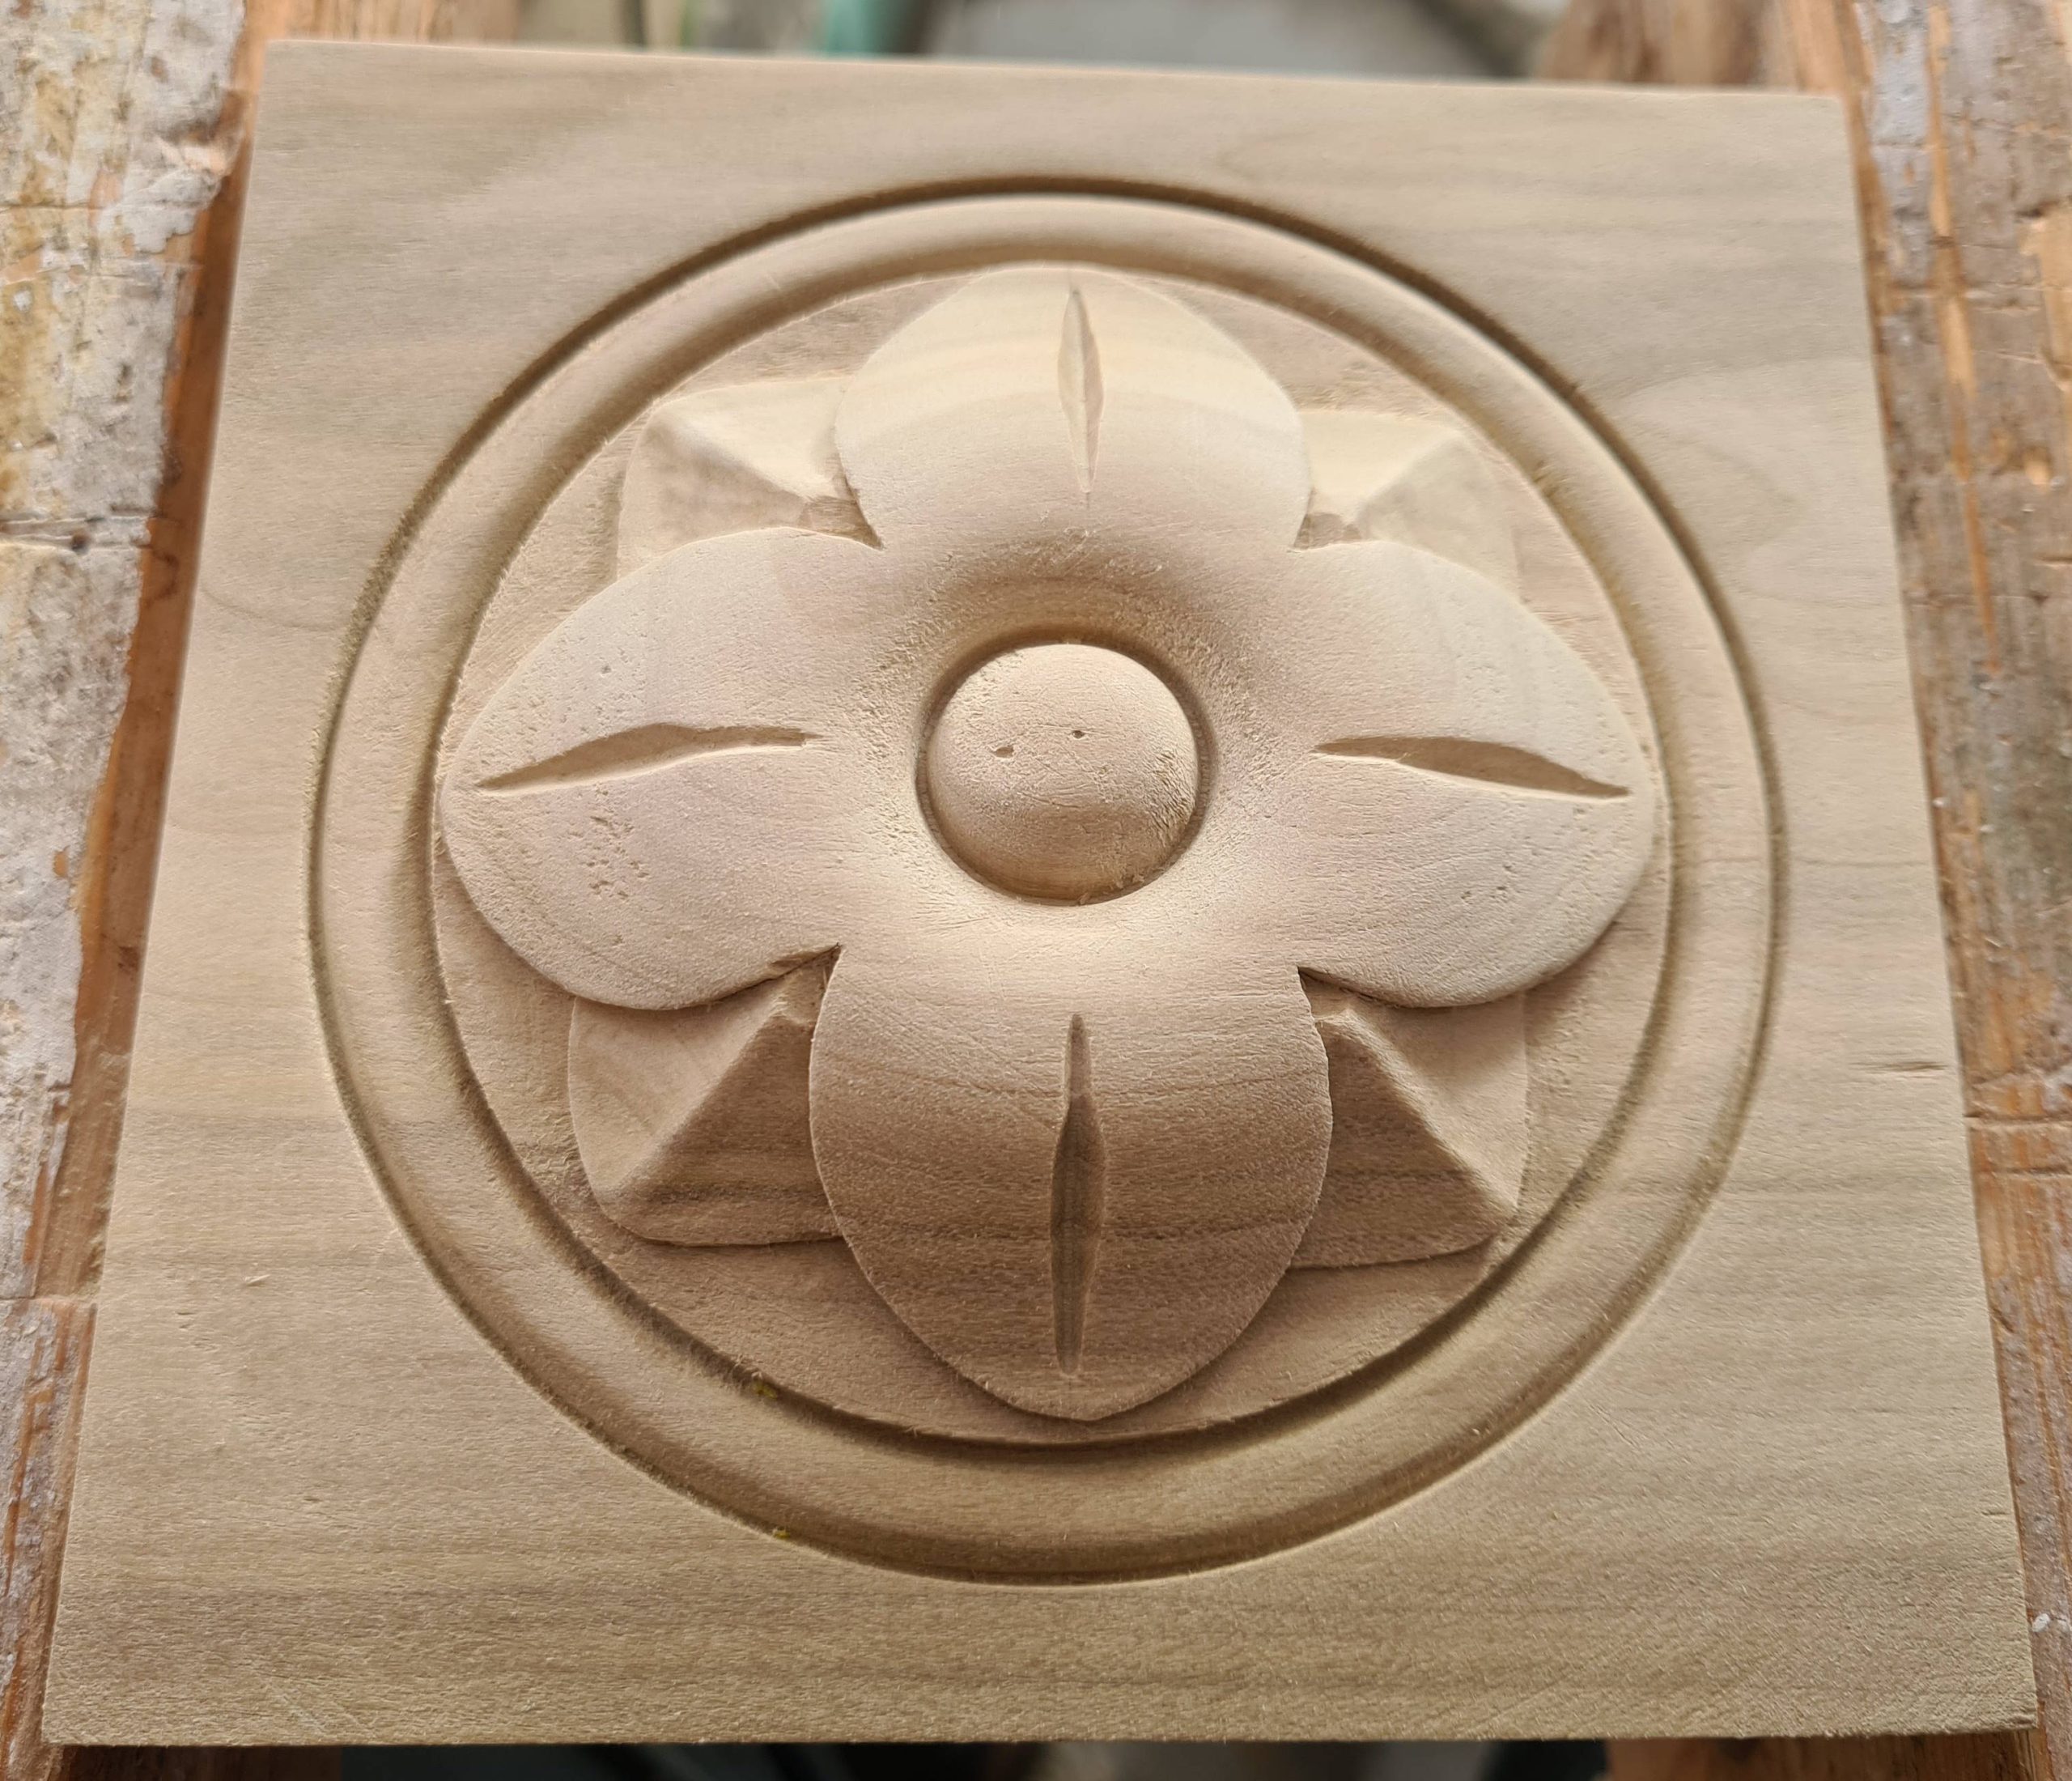
I’m pleased with how well this piece carved. Poplar is generally fairly good under the tools, but some pieces can be a bit crumbly and unforgiving.
As a final step take some sandpaper and ease all the edges and remove any torn grain. I go over it with 180 grit Abranet as it’s good at conforming to the shape of the carving. The flat areas of land between the large and small petals can be touched with a small piece of 80 grit followed by 120 and 180 if needed. The large land areas outside the ring need some 120.
The chip I took out of the centre has all but vanished with this finishing sand. There’s a tiny remanent but that will easily be hidden by paint.
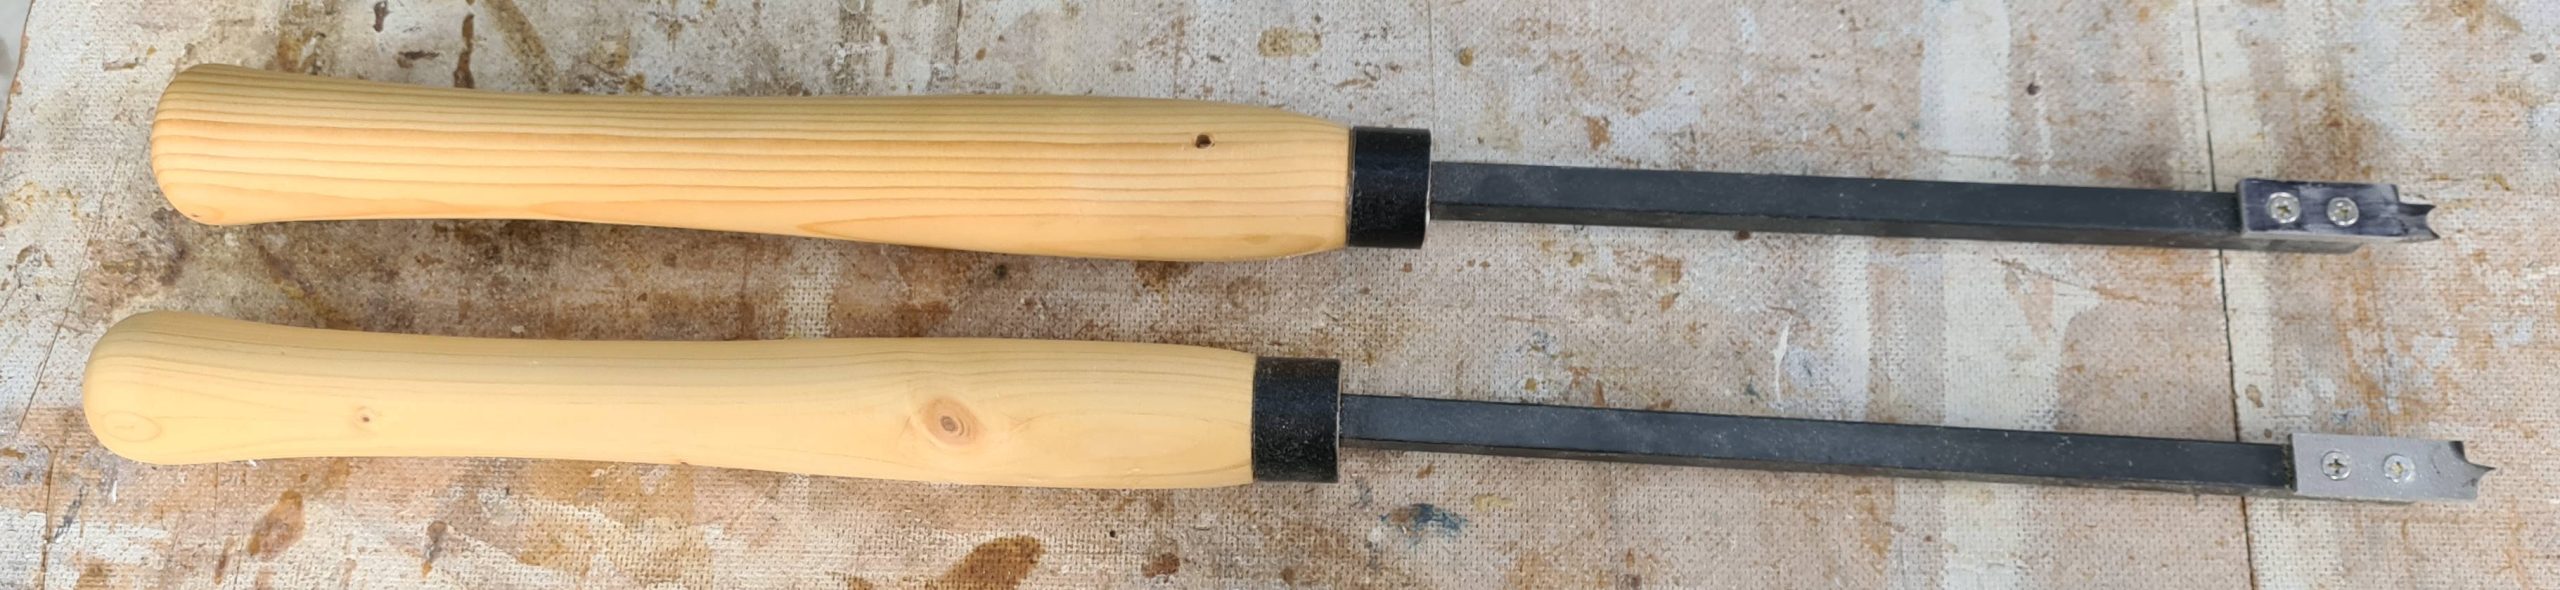
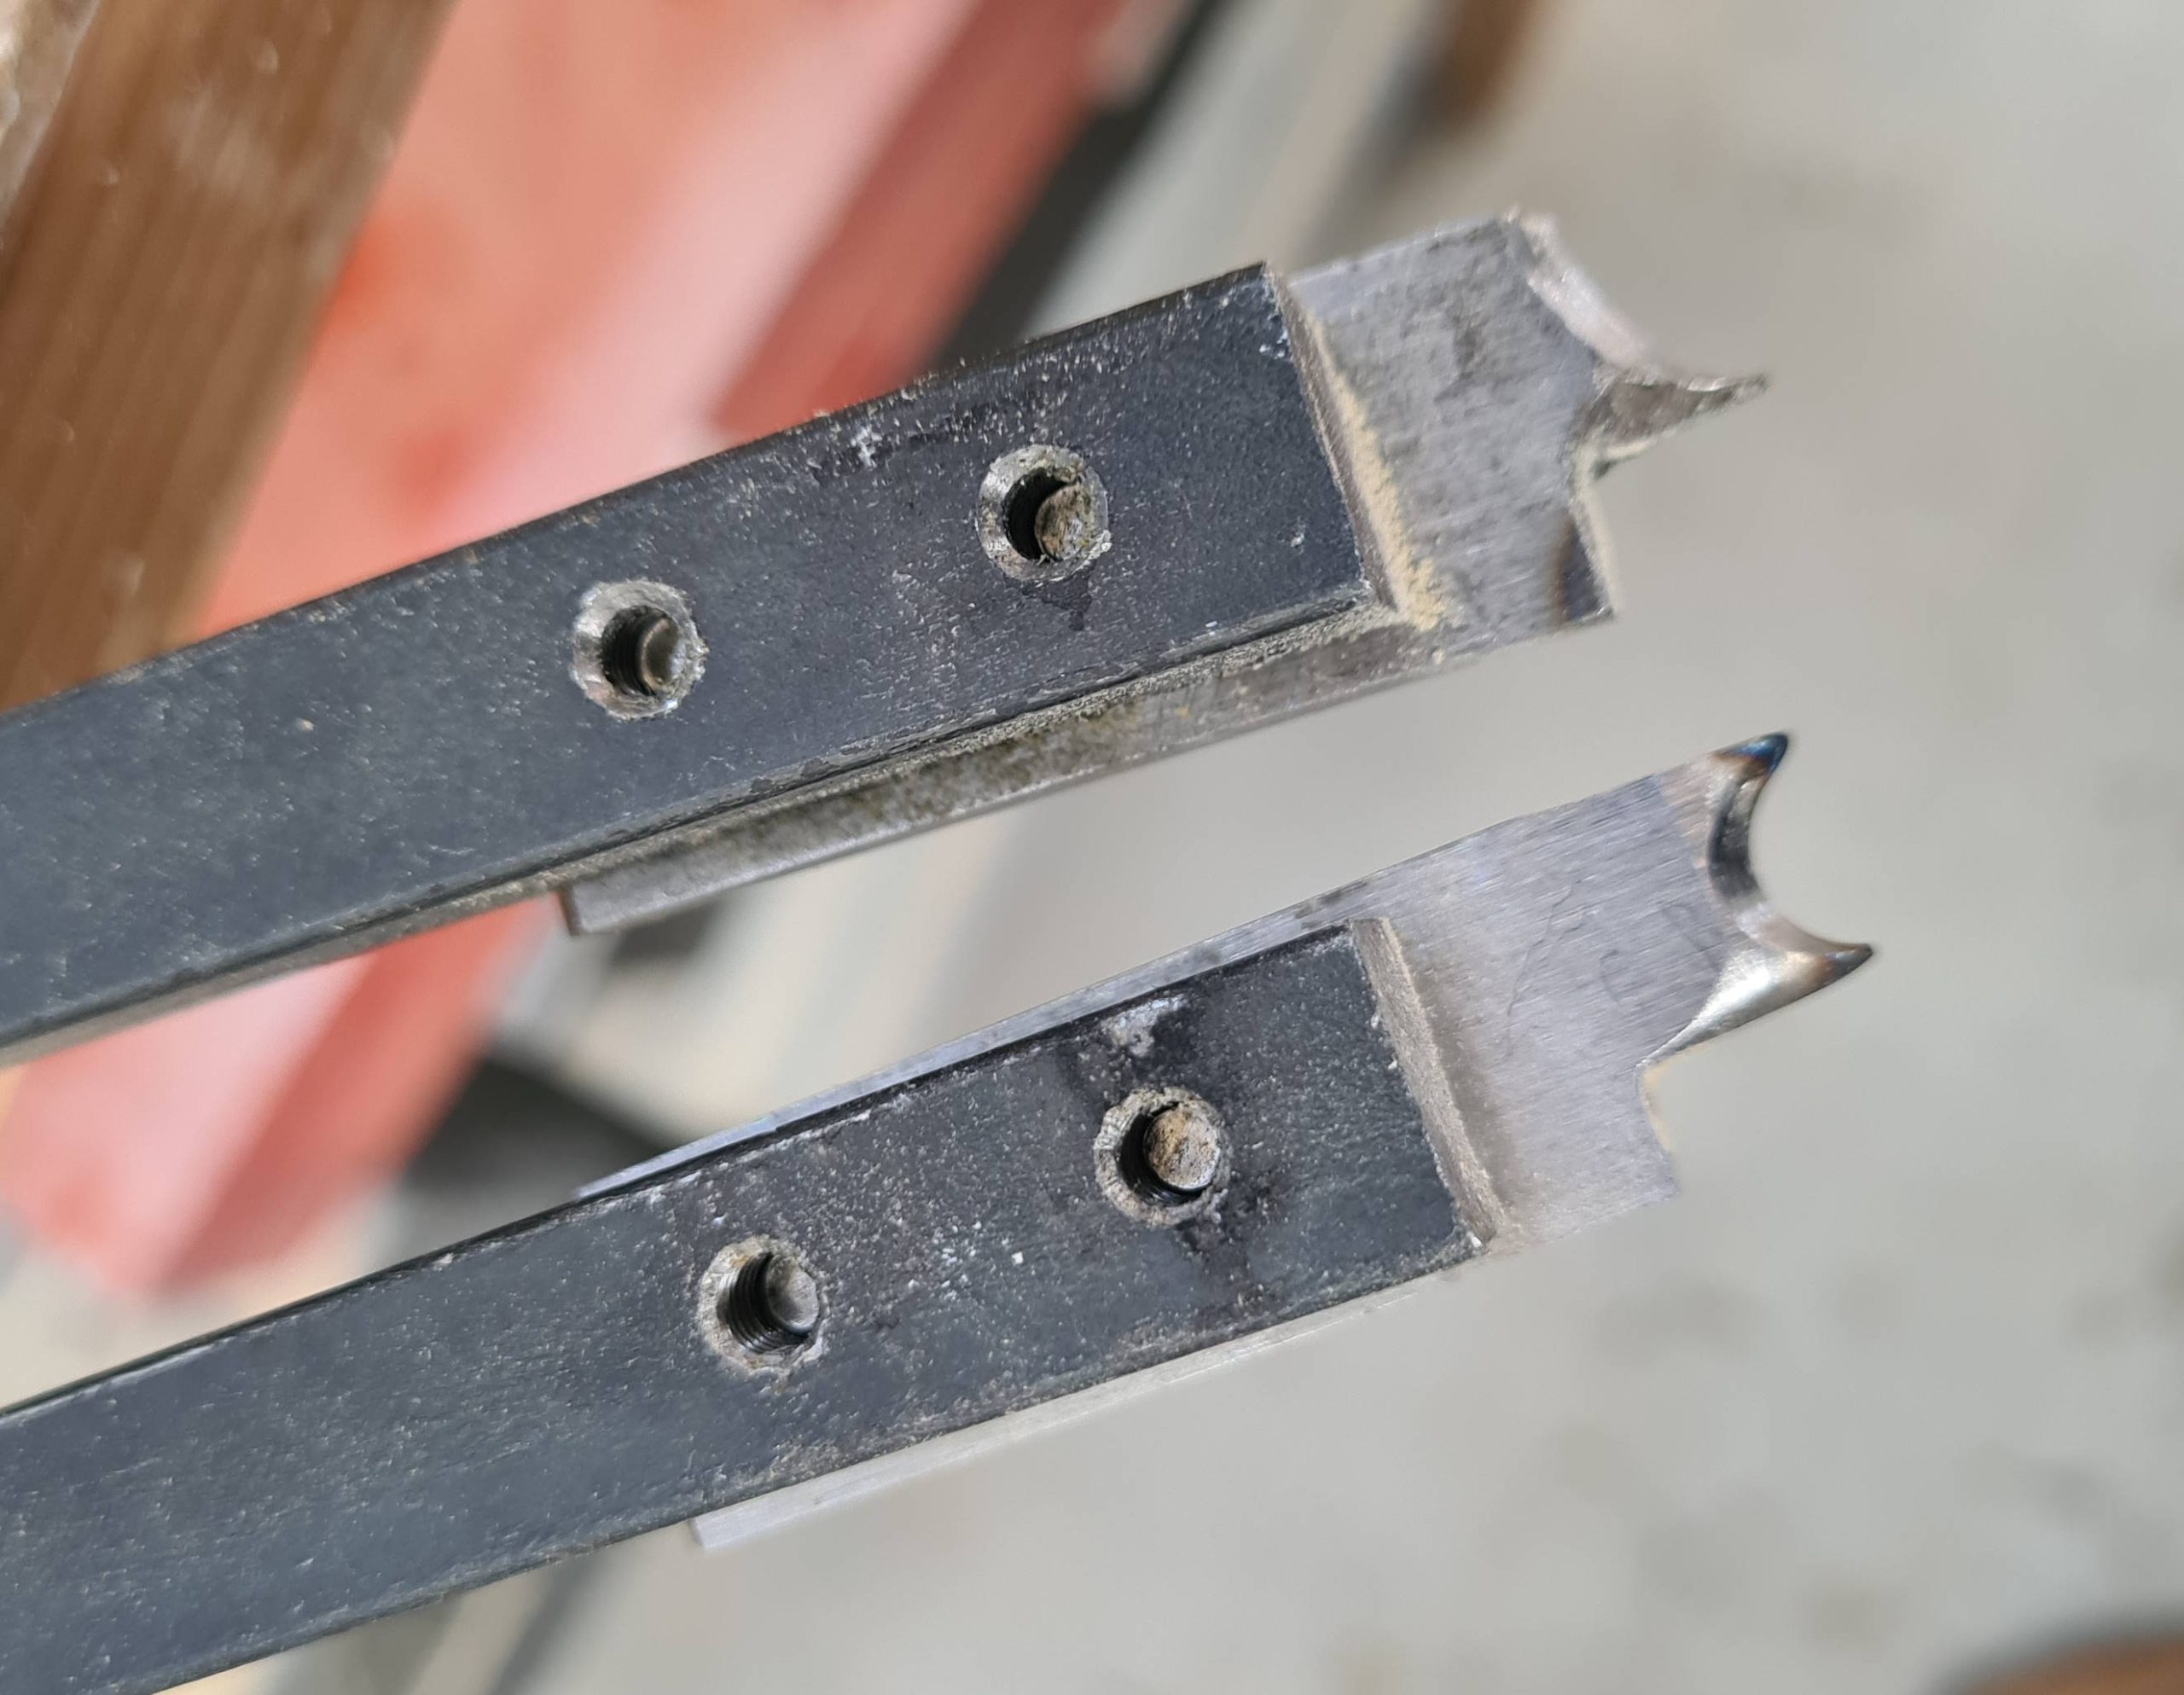
Custom Form Tools
Some additional pictures of the form tools I made. Form tools like this are usually used with spindle turning where relief isn’t an issue. Since these are used with faceplate turning it’s necessary to pay careful attention to adding relief. If you look carefully you can see that on the left hand side of the points I’ve had to almost completely grind away the underside. This makes the points quite prone to over heating and you can see I’ve blued the tips of the ring turning cutter.
This is tool steel so I could harden (oil quench) and temper the cutters but I didn’t feel it was necessary for twenty or so pieces. It would have made refining the shape harder if I needed to. Maybe once this project is over I’ll give it a shot. I performed much of the initial cutter shaping with a regular bench grinder and then refined with hand files. Once I bought the Dremel I further refined the shape with that, the Dremel is great for this.
The handles are part of an old cupboard and the ferrules are made of tube steel from a cross fit trainer. The shank is 10x10mm mild steel. The cutters are made from 12x4mm tool steel (from memory) and held in place with M4 stainless screws spaced at 15mm. In theory the cutters should be interchangeable but I’ve not tried yet.